
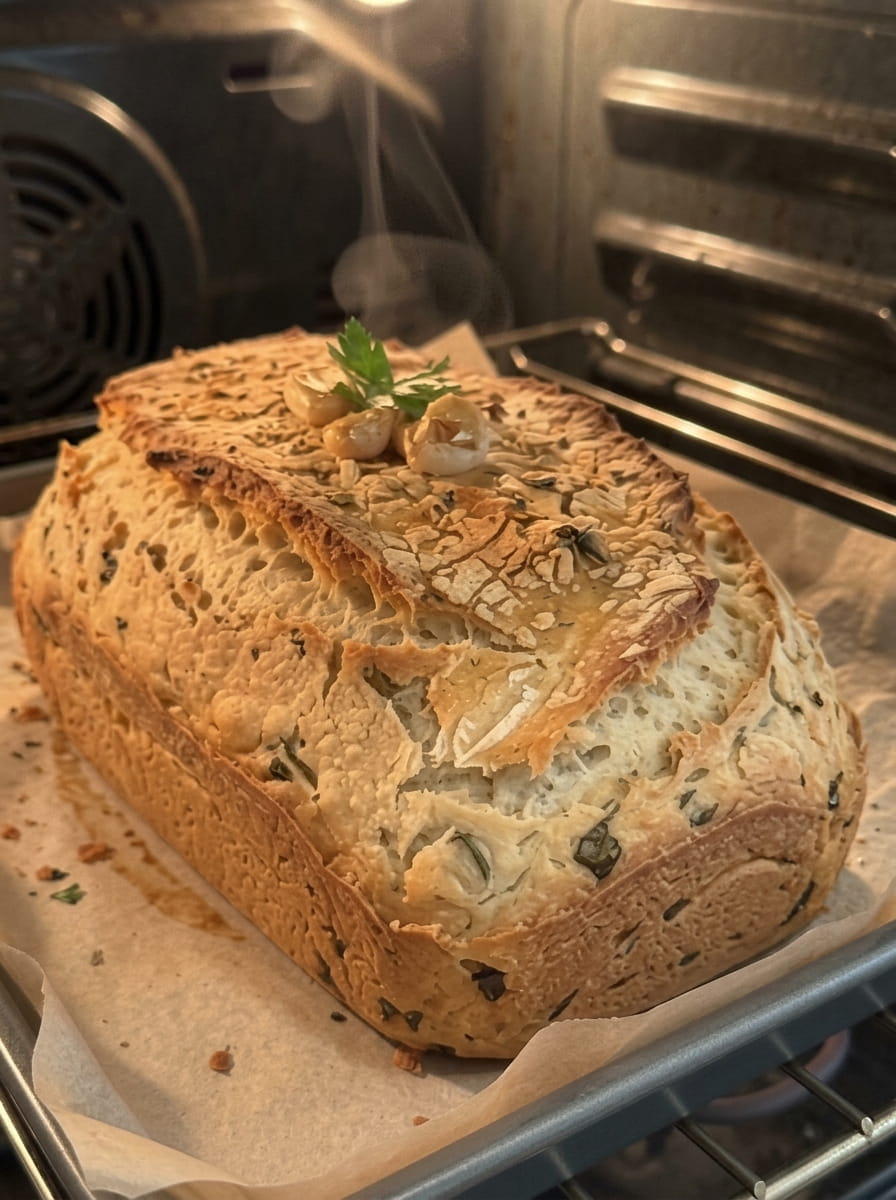
White Bean Garlic Herb Bread: Soft, Savory, Flourless-Style Loaf with Oat Flour
If you have ever wished for a quick, wholesome loaf you could bake without yeast, kneading, or waiting for dough to rise, this white bean garlic herb bread is for you. Creamy white beans are blended with eggs to create a smooth base, then mixed with oat flour, fresh garlic, and fragrant Italian herbs. The result is a rustic loaf with a tender center, a golden crust, and a savory aroma that fills the kitchen as it bakes.
It is easy, budget-friendly, and made mostly from pantry staples. It is also higher in protein and fiber than many quick breads, and it contains no wheat flour. Serve it warm with butter, pair it with soup, or use it as the base for sandwiches. In this guide you will find the full recipe, an explanation of why each ingredient matters, baking tips, troubleshooting help, variations, serving ideas, storage advice, and answers to common questions.
Table of Contents
- Why You’ll Love This White Bean Bread
- What to Expect: Texture and Flavor
- Ingredients and Why They Matter
- Equipment You’ll Need
- Step-by-Step Instructions
- Pro Tips for the Best Loaf
- Troubleshooting Common Problems
- Delicious Variations
- How to Serve White Bean Garlic Herb Bread
- Storing, Freezing, and Reheating
- Frequently Asked Questions
- Final Thoughts
Why You’ll Love This White Bean Bread
Here is why this recipe deserves a spot in your baking rotation:
- No yeast and no rising time. This is a quick bread, so you can go from mixing bowl to oven in about 10 minutes.
- Made with pantry staples. A can of white beans, eggs, oat flour, garlic, Italian seasoning, baking powder, salt, and olive oil are all you need.
- High in protein and fiber. Beans and eggs add plant and animal protein, while beans and oats contribute fiber, which helps you feel satisfied.
- No wheat flour. The loaf uses oat flour instead of wheat flour, which is appealing if you want to reduce wheat in your diet. If you need it to be strictly gluten-free, use certified gluten-free oat flour.
- Savory and aromatic. Garlic and Italian herbs give it the cozy flavor of garlic bread and herb focaccia.
- Simple technique. You blend, stir, pour, and bake. There is no kneading or shaping.
- Versatile. It works for breakfast, lunch, snacks, and dinner sides.
- Great for meal prep. The loaf slices and freezes well, so you can keep it on hand for busy days.
What to Expect: Texture and Flavor
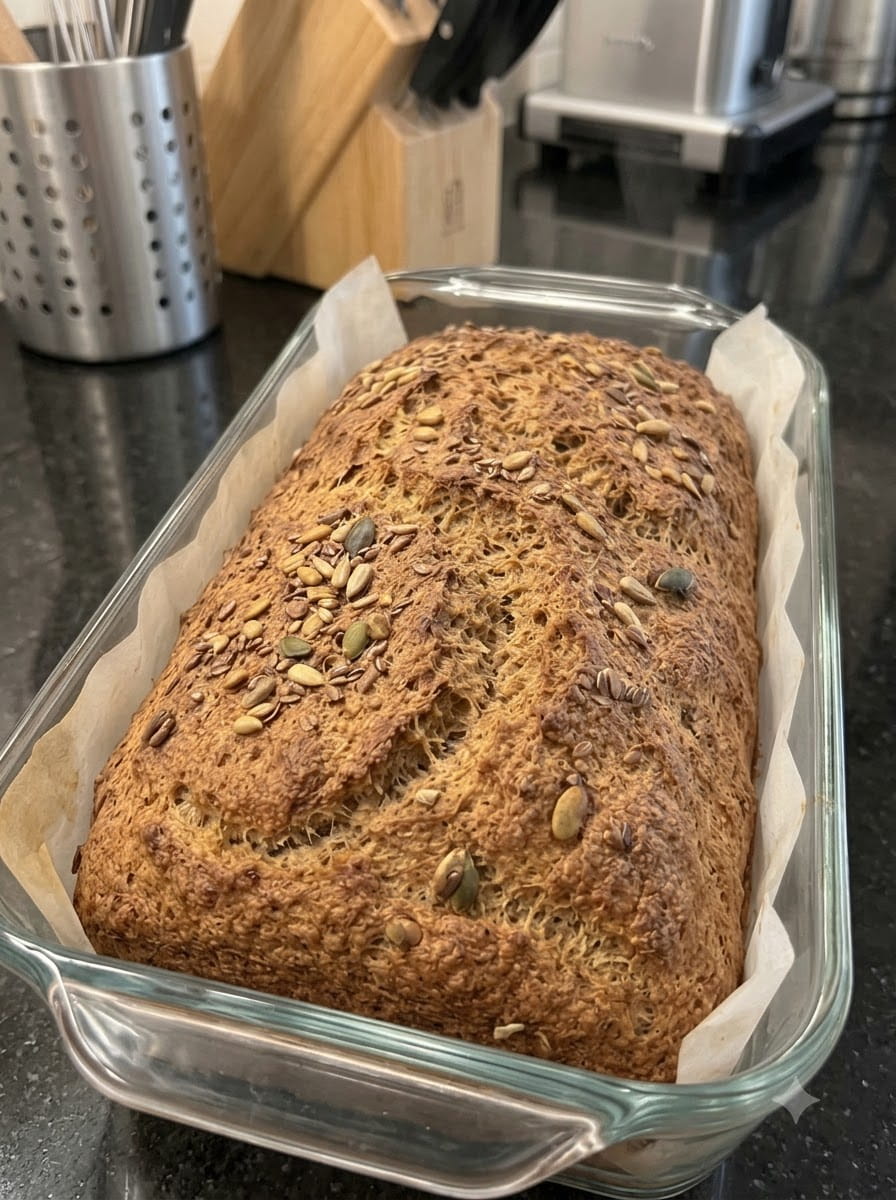
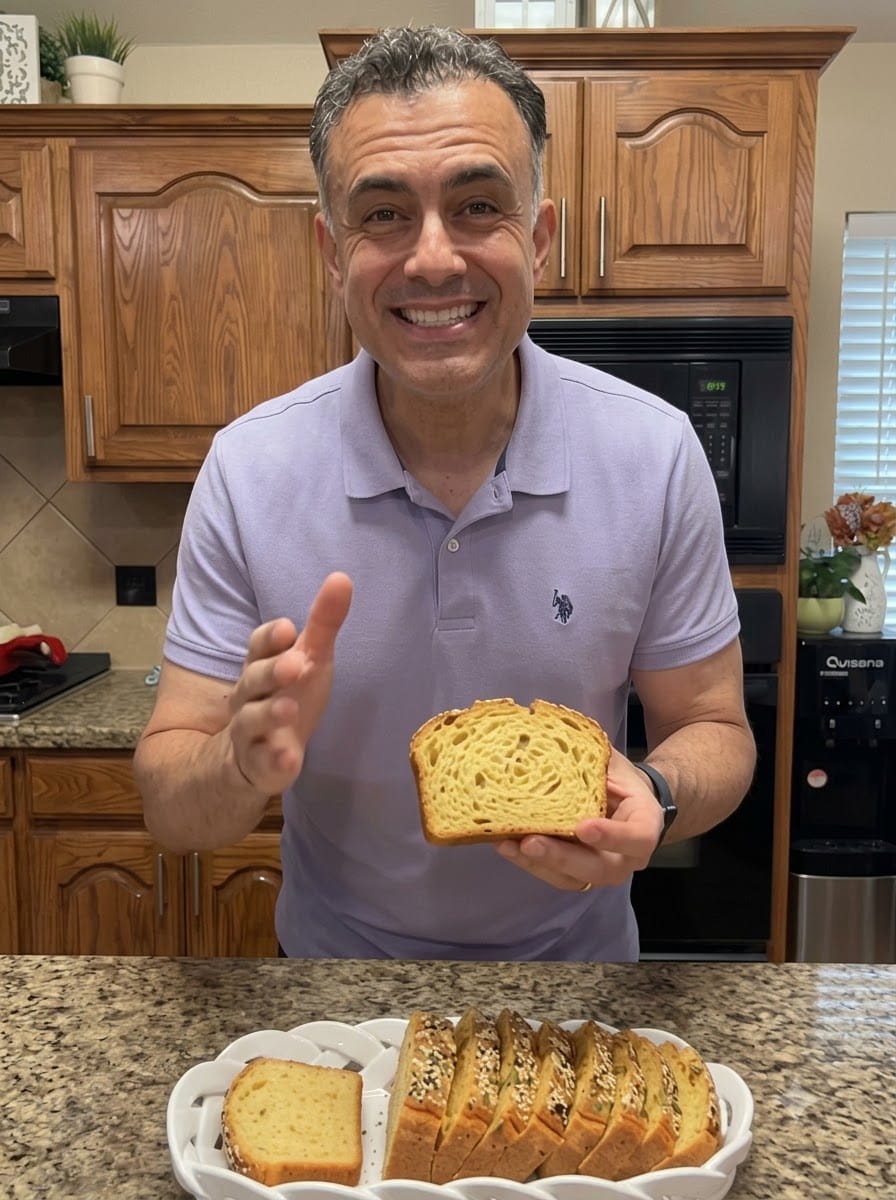
This bread is a moist, tender quick bread with a soft crumb and a golden crust, not a light, airy yeast loaf. The beans make the interior creamy and slightly dense, similar to a savory banana bread or a hearty seeded loaf. It slices cleanly once cooled and toasts beautifully.
The flavor is savory, garlicky, and herbal. White beans are very mild, so they take on the taste of the garlic, olive oil, and Italian seasoning rather than tasting “beany.” Most people are surprised that they cannot identify the beans at all. The oat flour adds a gentle, slightly sweet, wholesome flavor.
Ingredients and Why They Matter
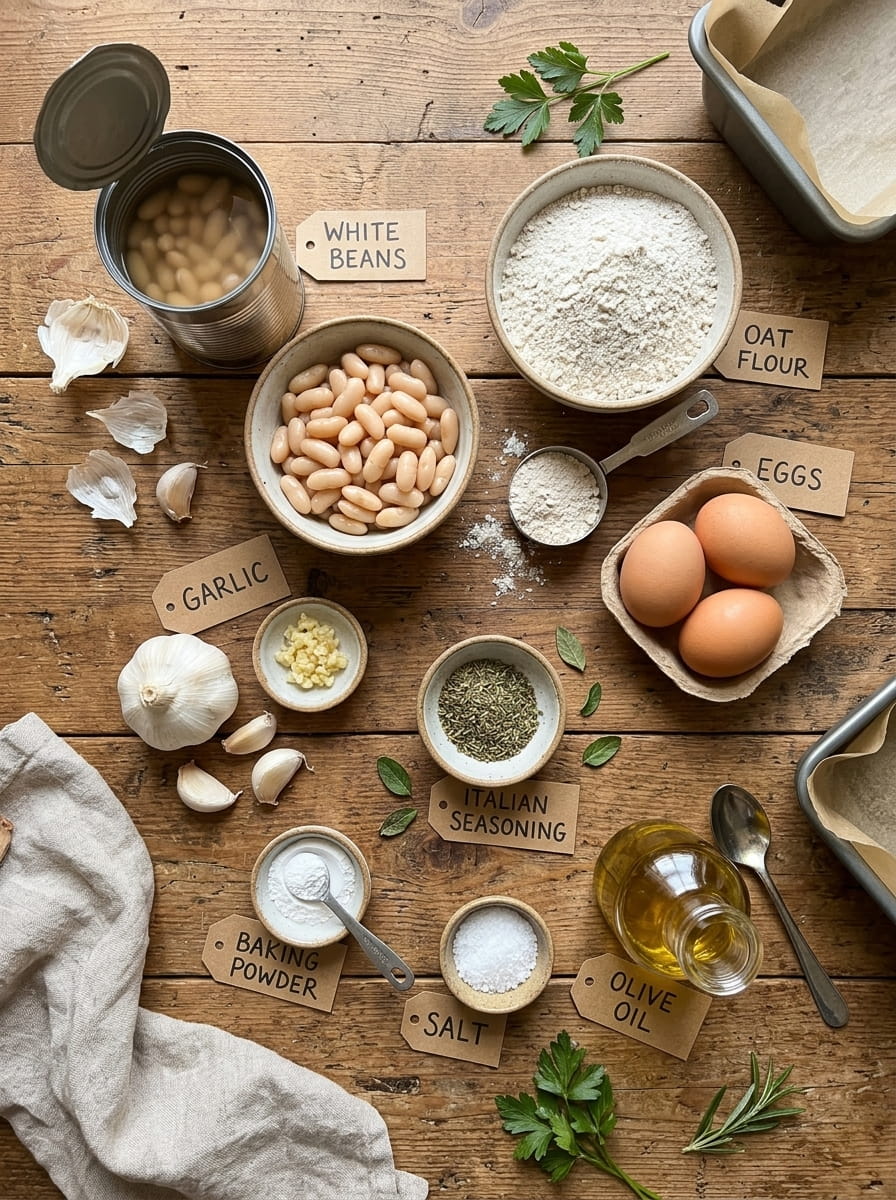
This recipe uses just eight ingredients. Here is what each one does.
- 1 can (15 oz / 425 g) white beans, drained and rinsed
- 2 large eggs
- 1 cup (90 g) oat flour
- 2 cloves garlic, minced
- 1 teaspoon Italian seasoning
- 1 teaspoon baking powder
- ½ teaspoon salt
- 1 tablespoon olive oil
White Beans
White beans, such as cannellini, great northern, or navy beans, are the base of this loaf. They are mild, creamy, and blend into a smooth puree that adds moisture, protein, and fiber. Canned beans are convenient, but they must be drained and rinsed well. Rinsing removes the salty, starchy liquid, which can affect both flavor and texture.
If you prefer to cook dried beans yourself, you will need about 1½ cups of cooked white beans, drained well. Make sure they are fully tender before blending.
Eggs
The eggs bind the loaf and help it hold its shape. They also contribute richness and a bit of lift as they set in the oven. When blended with the beans, they form a smooth, creamy batter base. Large eggs at room temperature blend a bit more smoothly, though cold eggs will also work.
Oat Flour
Oat flour gives the bread structure and a soft, tender crumb. You can buy it ready-made, or make your own by blending old-fashioned rolled oats in a blender or food processor until they form a fine powder. One cup of oat flour is about 90 g.
Oat flour absorbs liquid differently from wheat flour, so measuring accurately matters. Spoon the flour into the measuring cup and level it, or better yet, weigh it with a kitchen scale. If you want the loaf to be strictly gluten-free, look for oats or oat flour labeled certified gluten-free, since regular oats can be cross-contaminated with wheat during processing.
Garlic
Fresh minced garlic provides the bold, aromatic flavor that defines this bread. As it bakes, the garlic softens and mellows, giving the loaf savory depth. If you love garlic, feel free to add a third clove. Garlic powder can stand in for fresh in a pinch, using about ½ teaspoon in place of the two cloves.
Italian Seasoning
This classic blend of dried herbs, typically basil, oregano, thyme, and rosemary, gives the loaf its rustic, savory character. It pairs especially well with garlic and olive oil. You can use a store-bought blend or mix your own.
Baking Powder
Baking powder is the leavening agent. Because there is no yeast, it creates the gas bubbles that lift the loaf during baking, giving it a lighter texture. Make sure your baking powder is fresh. Old baking powder loses its power and can lead to a flat, dense loaf. You can test it by stirring a small spoonful into hot water. If it fizzes vigorously, it is still active.
Salt
Salt is essential for flavor. Beans and oat flour are mild, and without enough salt the bread tastes flat. Salt also helps bring out the garlic and herbs. If you use canned beans labeled “no salt added,” you may want to keep the full amount. If you use regular canned beans and rinse them well, the recipe as written should be balanced.
Olive Oil
Olive oil adds moisture, richness, and a subtle fruity flavor. It also helps keep the crumb tender and prevents the loaf from drying out. A tablespoon is enough for flavor and softness. You can also use it to lightly grease the loaf pan if you are not using parchment paper.
Equipment You’ll Need
You will need only a few simple tools:
- A small loaf pan, about 8 by 4 inches
- Parchment paper (or olive oil for greasing)
- A food processor or blender
- A large mixing bowl
- A spatula or wooden spoon
- A knife and cutting board for mincing garlic
- Measuring cups and spoons, or a kitchen scale
- A toothpick or skewer for testing doneness
- A wire rack for cooling
- A serrated knife for slicing
A blender can work in place of a food processor, but you may need to scrape down the sides a few times to get a smooth puree.
Step-by-Step Instructions
Step 1: Preheat the Oven
Preheat your oven to 350°F (175°C). Line a small loaf pan with parchment paper, leaving some overhang on the sides to use as handles, or lightly grease the pan with olive oil. Parchment is the easiest way to guarantee a clean release.
Step 2: Blend the Beans
Add the drained and rinsed white beans and the eggs to a food processor or blender. Blend until smooth and creamy. Stop to scrape down the sides if needed. The mixture should be free of whole bean pieces, because lumps can create dense spots in the finished loaf.
Step 3: Mix the Ingredients
Transfer the bean mixture to a large bowl. Add the oat flour, minced garlic, Italian seasoning, baking powder, salt, and olive oil. Make sure the baking powder is evenly distributed so the loaf rises evenly.
Step 4: Prepare the Batter
Stir until all the ingredients are evenly combined. The batter should be thick but spreadable, similar to a thick muffin batter. If it seems very stiff, mix in a teaspoon or two of water or milk. If it seems too loose, let it sit for a couple of minutes, because oat flour continues to absorb moisture as it rests.
Step 5: Fill the Loaf Pan
Pour or spoon the batter into the prepared pan and smooth the top with a spatula. If you like, sprinkle a little extra Italian seasoning over the surface for a more rustic look and added aroma.
Step 6: Bake
Bake for 40 to 50 minutes, or until the loaf is golden and a toothpick inserted into the center comes out clean. The top should feel firm to the touch, and the edges should pull slightly away from the sides of the pan. Ovens vary, so start checking around the 40-minute mark.
If the top is browning too quickly before the center is cooked, loosely cover the loaf with foil for the remainder of the baking time.
Step 7: Cool
Allow the bread to rest in the pan for 10 to 15 minutes, then lift it out using the parchment and transfer it to a wire rack. Let it cool before slicing to help it hold its shape. Bean-based breads continue to set as they cool, so cutting too early can result in gummy or crumbly slices.
Step 8: Serve and Enjoy
Slice with a serrated knife and serve with butter, avocado, hummus, or your favorite sandwich fillings. It is also delicious alongside soups, salads, and roasted vegetables.
Pro Tips for the Best Loaf
Rinse and drain the beans well. Excess liquid can make the loaf gummy. After rinsing, shake off the water and pat the beans dry with a paper towel if they seem very wet.
Blend until completely smooth. A silky puree creates a uniform crumb. Take your time and scrape down the bowl.
Measure the oat flour carefully. Too much flour makes the bread dry, while too little makes it gummy. A scale is the most accurate method.
Use fresh baking powder. It is the only source of lift, so make sure it is active.
Do not skip the cooling time. The texture improves a lot once the loaf has cooled and set.
Toast the slices. Toasting adds crispness to the crust and brings out the savory flavor.
Add fresh herbs. A tablespoon of chopped fresh rosemary, parsley, or chives brightens the flavor.
Rest the batter briefly. Letting it sit for 5 minutes before baking allows the oat flour to hydrate, which can improve the structure.
Check doneness in more than one spot. Because the loaf is dense, insert the toothpick in the center and make sure it comes out clean.
Slice with a serrated knife. A gentle sawing motion prevents crushing the soft crumb.
Troubleshooting Common Problems
My bread is gummy in the middle
This usually means it was underbaked or sliced while warm. Bake it a few minutes longer, and let it cool completely before cutting. Also make sure you drained the beans well and measured the oat flour accurately.
The loaf is dry and crumbly
You may have used too much oat flour or overbaked it. Weigh the flour for accuracy, check for doneness at the early end of the baking time, and make sure to include the olive oil.
The bread did not rise much
Check that your baking powder is fresh and that you did not overmix the batter after adding it. Keep in mind this is a dense bean-based loaf, so it will not rise like a yeast bread. Using a smaller pan will give a taller loaf.
The top browned too fast
Tent the loaf loosely with foil partway through baking, and make sure the rack is in the center of the oven.
I can taste the beans
Rinse the beans thoroughly, blend them until very smooth, and add the full amount of garlic and herbs. Fresh garlic and a pinch of extra salt help balance the flavor.
The loaf stuck to the pan
Use parchment paper for the easiest release. If you greased the pan instead, run a thin knife around the edges before lifting the loaf out.
The bread tastes bland
Season well. You can increase the garlic, add fresh herbs, or sprinkle flaky salt on top. Serving it with a flavorful spread also helps.
The batter is too thick or too thin
A thick batter can be loosened with a teaspoon or two of water or milk. A thin batter often thickens after resting for a few minutes, as the oat flour absorbs moisture.
Delicious Variations
Once you have the base recipe down, try these flavorful twists:
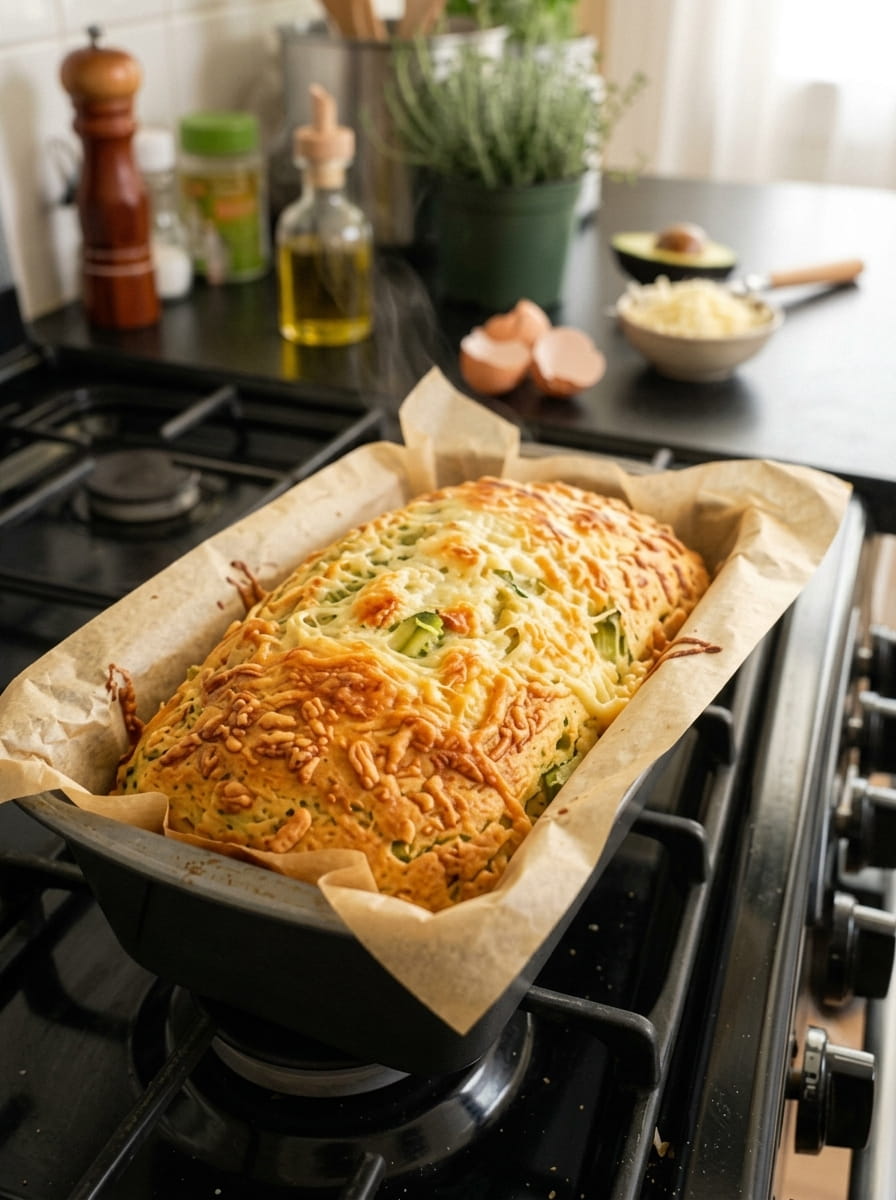
- Cheesy garlic bread: Stir in ½ cup of shredded cheddar, mozzarella, or parmesan, and sprinkle a little more on top before baking.
- Rosemary and olive: Add chopped fresh rosemary and sliced olives for a Mediterranean flavor.
- Sun-dried tomato and basil: Fold in chopped sun-dried tomatoes and fresh basil for a bright, savory loaf.
- Spicy version: Add a pinch of red pepper flakes or a tablespoon of finely chopped jalapeño.
- Seeded top: Sprinkle sesame seeds, sunflower seeds, pumpkin seeds, or poppy seeds on top before baking for crunch.
- Everything seasoning: Brush the top lightly with olive oil and sprinkle with everything bagel seasoning.
- Roasted garlic: Replace the fresh garlic with 3 to 4 cloves of mashed roasted garlic for a sweeter, mellow taste.
- Onion and chive: Add finely chopped green onions or chives for a mild oniony note.
- Muffin version: Spoon the batter into a lined muffin tin and bake for about 20 to 25 minutes, checking for doneness.
- Chickpea swap: Substitute chickpeas for the white beans for a slightly nuttier flavor, blending until very smooth.
How to Serve White Bean Garlic Herb Bread
This versatile loaf pairs well with so many meals.
Breakfast ideas
- Toasted with butter or olive oil
- Topped with mashed avocado and a fried egg
- Served with cream cheese and sliced tomatoes
- Spread with almond butter for a savory-sweet option
Sandwiches and lunch
- Turkey, lettuce, and tomato
- Hummus and roasted vegetables
- Chicken or egg salad
- Mozzarella, tomato, and basil, toasted in a pan like a panini
With soup and salad
- Tomato soup for dunking
- Minestrone or vegetable soup
- Lentil soup or creamy mushroom soup
- A fresh green salad with vinaigrette
Dips and spreads
- Hummus
- Olive tapenade
- Pesto
- Whipped feta
- Olive oil and balsamic vinegar for dipping
Dinner sides
- Alongside roasted vegetables
- With pasta dishes and stews
- As a savory accompaniment to grilled chicken or fish
For an extra treat, brush slices with olive oil and toast in a skillet until golden, then rub with a cut garlic clove.
Storing, Freezing, and Reheating
Room temperature: Keep the cooled loaf wrapped in a clean towel or in an airtight container for up to 1 day. Because the bread is moist and contains eggs and beans, it is best to refrigerate it after that.
Refrigerating: Wrap the loaf tightly or store slices in an airtight container in the refrigerator for up to 4 to 5 days.
Freezing: Slice the cooled loaf, place parchment between slices, and freeze in a freezer bag for up to 3 months. This lets you remove only what you need.
Reheating: Toast the slices straight from the fridge or freezer until warm and crisp at the edges. You can also warm them in a 350°F (175°C) oven for 5 to 10 minutes. The microwave works for a quick option, but toasting gives the best texture.
Meal prep tip: Bake the loaf on a weekend, slice and freeze it, and you will have a high-fiber, high-protein bread ready for the busy week ahead.
Frequently Asked Questions
Can I taste the beans in this bread?
Generally, no. White beans are very mild, and once they are blended and baked with garlic, herbs, and olive oil, they simply add creaminess and moisture. Be sure to rinse them well.
What kind of white beans should I use?
Cannellini, great northern, and navy beans all work well. Cannellini beans tend to be especially creamy and mild. Any canned white bean that is soft and drained well will do.
Can I use dried beans instead of canned?
Yes. Cook about ¾ cup of dried beans until fully tender, which should yield around 1½ cups cooked, then drain thoroughly. Make sure they are not too wet before blending.
Is this bread gluten-free?
The recipe contains no wheat flour, but oats can be cross-contaminated during processing. If you need the bread to be strictly gluten-free, use certified gluten-free oat flour and check your baking powder and seasoning labels.
How do I make oat flour at home?
Blend old-fashioned or quick rolled oats in a high-speed blender or food processor until they form a fine, flour-like powder. Measure after blending for accuracy, since the volume changes. About 1 cup of oat flour weighs roughly 90 g.
Can I substitute all-purpose flour for oat flour?
You can, but the texture will be different, and the amount of liquid may need adjustment. Oat flour gives a softer, more tender crumb. If you substitute, start with the same weight and check the batter consistency.
Can I make it vegan?
Eggs are important for binding and structure here, so a vegan version requires experimentation. Flax eggs or a commercial egg replacer may work, but the texture will likely be denser and the results are not guaranteed.
Can I use baking soda instead of baking powder?
It is not a direct swap. Baking soda needs an acid to activate and is stronger, so it can leave a soapy taste if used incorrectly. Stick with baking powder for best results.
Why is my loaf dense?
This is a bean-based quick bread, so it is naturally denser than yeast bread. To keep it as light as possible, blend the beans until smooth, use fresh baking powder, and avoid overmixing or adding too much flour.
Can I double the recipe?
Yes. Use a standard 9 by 5 inch loaf pan, double all the ingredients, and expect a longer baking time. Check for doneness with a toothpick, and tent with foil if the top browns too fast.
Can I add cheese?
Absolutely. Shredded cheddar, mozzarella, or parmesan blends well with the garlic and herbs. Mix about ½ cup into the batter and sprinkle a bit on top.
Is this bread good for sandwiches?
Yes. Once it is fully cooled, it slices well and holds up to spreads and fillings. Toasting the slices adds strength and flavor.
How do I know when it is done?
The top should be golden and firm, and a toothpick inserted into the center should come out clean. The loaf should also feel set rather than soft or wobbly.
Final Thoughts
This white bean garlic herb bread is proof that wholesome ingredients can turn into something comforting, savory, and satisfying with very little effort. Creamy beans and eggs create a tender base, oat flour gives structure, and garlic and Italian herbs fill every slice with flavor. There is no yeast, no kneading, and no waiting for dough to rise.
Bake a loaf to enjoy with soup on a cool evening, slice it for sandwiches, or toast it for breakfast with avocado and a fried egg. Once you try the base recipe, experiment with cheeses, fresh herbs, and seeds to make it your own.
If you make this recipe, share your favorite way to serve it in the comments, and save it for your next cozy meal. Happy baking! 🫘🧄🌿🍞
Print
White Bean Garlic Herb Bread
Ingredients
This recipe uses just eight ingredients. Here is what each one does.
- 1 can (15 oz / 425 g) white beans, drained and rinsed
- 2 large eggs
- 1 cup (90 g) oat flour
- 2 cloves garlic, minced
- 1 teaspoon Italian seasoning
- 1 teaspoon baking powder
- ½ teaspoon salt
- 1 tablespoon olive oil
Instructions
Preheat your oven to 350°F (175°C). Line a small loaf pan with parchment paper, leaving some overhang on the sides to use as handles, or lightly grease the pan with olive oil. Parchment is the easiest way to guarantee a clean release.
Add the drained and rinsed white beans and the eggs to a food processor or blender. Blend until smooth and creamy. Stop to scrape down the sides if needed. The mixture should be free of whole bean pieces, because lumps can create dense spots in the finished loaf.
Transfer the bean mixture to a large bowl. Add the oat flour, minced garlic, Italian seasoning, baking powder, salt, and olive oil. Make sure the baking powder is evenly distributed so the loaf rises evenly.
Stir until all the ingredients are evenly combined. The batter should be thick but spreadable, similar to a thick muffin batter. If it seems very stiff, mix in a teaspoon or two of water or milk. If it seems too loose, let it sit for a couple of minutes, because oat flour continues to absorb moisture as it rests.
Pour or spoon the batter into the prepared pan and smooth the top with a spatula. If you like, sprinkle a little extra Italian seasoning over the surface for a more rustic look and added aroma.
Bake for 40 to 50 minutes, or until the loaf is golden and a toothpick inserted into the center comes out clean. The top should feel firm to the touch, and the edges should pull slightly away from the sides of the pan. Ovens vary, so start checking around the 40-minute mark.
If the top is browning too quickly before the center is cooked, loosely cover the loaf with foil for the remainder of the baking time.
Allow the bread to rest in the pan for 10 to 15 minutes, then lift it out using the parchment and transfer it to a wire rack. Let it cool before slicing to help it hold its shape. Bean-based breads continue to set as they cool, so cutting too early can result in gummy or crumbly slices.
Slice with a serrated knife and serve with butter, avocado, hummus, or your favorite sandwich fillings. It is also delicious alongside soups, salads, and roasted vegetables.