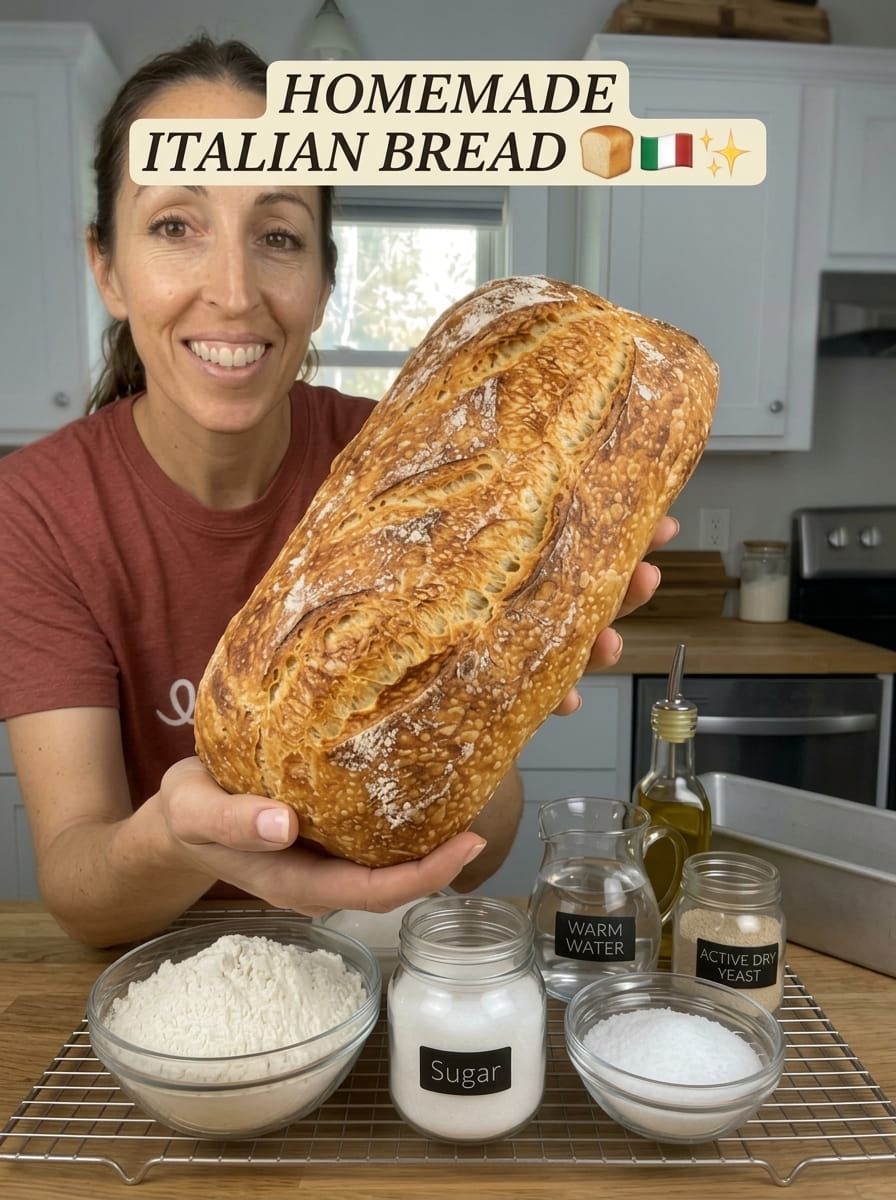
Homemade Italian Bread Recipe: Easy, Crusty and Soft Inside
Meta description: Learn how to make homemade Italian bread with a golden, crackly crust and a soft, airy crumb. Simple ingredients, clear steps, pro tips, and serving ideas.
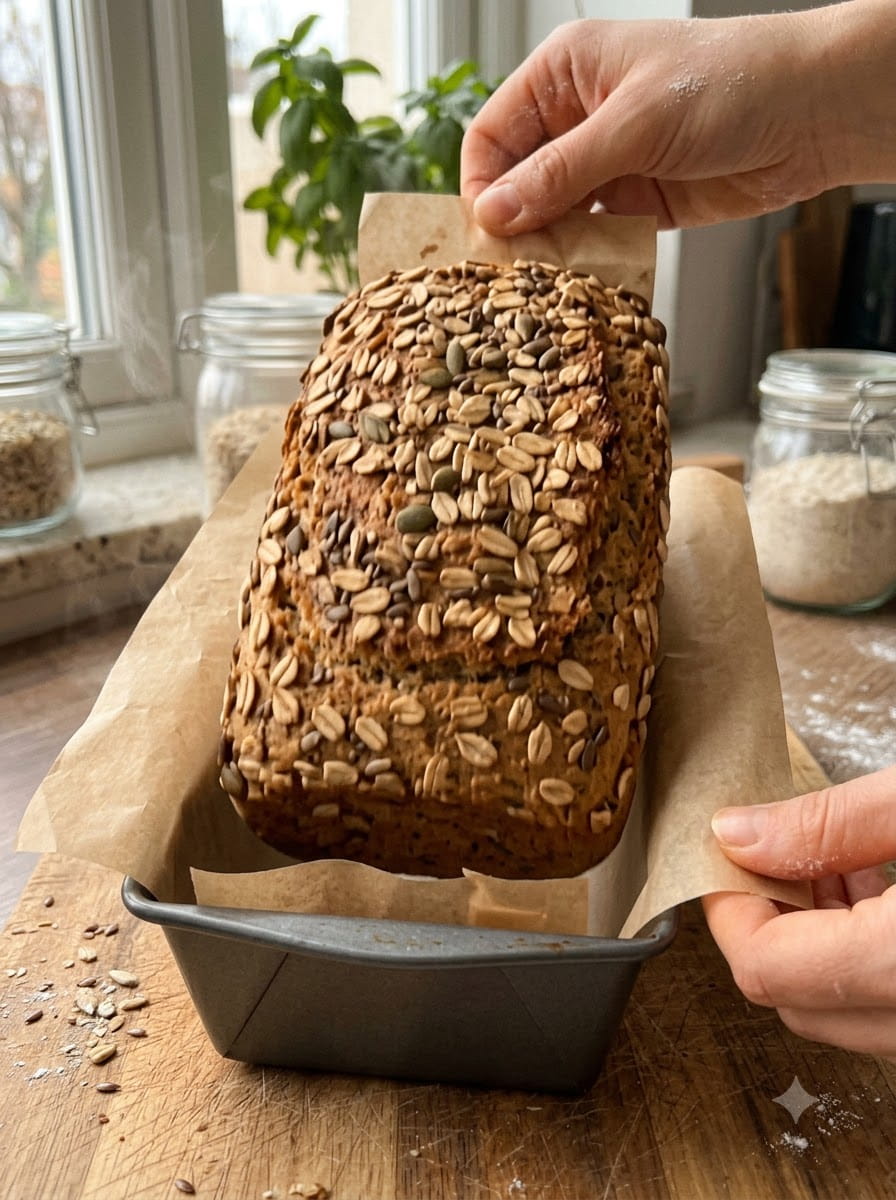
Homemade Italian bread is one of the easiest yeast breads you can bake, and it rewards you with a golden, crackly crust and a soft, airy inside using nothing more than flour, water, yeast, salt, sugar, and olive oil. If you have ever walked past a bakery and wished your own kitchen smelled that good, this is the recipe that makes it happen.
This classic Italian bread loaf is endlessly useful. Tear it warm from the oven and dip it in olive oil. Slice it thick for garlic bread. Toast it for bruschetta, pile it with deli meats for sandwiches, or set it next to a pot of soup or a big bowl of pasta. One loaf can anchor an entire meal, and the dough comes together in a single bowl with no special equipment and no kneading machine required.
Why You’ll Love This Homemade Italian Bread Recipe
There are plenty of bread recipes online, but this easy Italian bread recipe stands out for a few practical reasons.
- Simple pantry ingredients. You need only six ingredients, and most kitchens already have them on hand. There are no starters, preferments, or specialty flours to hunt down.
- Beginner friendly. The dough is soft and forgiving. If you have never baked bread before, this is a confidence-building first loaf.
- Crisp crust, tender crumb. A hot oven and a few shallow cuts on top give you a deeply golden, crunchy crust, while the olive oil keeps the inside light and soft.
- Hands-on time is short. Most of the three hours is waiting while the dough rises. You mix, shape, and score in about 20 minutes of actual work.
- Incredibly versatile. The same loaf becomes dinner bread, sandwich bread, croutons, breadcrumbs, or the base for a cheesy garlic toast.
- Better than store-bought. Fresh homemade bread has a flavor and aroma that packaged loaves cannot match, and you control exactly what goes into it.
In this guide you will find the full ingredient list, detailed step-by-step directions, expert tips for a better crust and crumb, a troubleshooting section, flavor variations, serving ideas, storage and freezing advice, and answers to the most common questions about baking Italian bread at home.
Ingredients for Homemade Italian Bread
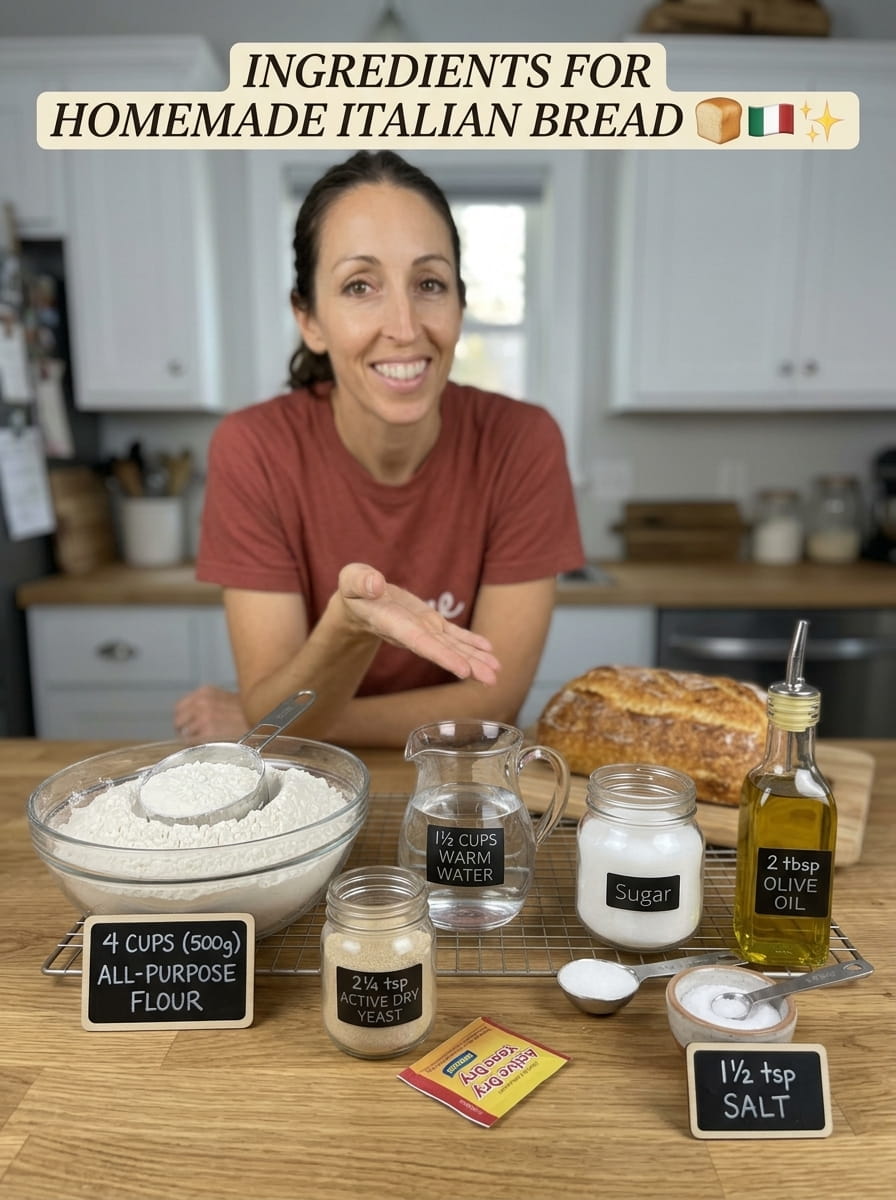
This recipe makes one large loaf, enough for about 8 to 10 slices.
| Ingredient | Amount |
|---|---|
| All-purpose flour | 4 cups (500 g) |
| Warm water | 1½ cups (360 ml) |
| Active dry yeast | 2¼ tsp (1 packet) |
| Sugar | 1 tbsp |
| Salt | 1½ tsp |
| Olive oil | 2 tbsp |
A Closer Look at Each Ingredient
All-purpose flour is all you need for a tender loaf with a pleasant chew. Bread flour will give a slightly chewier, taller loaf thanks to its higher protein, but all-purpose flour keeps this bread soft and easy to slice.
Warm water should feel comfortably warm on your wrist, around 105°F to 110°F (40°C to 43°C). Water that is too hot can kill the yeast, and water that is too cold will slow it down.
Active dry yeast is the engine of the loaf. Check the expiration date, because old yeast is the most common reason bread fails to rise.
Sugar gives the yeast a quick snack to get it foaming and adds a hint of browning to the crust.
Salt controls the yeast and builds flavor. Never skip it, as bread without salt tastes flat.
Olive oil adds a subtle fruity richness, softens the crumb, and helps the bread stay fresh a little longer. Use a good extra virgin olive oil if you have one.
Equipment You’ll Need
- A large mixing bowl
- A wooden spoon or dough whisk
- Measuring cups and spoons, or a kitchen scale
- A baking sheet lined with parchment paper
- A sharp knife or bread lame for scoring
- A wire cooling rack
- A clean kitchen towel or plastic wrap for covering the dough
A kitchen scale is optional but helpful. Weighing your flour is the most reliable way to get consistent results, because a cup of flour can vary by 20 to 30 grams depending on how it is scooped.
How to Make Homemade Italian Bread: Step-by-Step Directions
Total time is about 3 hours, including rising and baking. Active time is roughly 20 minutes.
Step 1: Activate the Yeast
Pour the warm water into a large bowl and stir in the sugar and active dry yeast. Let the mixture stand for 5 to 10 minutes. It should turn foamy and smell pleasantly yeasty. If nothing happens after 10 minutes, your yeast is likely expired or the water was the wrong temperature, so start over with fresh yeast.
Step 2: Make the Dough
Add the flour, salt, and olive oil to the foamy yeast mixture. Stir with a wooden spoon until a soft, shaggy dough forms and no dry flour remains. The dough should be slightly sticky but hold together. If it feels unmanageably wet, add flour a tablespoon at a time. A little stickiness is a good sign, since wetter dough bakes into a lighter, airier loaf.
You can knead the dough by hand on a lightly floured surface for 5 to 8 minutes, or use a stand mixer with a dough hook on medium-low speed for about 5 minutes. The dough is ready when it feels smooth and springs back slowly when poked. This recipe also works with minimal kneading if you give the dough a long rise.
Step 3: First Rise
Lightly oil a clean bowl, place the dough inside, and turn it once to coat. Cover with a towel or plastic wrap and let it rise in a warm, draft-free spot for 1 to 1½ hours, until doubled in size. A turned-off oven with the light on works well as a cozy rising spot.
Step 4: Shape the Loaf
Turn the risen dough onto a lightly floured surface. Press it gently into a rough rectangle to release large air bubbles, then roll it up from the long side into a log and pinch the seam closed. Roll it gently back and forth to lengthen it into a classic Italian-style loaf about 12 to 14 inches long, with slightly tapered ends. Keep your touch light so the loaf stays airy.
Step 5: Second Rise
Place the loaf seam side down on a parchment-lined baking sheet. Cover loosely and let it rise for 30 to 45 minutes, until visibly puffy. Press a floured fingertip lightly into the side: if the dent springs back slowly, it is ready to bake.
While it rises, preheat your oven to 425°F (220°C).
Step 6: Score the Top
Use a sharp knife or bread lame to make several shallow diagonal cuts, about ¼ inch deep, across the top of the loaf. Scoring lets steam escape and helps the loaf expand evenly instead of tearing in random places.
Step 7: Bake
Bake at 425°F (220°C) for 25 to 30 minutes, until the crust is deeply golden and crisp. The loaf should sound hollow when you tap the bottom. For a bakery-style crackle, place a metal pan on the lower rack while the oven heats and carefully add a cup of hot water when you slide the bread in, creating steam.
Step 8: Cool Before Slicing
Transfer the bread to a wire rack and let it cool for at least 20 to 30 minutes. It is tempting to slice right away, but the crumb is still setting inside. Cutting too early can make the texture gummy and cause the crust to soften.
Tips for a Crispy Crust and Soft, Airy Crumb
A few small habits separate an average loaf from a bakery-quality Italian bread. These are the techniques that make the biggest difference.
- Measure flour by weight. Too much flour is the number one cause of dense bread. If you use cups, spoon the flour into the cup and level it off instead of scooping straight from the bag.
- Respect the yeast. Use warm, not hot, water and always let the yeast foam before adding the other ingredients. This proves the yeast is alive.
- Let the dough rise fully. Judge by size and feel, not just the clock. A cooler kitchen can stretch the first rise to 2 hours, while a warm one may finish in under an hour.
- Handle the dough gently when shaping. Pressing out every bubble creates a tight crumb. Shape quickly and softly so some of the gas stays in.
- Create steam in the oven. Steam keeps the surface flexible during the first minutes of baking so the loaf rises fully, then dries into a thin, shatteringly crisp crust.
- Preheat thoroughly. Let the oven reach 425°F (220°C) before the bread goes in. An oven thermometer is inexpensive and often reveals that the dial is off by 25 degrees or more.
- Score with confidence. Use a very sharp blade and make quick, shallow cuts at a slight angle. A dull knife drags and deflates the dough.
- Brush for extra shine. For a glossy, richly colored crust, brush the loaf with a little water before baking, or with an egg wash made from one egg and a tablespoon of water.
- Bake until deeply golden. Pale bread tastes bland. The darker, caramelized color is where much of the flavor lives, so do not pull the loaf too early.
- Cool completely on a rack. Air circulation underneath keeps the bottom crust from steaming itself soft.
Develop More Flavor With a Slower Rise
If you have time, flavor improves with patience. After mixing, cover the dough and refrigerate it for 8 to 24 hours. The slow, cold fermentation develops a more complex, slightly tangy taste. Let the dough come to room temperature for about an hour, then shape, proof, and bake as directed.
Troubleshooting Common Italian Bread Problems
Even experienced bakers hit snags. Here is how to diagnose and fix the most common issues.
| Problem | Likely cause | Fix |
|---|---|---|
| Dough did not rise | Expired yeast, water too hot or cold, or a cold room | Test yeast in warm water with sugar first; use water around 105°F to 110°F; move dough to a warmer spot |
| Dense, heavy loaf | Too much flour, under-proofing, or over-pressing during shaping | Weigh the flour, let the dough fully double, and shape gently |
| Pale, soft crust | Oven not hot enough, no steam, or pulled too early | Verify oven temperature, add steam, bake until deep golden |
| Crust too hard or thick | Over-baking or too much steam for too long | Shorten bake time slightly and remove the steam pan after 10 minutes |
| Loaf spread flat | Over-proofed dough or dough too wet | Shorten the second rise; add a little flour; shape with more surface tension |
| Large tunnels inside | Dough not shaped tightly or air pockets trapped | Roll the log snugly and pinch the seam firmly |
| Gummy interior | Sliced while too hot or under-baked | Cool at least 20 to 30 minutes and check for a hollow sound |
| Bread tastes bland | Too little salt or too short a rise | Measure salt precisely and try the slow refrigerator rise |
How to Tell When the Bread Is Done
Three signals work together. First, the crust should be a deep golden brown, not pale. Second, the loaf should sound hollow when you tap the bottom. Third, if you use an instant-read thermometer, the center should read about 190°F to 210°F (88°C to 99°C).
Easy Variations on Italian Bread
Once you have mastered the basic loaf, it becomes a canvas for flavor.
- Garlic and herb loaf. Knead in 2 teaspoons of dried Italian seasoning and 2 minced garlic cloves, or brush the baked loaf with garlic butter.
- Cheesy Italian bread. Fold in ¾ cup of shredded mozzarella, provolone, or grated Parmesan during shaping, or sprinkle cheese on top for the last 5 minutes of baking.
- Rosemary and sea salt. Brush the scored loaf with olive oil and sprinkle with fresh chopped rosemary and flaky sea salt before baking.
- Sesame or poppy seed crust. Brush with water or egg wash and press on seeds for a classic bakery look.
- Whole wheat blend. Replace up to 1 cup of the flour with whole wheat flour for a nuttier flavor. You may need a splash more water.
- Rolls or baguettes. Divide the dough into 8 rolls for sandwiches (bake 18 to 22 minutes) or 2 slimmer loaves (bake 20 to 25 minutes).
- Olive and sun-dried tomato. Knead in ½ cup of chopped olives or oil-packed sun-dried tomatoes for a Mediterranean twist.
Make-Ahead and Scheduling Options
Baking bread fits easily into a busy day when you plan around the rises.
- Overnight method. Mix the dough in the evening, refrigerate it overnight, and shape and bake the next day.
- Freeze the dough. After the first rise, shape the dough, wrap it tightly, and freeze for up to 1 month. Thaw in the refrigerator overnight, then complete the second rise and bake.
- Same-day plan. Start in the morning and you will have warm bread by lunch or dinner. Roughly 3 hours covers everything from mixing to cooling.
What to Serve With Homemade Italian Bread
This bread earns its place at nearly every table. Here are the best ways to enjoy it.
Dip it in soup. A thick slice is perfect for soaking up tomato soup, minestrone, creamy potato soup, or a hearty beef stew.
Serve it with pasta. Spaghetti with marinara, fettuccine Alfredo, or baked lasagna all taste better with a crusty piece of bread on the side for mopping up the sauce.
Build Italian-style sandwiches. Slice the loaf lengthwise and layer with salami, ham, provolone, tomato, lettuce, and a drizzle of vinaigrette. It also makes excellent meatball subs and chicken parmesan sandwiches.
Make garlic bread. Slice the loaf, spread with butter mixed with minced garlic and parsley, and bake until bubbly and golden.
Toast it for bruschetta. Grill or toast thin slices, rub with a cut garlic clove, and top with diced tomatoes, basil, and olive oil.
Enjoy it warm with butter. There is nothing quite like a warm slice with melting butter and a pinch of flaky salt.
Dip it in olive oil and herbs. Pour good olive oil into a shallow dish, add dried oregano, basil, a pinch of red pepper flakes, and grated Parmesan, then dip away.
Pair it with salads. Serve alongside a Caesar, Caprese, or antipasto salad for a satisfying light meal. Cubed leftovers also make wonderful homemade croutons.
How to Store, Reheat, and Freeze Italian Bread
Homemade bread has no preservatives, so it is best on the day it is baked. With the right storage, though, you can enjoy it for several days.
- Room temperature (1 to 2 days). Keep the loaf cut side down on a cutting board, or wrap it loosely in a clean kitchen towel or paper bag. This protects the crust’s crunch. Avoid sealed plastic at first, since it traps moisture and softens the crust.
- Airtight storage (up to 3 days). For a softer crust and longer freshness, store it in a bread bag or sealed container once completely cooled.
- Refrigerator. Not recommended. Cold temperatures make bread go stale faster.
- Freezer (up to 3 months). Slice the cooled loaf, wrap tightly in plastic wrap or foil, then place in a freezer bag. Pull out slices as needed and toast them straight from frozen.
Reviving Day-Old Bread
To refresh a whole loaf, run it quickly under water or mist it lightly, then bake at 350°F (175°C) for 10 to 12 minutes. The crust turns crisp again and the inside softens. For frozen loaves, thaw at room temperature and reheat the same way.
Using Up Leftovers
Stale Italian bread is a gift. Turn it into crunchy croutons, homemade breadcrumbs, panzanella salad, French toast, bread pudding, or the base for a savory strata.
Frequently Asked Questions About Homemade Italian Bread
Can I use instant yeast instead of active dry yeast?
Yes. Use the same amount, 2¼ teaspoons. You can mix instant yeast straight into the flour without proofing it first, though proofing is a useful check that the yeast is alive.
Can I use bread flour instead of all-purpose flour?
Yes. Bread flour has more protein, so the loaf will be a little chewier and may rise slightly taller. You may need an extra tablespoon or two of water.
Why is my Italian bread dense?
The usual causes are too much flour, expired yeast, or cutting the rises short. Weigh your flour, check that the yeast foams, and let the dough double in size before shaping.
Do I need to knead this dough?
Kneading for 5 to 8 minutes gives the best structure, but a no-fuss approach also works. Mix well, give the dough a long rise, and fold it a few times during the first hour.
Do I need a baking stone or Dutch oven?
No. A standard baking sheet lined with parchment works well. A preheated baking stone or steel can add extra oven spring and a crispier bottom crust, but they are optional.
How do I get a crispier crust?
Add steam by placing a pan of hot water on the lower rack, bake until the crust is deeply golden, and cool the loaf on a wire rack. Leaving the cooled loaf uncovered for a short time also helps.
Can I make this recipe without sugar?
Yes. The sugar mainly speeds up the yeast and adds a touch of browning. Without it the yeast may take a few extra minutes to foam, and the crust may be slightly paler.
What is the difference between Italian bread and French bread?
The two are similar, but American-style Italian bread often includes a little olive oil, sometimes sugar, and has a slightly softer crust and tender crumb. Traditional French baguettes are leaner, usually just flour, water, yeast, and salt, with a thinner, crackly crust.
Can I double the recipe?
Yes. Double every ingredient and divide the dough into two loaves. Bake them side by side on one large sheet or on two sheets, and add a few minutes if the oven is crowded.
Final Thoughts
Homemade Italian bread proves that a handful of humble ingredients can become something wonderful. With a golden, crackly crust, a soft and airy crumb, and an aroma that fills the whole house, this easy Italian bread recipe belongs in every home baker’s collection. It works for weeknight dinners, cozy soup nights, holiday tables, and last-minute sandwiches alike.
Try it once and you will likely never buy a packaged loaf again. Bake a loaf this week, serve it warm with butter and olive oil, and share it with someone you love. If you make variations of your own, such as garlic and cheese or rosemary and sea salt, they are a great way to make the recipe truly yours.
Print
Homemade Italian Bread
Ingredients
This recipe makes one large loaf, enough for about 8 to 10 slices.
Ingredient Amount
All-purpose flour 4 cups (500 g)
Warm water 1½ cups (360 ml)
Active dry yeast 2¼ tsp (1 packet)
Sugar 1 tbsp
Salt 1½ tsp
Olive oil 2 tbsp
Instructions
Total time is about 3 hours, including rising and baking. Active time is roughly 20 minutes.
Pour the warm water into a large bowl and stir in the sugar and active dry yeast. Let the mixture stand for 5 to 10 minutes. It should turn foamy and smell pleasantly yeasty. If nothing happens after 10 minutes, your yeast is likely expired or the water was the wrong temperature, so start over with fresh yeast.
Add the flour, salt, and olive oil to the foamy yeast mixture. Stir with a wooden spoon until a soft, shaggy dough forms and no dry flour remains. The dough should be slightly sticky but hold together. If it feels unmanageably wet, add flour a tablespoon at a time. A little stickiness is a good sign, since wetter dough bakes into a lighter, airier loaf.
You can knead the dough by hand on a lightly floured surface for 5 to 8 minutes, or use a stand mixer with a dough hook on medium-low speed for about 5 minutes. The dough is ready when it feels smooth and springs back slowly when poked. This recipe also works with minimal kneading if you give the dough a long rise.
Lightly oil a clean bowl, place the dough inside, and turn it once to coat. Cover with a towel or plastic wrap and let it rise in a warm, draft-free spot for 1 to 1½ hours, until doubled in size. A turned-off oven with the light on works well as a cozy rising spot.
Turn the risen dough onto a lightly floured surface. Press it gently into a rough rectangle to release large air bubbles, then roll it up from the long side into a log and pinch the seam closed. Roll it gently back and forth to lengthen it into a classic Italian-style loaf about 12 to 14 inches long, with slightly tapered ends. Keep your touch light so the loaf stays airy.
Place the loaf seam side down on a parchment-lined baking sheet. Cover loosely and let it rise for 30 to 45 minutes, until visibly puffy. Press a floured fingertip lightly into the side: if the dent springs back slowly, it is ready to bake.
While it rises, preheat your oven to 425°F (220°C).
Use a sharp knife or bread lame to make several shallow diagonal cuts, about ¼ inch deep, across the top of the loaf. Scoring lets steam escape and helps the loaf expand evenly instead of tearing in random places.
Bake at 425°F (220°C) for 25 to 30 minutes, until the crust is deeply golden and crisp. The loaf should sound hollow when you tap the bottom. For a bakery-style crackle, place a metal pan on the lower rack while the oven heats and carefully add a cup of hot water when you slide the bread in, creating steam.
Transfer the bread to a wire rack and let it cool for at least 20 to 30 minutes. It is tempting to slice right away, but the crumb is still setting inside. Cutting too early can make the texture gummy and cause the crust to soften.