
Soft & Buttery No-Knead Dinner Rolls: Fluffy, Golden, and Easy
These Soft & Buttery No-Knead Dinner Rolls are fluffy, tender, and brushed with melted butter for a beautifully golden finish. Made with simple pantry ingredients and an easy no-knead method, these homemade rolls are perfect for family dinners, holiday gatherings, soups, and cozy comfort meals. Enjoy them warm from the oven with a little extra butter.
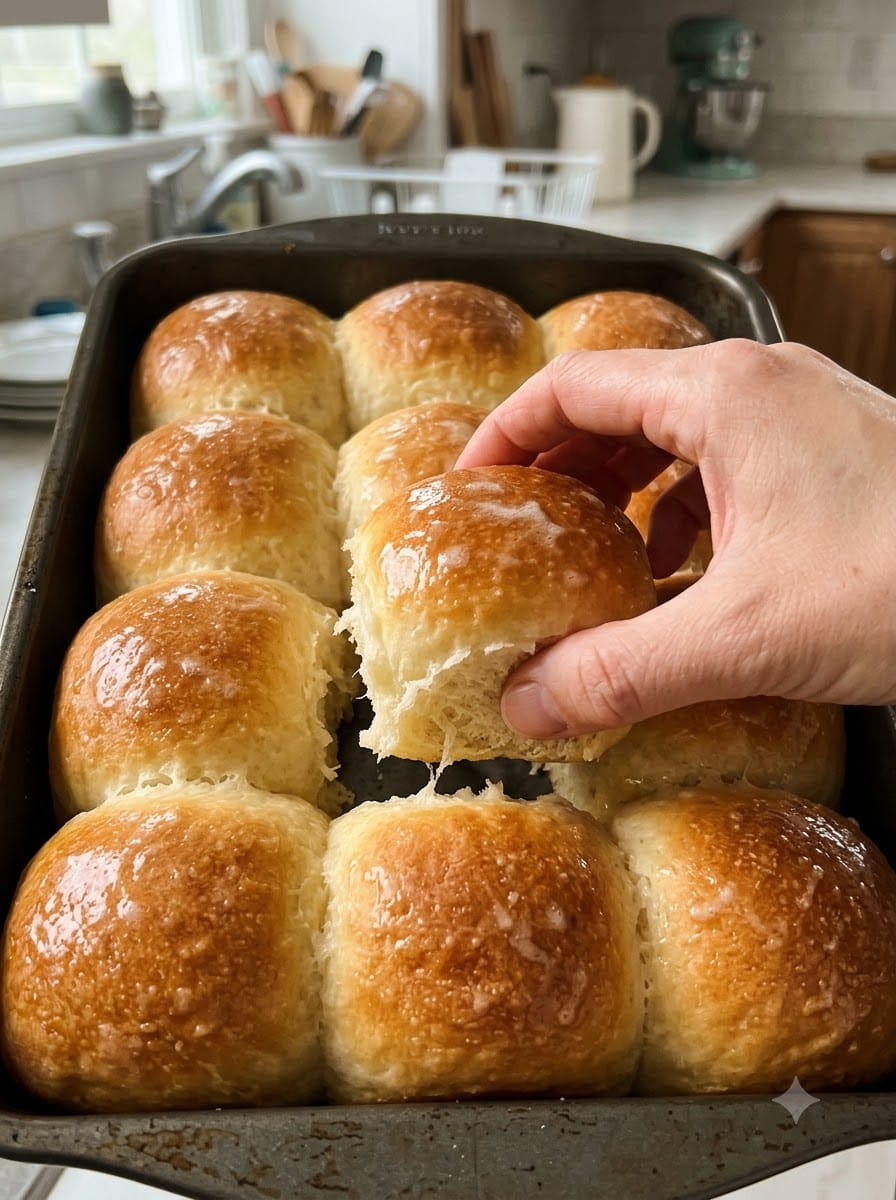
Homemade dinner rolls have a reputation for being fussy, but this recipe takes the work out of it. There is no kneading, no mixer, and no special technique. You whisk warm milk, yeast, sugar, melted butter, and an egg in a bowl, stir in flour and salt until a soft, sticky dough forms, and let it rise. After about an hour, you divide the dough into 12 pieces, shape each into a ball, arrange them in a baking dish, let them puff up, and bake. The moment they come out of the oven, you brush the tops with melted butter, which gives them a glossy, golden, buttery finish and a soft crust.
The rolls are rich thanks to the milk, butter, and egg, which is what makes the crumb so tender and the flavor so comforting. The dough is soft and slightly sticky, and that stickiness is a good thing: it is what keeps the finished rolls moist, pillowy, and pull-apart soft.
In this guide you will find the full recipe, a closer look at the ingredients, step-by-step instructions, tips for the fluffiest rolls, troubleshooting help, serving ideas, variations, make-ahead, storage, and freezing advice, and answers to common questions.
Why You’ll Love These No-Knead Dinner Rolls
There is no kneading. A bowl and a spoon are all you need. The dough comes together in minutes.
They are soft and fluffy. Milk, butter, and egg give the crumb a tender, pillowy texture.
They are buttery. A generous brush of melted butter right out of the oven adds richness, shine, and a soft crust.
They use pantry ingredients. Flour, milk, yeast, butter, sugar, an egg, and salt are everyday staples.
They are great for any occasion. They suit weeknight dinners, holiday tables, soup nights, and potlucks.
They are pull-apart style. Baked together in one dish, the rolls bake up touching and tender, and they are fun to tear apart.
They are beginner-friendly. The method is forgiving, and you do not need to shape perfect rolls.
They are versatile. Serve them with dinner, turn them into mini sandwiches, or enjoy them warm with butter and jam.
What Are No-Knead Dinner Rolls?
No-knead dinner rolls are soft, enriched yeast rolls made from a wet, sticky dough that relies on time rather than kneading to develop structure. “Enriched” means the dough contains ingredients such as milk, butter, sugar, and egg, which make the crumb softer, richer, and more tender than a lean dough made only with flour, water, salt, and yeast.
Because the dough is not kneaded, it is stirred only until combined, then left to rise. During the rise, the flour fully hydrates and the gluten gradually develops on its own. The dough is then shaped lightly and baked. The result is a roll with a soft, airy crumb that is not quite as springy or chewy as a kneaded roll, but is wonderfully tender and easy to make.
Ingredients for Soft & Buttery No-Knead Dinner Rolls
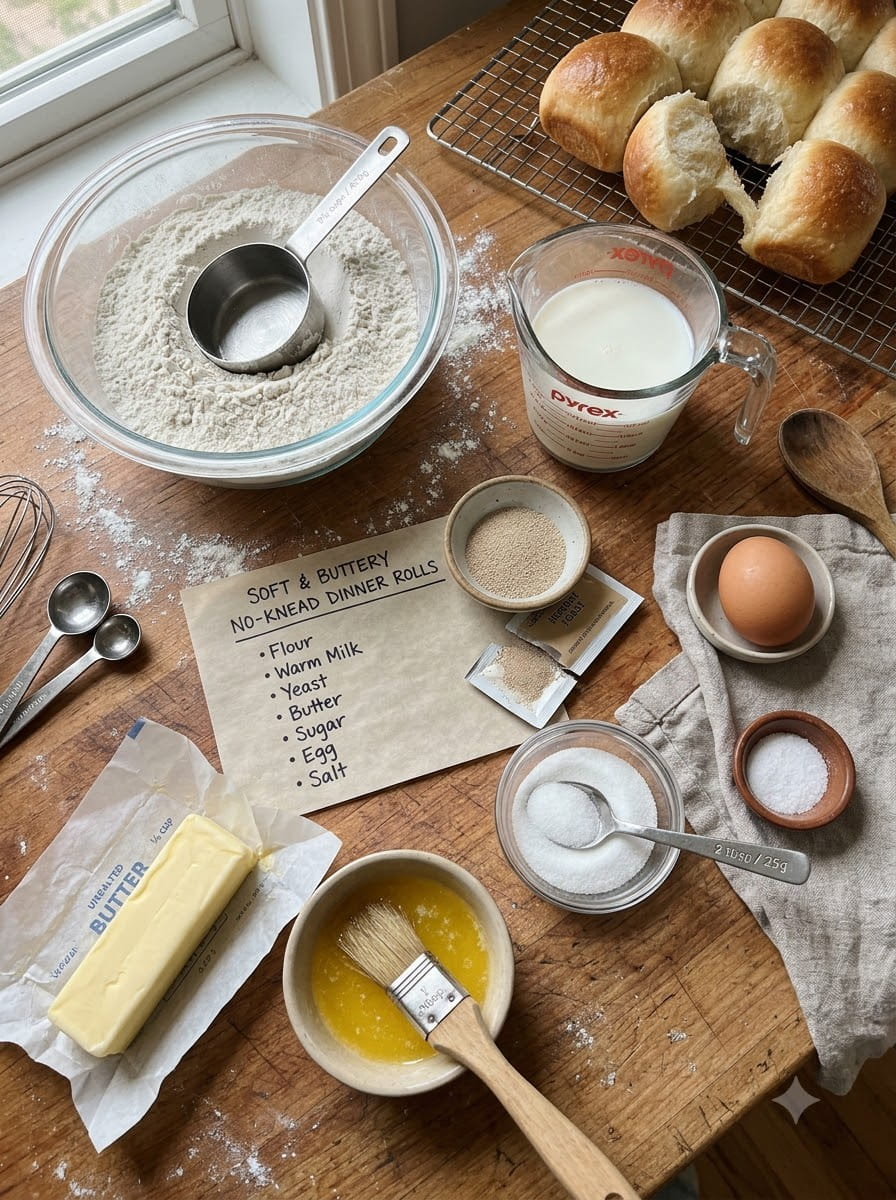
- 3½ cups all-purpose flour (420 g)
- 1 cup warm milk (240 ml)
- 2¼ teaspoons instant yeast (7 g)
- ¼ cup unsalted butter, melted (57 g)
- 2 tablespoons granulated sugar (25 g)
- 1 large egg
- 1 teaspoon salt (6 g)
- 2 tablespoons melted butter, for brushing
A Closer Look at the Ingredients
All-purpose flour. All-purpose flour gives rolls that are soft and tender. For the best results, weigh the flour (420 g). If you use cups, spoon the flour into the measuring cup and level it off, rather than scooping directly from the bag, which packs in extra flour and can make the rolls dense. Bread flour would give a slightly chewier roll, but it may absorb more liquid. This is an optional swap that is not part of the original recipe.
Warm milk. Milk adds richness, softness, and flavor. It should be warm, not hot, ideally around 100 to 110°F (38 to 43°C). Milk that is too hot can kill the yeast, and milk that is too cold will slow the rise. Whole milk gives the richest result, though lower-fat milk can also be used.
Instant yeast. Instant yeast, also called rapid-rise yeast, can be mixed directly into the wet ingredients. A packet is typically about 2¼ teaspoons, which is the amount used here. Active dry yeast can often be substituted, though it may rise more slowly. This is an optional swap that is not part of the original recipe.
Unsalted butter, melted. Butter adds richness and tenderness. Using unsalted butter lets you control the salt. Let the melted butter cool slightly before mixing it with the yeast and egg, so it does not overheat the mixture. This is an optional tip, but it helps protect the yeast and keeps the egg from cooking.
Granulated sugar. Two tablespoons add a touch of sweetness and give the yeast a little extra food. These are not sweet rolls, only lightly sweet and savory enough for dinner.
Large egg. The egg enriches the dough and contributes to a soft, tender crumb and golden color.
Salt. Salt balances the flavor and helps control the yeast. Do not leave it out.
Melted butter for brushing. The final brush of melted butter is what gives the rolls their glossy, buttery top and soft crust.
How to Make Soft & Buttery No-Knead Dinner Rolls: Step-by-Step Instructions
Step 1: Combine the Wet Ingredients
In a large bowl, whisk together the warm milk, instant yeast, sugar, melted butter, and egg until combined. If your butter is very hot, let it cool for a few minutes first. The mixture should be warm to the touch, but not hot.
Step 2: Add the Dry Ingredients
Add the flour and salt. Stir with a wooden spoon or spatula until a soft, sticky dough forms. No kneading is necessary. Stir just until there are no dry streaks of flour. The dough will be soft, shaggy, and sticky, and that is exactly right.
Step 3: Let the Dough Rise
Cover the bowl and place it in a warm spot for 60 to 90 minutes, or until the dough has doubled in size. A warm spot could be a turned-off oven with the light on, a spot near a warm (not hot) appliance, or simply a warm corner of your kitchen. The dough is ready when it looks puffy, airy, and has roughly doubled. In a cool kitchen, it may take longer.
Step 4: Prepare the Baking Pan
Lightly grease a 9-by-13-inch baking dish with butter. The rolls bake up soft and tender with golden bottoms when the dish is well greased.
Step 5: Shape the Rolls
Lightly flour your hands and divide the dough into 12 equal portions. A kitchen scale makes this easy, as each portion should weigh about the same. Shape each portion into a ball by gently tucking the edges underneath, and arrange the rolls in the prepared baking dish, leaving a little space between them. Because the dough is sticky, use just enough flour to keep it from clinging to your hands, rather than adding a lot of extra flour.
Step 6: Second Rise
Cover loosely and let the rolls rise for another 30 to 45 minutes, until puffy and touching one another. They should look pillowy and fill the pan.
Step 7: Preheat the Oven
Heat the oven to 350°F (175°C). It is a good idea to start preheating toward the end of the second rise.
Step 8: Bake
Bake for 20 to 25 minutes, until the tops are golden brown and the centers are fully baked. To be sure the centers are done, you can use an instant-read thermometer, which should read about 190°F (88°C) in the middle of a roll in the center of the pan. If the tops brown too quickly, loosely cover the pan with foil.
Step 9: Brush with Butter
Remove the rolls from the oven and immediately brush the tops generously with melted butter. Do this while the rolls are hot, so the butter soaks in slightly and leaves a soft, glossy finish.
Step 10: Serve Warm
Allow the rolls to cool for a few minutes before serving. Pull them apart and enjoy their soft, fluffy centers.
Helpful Tips for the Fluffiest Dinner Rolls
Use warm, not hot, milk. The ideal range is around 100 to 110°F (38 to 43°C). A thermometer helps here.
Cool the butter slightly. Very hot melted butter can harm the yeast and scramble the egg. Let it cool for a few minutes before mixing.
Do not add too much flour. Sticky dough makes soft rolls. Lightly flour your hands when shaping, rather than adding a lot of extra flour to the dough. This is the key tip from the original recipe.
Measure the flour carefully. Weigh it if possible. Too much flour leads to dense rolls.
Let the dough double. The first rise is where the dough develops its structure. Judge by size and look, not only the clock.
Divide evenly. Weighing the dough portions helps all 12 rolls bake at the same rate.
Let the second rise finish. The rolls should look puffy and touch one another before they go in the oven.
Do not overbake. Overbaked rolls are dry. Pull them when the tops are golden and the center reaches about 190°F (88°C).
Brush with butter right away. Hot rolls absorb the butter best, which keeps the tops soft.
Check the yeast. If your yeast is old, the dough may not rise. Check the date, and make sure it has been stored properly.
Troubleshooting Common Problems
The dough did not rise. The yeast may have been old, the milk may have been too hot or too cold, or the room may have been too cool. Use fresh yeast, warm the milk to 100 to 110°F (38 to 43°C), and give the dough more time in a warm spot.
The dough is too sticky to handle. The dough is meant to be sticky. Lightly flour your hands and the work surface, and use a bench scraper if you have one. Avoid adding a lot of extra flour, since it can make the rolls dense.
The rolls are dense. The dough may have been underproofed, the yeast may have been weak, or too much flour may have been added. Let the dough double, measure the flour with care, and make sure the second rise is complete.
The rolls are dry. They may have been overbaked or contained too much flour. Bake only until golden and fully cooked, and measure carefully.
The rolls are doughy in the center. They may be underbaked. Bake a few minutes longer, tent with foil if the tops are brown, and use a thermometer to check for about 190°F (88°C).
The tops are too dark. Cover the pan loosely with foil for the remainder of the baking time, or move the pan to a lower rack next time.
The bottoms are too dark. Use a light-colored baking dish or place the pan on a higher rack. Dark metal pans bake faster.
The rolls did not touch each other. The dough may not have risen enough in the second rise. Allow more time, or use a slightly smaller pan next time.
The rolls are not golden. Make sure the oven is fully preheated, and bake until the tops are golden. An oven thermometer can help if your oven runs cool.
The rolls are hard on top. Brush them with butter immediately after baking, and cover them lightly with a towel as they cool.
The rolls taste too yeasty. A very long or warm rise can produce a stronger yeasty flavor. Do not let the dough rise much beyond doubling.
Delicious Ways to Serve Buttery Dinner Rolls
Serving Suggestions
With roasted chicken, beef, or holiday meals. They are the perfect side for a Sunday roast or holiday table.
With creamy soups and hearty stews. Use them to soak up every last drop.
As mini sandwiches. Split them and fill with ham, turkey, or cheese.
Warm with butter, honey, or homemade jam. A simple spread lets the soft, buttery flavor shine.
More Ideas
Slider buns. Fill with pulled pork, roast beef, or crispy chicken.
Garlic butter rolls. Brush with melted butter mixed with a little garlic and parsley.
Breakfast sandwiches. Fill with scrambled eggs, cheese, and bacon.
Cheese melts. Top with a slice of cheese and warm until melted.
Bread pudding. Use day-old rolls in a baked bread pudding.
Thanksgiving leftovers. Make sandwiches with turkey and cranberry sauce.
Dipping rolls. Serve with olive oil and herbs, or a warm dip.
Variations to Try
The base recipe is delicious as written. These are optional ideas that go beyond the original recipe and have not been tested, so make changes one at a time.
- Garlic herb rolls. Mix a little minced garlic and dried herbs into the melted butter for brushing.
- Cheddar rolls. Fold a small handful of shredded cheese into the dough when shaping.
- Everything seasoning. Sprinkle everything bagel seasoning on top after brushing with butter.
- Sesame or poppy seeds. Sprinkle seeds on top before baking.
- Honey butter. Mix a little honey into the melted butter for brushing.
- Cinnamon sugar. Brush with butter and sprinkle with cinnamon sugar for a sweet version.
- Whole wheat blend. Replace part of the all-purpose flour with whole wheat flour. The rolls will be denser, and the dough may need slightly more liquid.
- Herb and parmesan. Add Italian seasoning and a little grated Parmesan.
Changes can affect the dough’s moisture and the baking time, so watch the dough and check for doneness.
Make-Ahead, Storage, and Freezing
At room temperature. Once completely cooled, store the rolls in an airtight container or a zip-top bag for about 2 to 3 days. Because they contain milk and egg, do not leave them out for long periods in a very warm kitchen.
In the refrigerator. Refrigeration can dry out bread, so it is usually best avoided unless you need to store them longer in a warm, humid climate.
In the freezer. Cool the rolls completely, then freeze them in an airtight freezer bag for up to about 3 months. Thaw at room temperature, then warm them in the oven.
Reheating. Wrap the rolls in foil and warm them in a 300 to 350°F (150 to 175°C) oven for about 10 minutes, until warm and soft. A short time in the microwave also works, though it softens the crust. Brush with a little more melted butter for freshness.
Make-ahead idea. To spread out the work, you may be able to shape the rolls, cover the dish, and refrigerate it overnight, then bring it to room temperature before baking. This is not part of the original recipe and has not been tested here, so watch the dough closely and allow extra time for the rolls to puff.
Freezing the dough. This recipe has not been tested with frozen unbaked dough, so freezing the baked rolls is the more reliable option.
Are Dinner Rolls Healthy?
These are enriched, buttery rolls meant to be enjoyed as part of a meal. They are made from simple ingredients and contain no preservatives. They are a source of carbohydrates, and the milk and egg add some protein.
Nutritional values depend on your ingredients and the size of your rolls. If you track nutrition closely, calculate the values using your own products. If you have a medical condition or specific dietary needs, check with a healthcare professional about how these rolls fit into your meals.
Allergen and Dietary Notes
These rolls contain wheat and gluten, milk, butter, and egg. They are not gluten-free, dairy-free, or egg-free as written. Substitutions for milk, butter, or egg would change the texture and have not been tested with this recipe.
Frequently Asked Questions
Do I really not need to knead the dough?
Correct. The dough is stirred until combined, then given time to rise. The rest period allows the gluten to develop on its own.
Why is the dough sticky?
A soft, sticky dough produces soft, tender rolls. Use lightly floured hands when shaping, and avoid adding a lot of extra flour.
Can I use active dry yeast?
Often yes, in the same amount, though it may rise a little more slowly. The recipe calls for instant yeast. This swap is not part of the original recipe.
What temperature should the milk be?
Warm, about 100 to 110°F (38 to 43°C). Hot milk can kill the yeast.
Can I use non-dairy milk?
It may work, but the flavor and texture will change, and this recipe has not been tested with non-dairy milk.
Can I use salted butter?
You can, but reduce the added salt slightly, since salted butter varies by brand. Unsalted butter lets you control the saltiness.
What size baking dish do I need?
The recipe uses a 9-by-13-inch baking dish for 12 rolls.
How do I know when the rolls are done?
The tops should be golden brown, and the centers should be fully baked. An instant-read thermometer should read about 190°F (88°C) in the center of a roll.
Can I make the dough ahead?
Refrigerating shaped rolls overnight may work, but this is not part of the original recipe and has not been tested here. The safest make-ahead option is to bake the rolls and freeze them.
Can I freeze the rolls?
Yes. Cool them completely, freeze in an airtight bag, and reheat in a warm oven.
Why are my rolls dense?
Common causes are old yeast, too much flour, underproofing, or hot milk that harmed the yeast. Check your yeast, measure the flour by weight, and let the dough double.
Can I double the recipe?
Yes, using a large bowl and two baking dishes, but watch the rise times and baking times, since they may change.
Can I make these into a loaf?
The dough could probably be baked in a loaf pan, but the shape and baking time would change, and this has not been tested with this recipe.
Why do I brush with butter right after baking?
The hot rolls absorb the butter, which makes the tops soft, glossy, and flavorful.
Final Thoughts
These Soft & Buttery No-Knead Dinner Rolls prove that you do not need a mixer, kneading, or advanced skills to bake a pan of tender, golden rolls. With milk, butter, an egg, yeast, flour, and a little patience, you get pillowy rolls with a rich, buttery flavor, ready to go with just about any meal.
The method is simple: whisk the wet ingredients, stir in the flour and salt, let the dough rise, shape it into 12 rolls, let them puff up, bake, and brush with butter. A few small habits make a big difference, such as using warm but not hot milk, resisting the urge to add extra flour, letting the dough double, and not overbaking.
Serve them warm alongside a family dinner, a holiday feast, or a big bowl of soup, with a little extra butter or honey, and enjoy their soft, fluffy centers. 🧈🍞✨
Print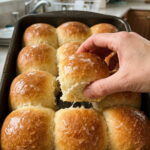
Soft & Buttery No-Knead Dinner Rolls
Ingredients
- 3½ cups all-purpose flour (420 g)
- 1 cup warm milk (240 ml)
- 2¼ teaspoons instant yeast (7 g)
- ¼ cup unsalted butter, melted (57 g)
- 2 tablespoons granulated sugar (25 g)
- 1 large egg
- 1 teaspoon salt (6 g)
- 2 tablespoons melted butter, for brushing
Instructions
In a large bowl, whisk together the warm milk, instant yeast, sugar, melted butter, and egg until combined. If your butter is very hot, let it cool for a few minutes first. The mixture should be warm to the touch, but not hot.
Add the flour and salt. Stir with a wooden spoon or spatula until a soft, sticky dough forms. No kneading is necessary. Stir just until there are no dry streaks of flour. The dough will be soft, shaggy, and sticky, and that is exactly right.
Cover the bowl and place it in a warm spot for 60 to 90 minutes, or until the dough has doubled in size. A warm spot could be a turned-off oven with the light on, a spot near a warm (not hot) appliance, or simply a warm corner of your kitchen. The dough is ready when it looks puffy, airy, and has roughly doubled. In a cool kitchen, it may take longer.
Lightly grease a 9-by-13-inch baking dish with butter. The rolls bake up soft and tender with golden bottoms when the dish is well greased.
Lightly flour your hands and divide the dough into 12 equal portions. A kitchen scale makes this easy, as each portion should weigh about the same. Shape each portion into a ball by gently tucking the edges underneath, and arrange the rolls in the prepared baking dish, leaving a little space between them. Because the dough is sticky, use just enough flour to keep it from clinging to your hands, rather than adding a lot of extra flour.
Cover loosely and let the rolls rise for another 30 to 45 minutes, until puffy and touching one another. They should look pillowy and fill the pan.
Heat the oven to 350°F (175°C). It is a good idea to start preheating toward the end of the second rise.
Bake for 20 to 25 minutes, until the tops are golden brown and the centers are fully baked. To be sure the centers are done, you can use an instant-read thermometer, which should read about 190°F (88°C) in the middle of a roll in the center of the pan. If the tops brown too quickly, loosely cover the pan with foil.
Remove the rolls from the oven and immediately brush the tops generously with melted butter. Do this while the rolls are hot, so the butter soaks in slightly and leaves a soft, glossy finish.
Allow the rolls to cool for a few minutes before serving. Pull them apart and enjoy their soft, fluffy centers.