The Crunchiest Spicy Pickled Garlic You’ll Ever Make
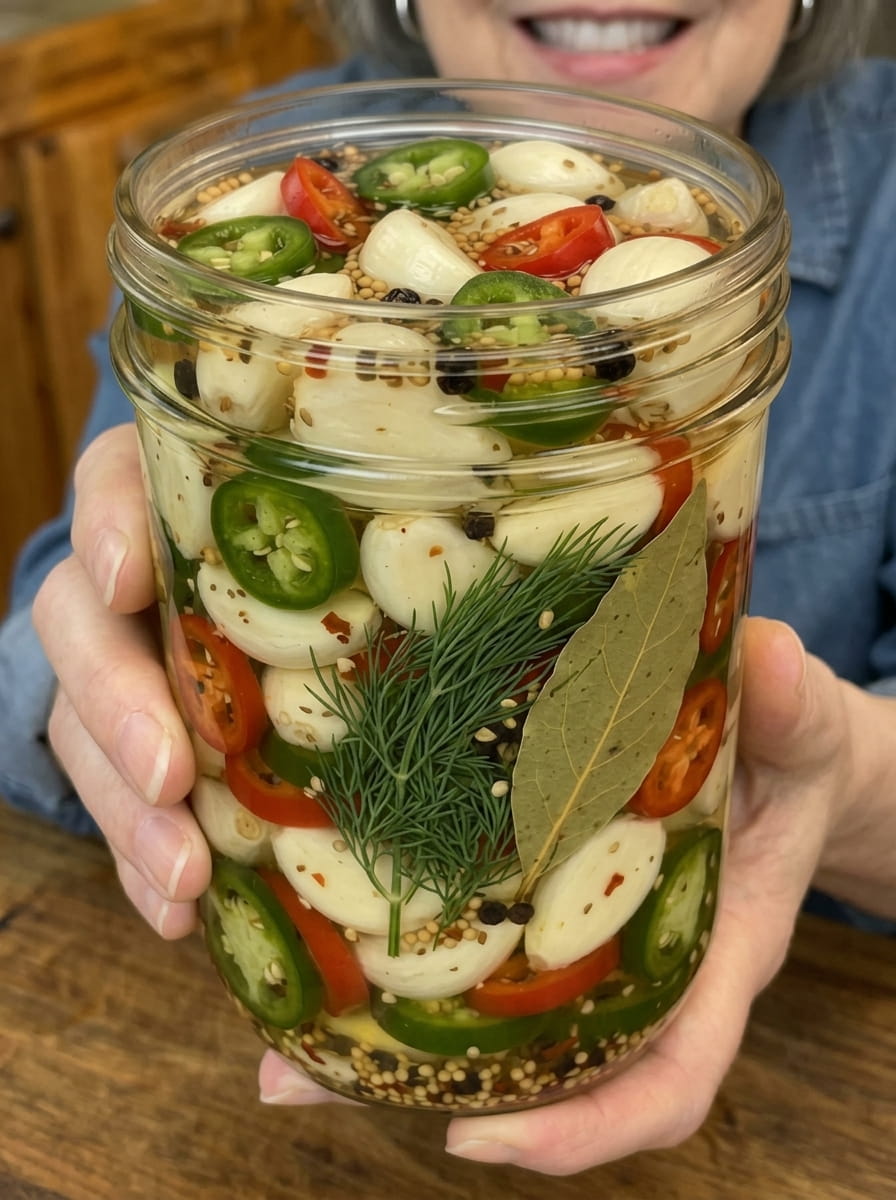
If you’re a garlic lover who also happens to crave a little heat, this Spicy Pickled Garlic is about to become your new obsession. Crunchy, tangy, garlicky, and seriously spicy, every clove delivers a satisfying snap along with a bold punch of flavor. Whole garlic cloves soak up a zesty vinegar brine infused with fresh jalapeño, red pepper flakes, mustard seeds, and aromatic spices, creating an addictive refrigerator snack that’s just as good straight from the jar as it is piled onto a sandwich or burger.
Whether you’re already a fan of pickled garlic and looking for a spicier version, or you’ve never tried it before and are curious what all the fuss is about, this recipe is simple to make and endlessly rewarding. Below, you’ll find a complete ingredient breakdown, detailed step-by-step instructions, expert tips for the best crunch and heat, storage guidance, serving suggestions, and answers to the most frequently asked questions about making spicy pickled garlic at home.
Why You’ll Love This Spicy Pickled Garlic
There are plenty of reasons this fiery, crunchy pickle has developed such a devoted following, and once you try it, you’ll understand exactly why.
The crunch is unbeatable. Because the garlic cloves go into the jar completely raw rather than being cooked first, they retain an incredibly satisfying, crisp snap that makes them wonderfully addictive to eat straight from the jar.
The heat builds with every bite. Between the fresh jalapeño, red pepper flakes, and the natural sharpness of raw garlic mellowing into something tangier and spicier as it pickles, this recipe delivers a genuine kick that spice lovers will appreciate.
It mellows garlic’s harsh bite while amping up the flavor. Raw garlic can be overpoweringly sharp and pungent, but once pickled, that harshness softens into something tangy, savory, and far more snackable, all while retaining that unmistakable garlicky punch.
It’s incredibly easy to make. With no cooking of the garlic itself required and just a quick warm-through of the brine, this recipe comes together with minimal hands-on time and no special canning equipment.
It’s endlessly versatile. This isn’t a one-use condiment. Spicy pickled garlic works beautifully on charcuterie boards, sandwiches, burgers, salads, and tacos, or simply enjoyed straight from the jar as a bold, crunchy snack.
It keeps well in the fridge. Once made, this pickle stays fresh and flavorful for weeks, making it a great make-ahead project for meal prep, snacking, or gifting to fellow garlic and spice lovers.
It’s a great way to use up extra garlic. If you find yourself with more garlic on hand than you know what to do with, pickling it is a fantastic way to extend its shelf life while creating something genuinely delicious.
Why Pickle Garlic Whole?
Unlike many pickled garlic recipes that involve briefly simmering the cloves in the brine, this recipe uses the raw-pack method, meaning the whole peeled garlic cloves go directly into the jar without any precooking. This approach preserves the garlic’s naturally crisp, crunchy texture, resulting in a pickle with real bite rather than a softer, more mellow texture. As the cloves sit in the tangy, spicy brine, they gradually mellow in flavor while absorbing the heat from the jalapeño and red pepper flakes, striking a perfect balance between crunchy texture and bold, developed flavor.
This method also means the recipe comes together especially quickly, with no need to heat a large pot of brine to a full simmer with the garlic inside. Instead, the brine is simply warmed through and poured directly over the raw garlic cloves.
Ingredients You’ll Need
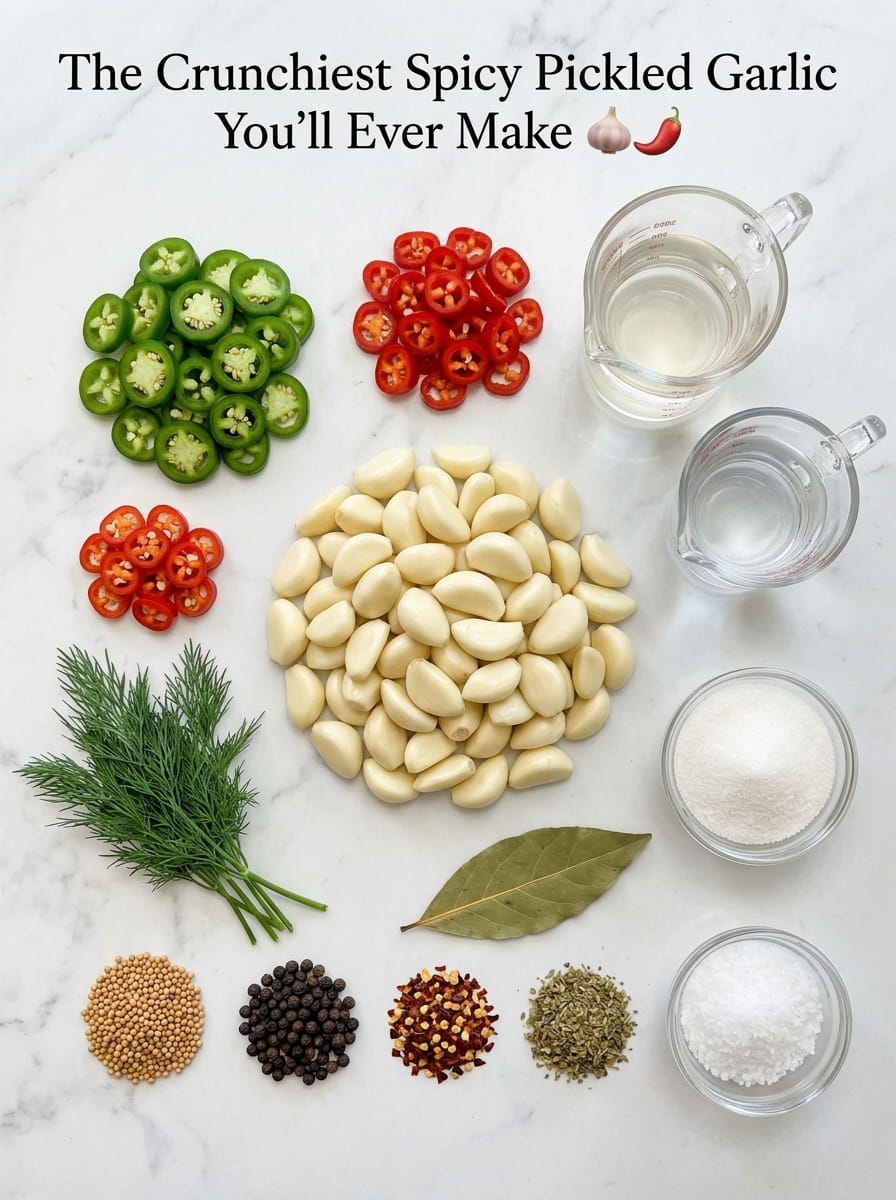
This recipe is broken into two simple components: the garlic and aromatics, and the tangy, spiced brine.
For the Garlic
2 cups peeled whole garlic cloves — Using pre-peeled garlic cloves from the store can save significant prep time, though freshly peeled cloves work wonderfully too. Look for firm, fresh cloves without any soft spots or sprouting.
1 fresh jalapeño, thinly sliced — Fresh jalapeño brings real, building heat and a fresh, slightly grassy spice that layers beautifully with the red pepper flakes.
3 sprigs fresh dill — Fresh dill adds a bright, aromatic, herby note that pairs perfectly with the garlic and spicy elements, echoing the flavor of a classic dill pickle.
1 teaspoon mustard seeds — Mustard seeds are a pickling staple, contributing subtle tang and a bit of texture to the jar.
1/2 teaspoon black peppercorns — Whole peppercorns add warm, slightly floral heat to the brine.
1/2 teaspoon red pepper flakes — Red pepper flakes reinforce the heat from the fresh jalapeño, adding a steady, lingering spice throughout the jar.
1/2 teaspoon dried oregano — Oregano adds a warm, earthy herbal note that rounds out the overall flavor.
1 bay leaf — A bay leaf contributes a subtle herbal aroma that infuses into the brine as the garlic pickles.
For the Brine
1 cup white vinegar — White vinegar provides the sharp, clean acidity that’s essential to a great pickle.
1/2 cup water — Water dilutes the vinegar slightly, softening the acidity so the other flavors can shine through.
2 tablespoons granulated sugar — A touch of sugar balances out the sharp vinegar, rounding out the overall flavor of the brine.
1 1/2 teaspoons kosher salt — Salt is essential for both flavor and the pickling process, helping season the garlic all the way through.
How to Make Spicy Pickled Garlic (Step-by-Step)
This recipe is refreshingly simple and comes together with very little hands-on time, since the garlic goes into the jar completely raw. Here’s exactly how to make it from start to finish.
Step 1: Pack the Jar
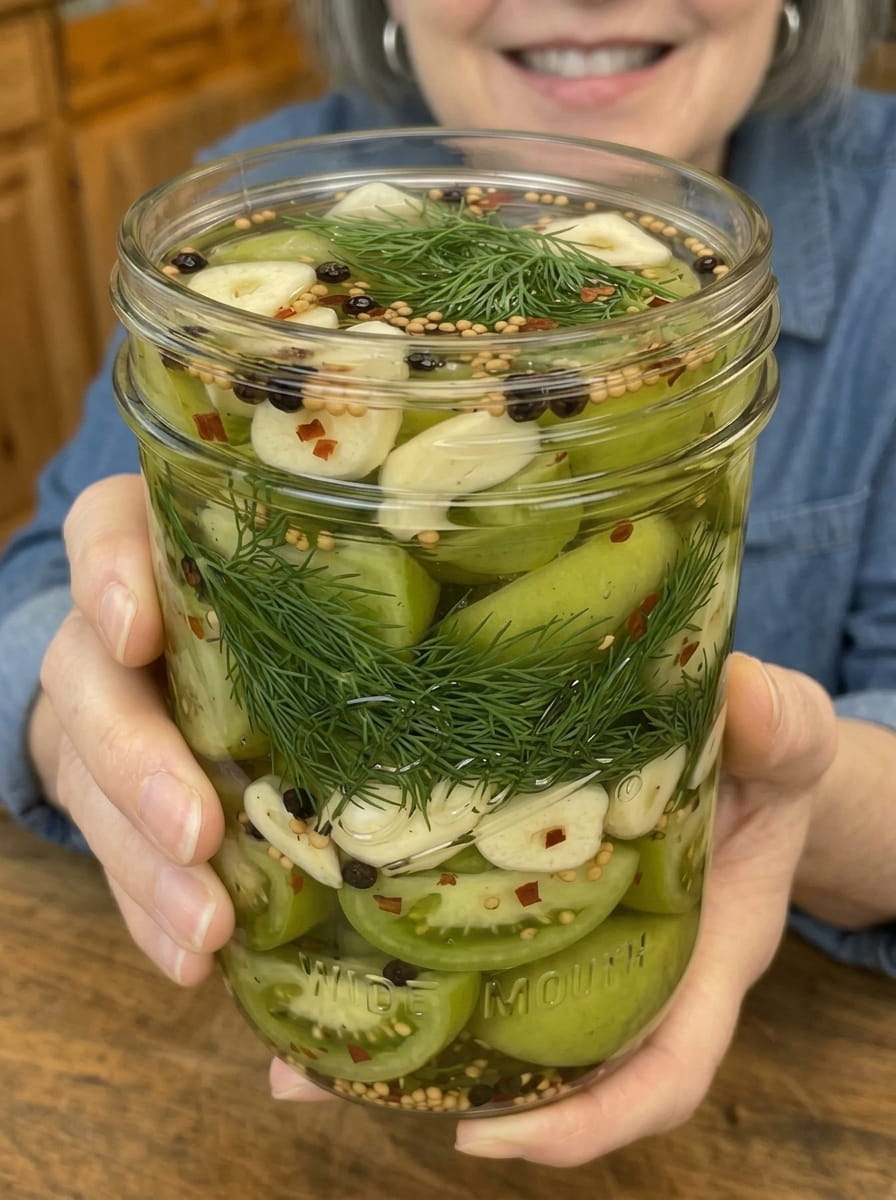
Pack the peeled whole garlic cloves into a clean glass jar, tucking in the sliced jalapeño, fresh dill sprigs, mustard seeds, black peppercorns, red pepper flakes, oregano, and bay leaf as you go. Distributing the aromatics evenly throughout the jar ensures every clove gets plenty of flavor contact.
Step 2: Build the Brine
In a small saucepan, combine the white vinegar, water, sugar, and kosher salt. This straightforward combination of acid, sugar, and salt forms the base of a well-balanced pickling brine.
Step 3: Warm the Brine
Place the saucepan over medium heat and warm the mixture, stirring until the sugar and salt have completely dissolved. It’s important not to bring this brine to a hard boil; a gentle warm-through is all that’s needed to dissolve the sugar and salt without altering the brine’s flavor.
Step 4: Pour the Brine Over the Garlic
Carefully pour the warm brine over the garlic cloves in the jar, making sure every single clove is completely submerged in liquid. Any cloves poking above the brine line are more likely to discolor or spoil, so top off with a little extra brine if needed.
Step 5: Cool Uncovered
Let the jar cool uncovered on the counter until it reaches room temperature. Allowing the jar to cool fully before sealing helps prevent excess condensation from building up inside once closed.
Step 6: Cover and Refrigerate
Once cooled, cover the jar tightly with a lid and transfer it to the refrigerator. Let the garlic pickle for at least 24 hours, which allows the brine to begin flavoring the cloves throughout.
Step 7: Let the Flavor Develop
For the best flavor, allow the garlic to pickle for 2 to 3 days before serving. The longer it sits in the refrigerator, the more the tangy, spicy, garlicky flavor develops and mellows into something truly addictive.
Step 8: Serve and Enjoy
Once ready, keep the jar refrigerated and enjoy the crunchy, spicy pickled garlic on sandwiches, burgers, tacos, salads, charcuterie boards, or straight from the jar.
Tips for the Best Spicy Pickled Garlic
Use fresh, firm garlic cloves. Avoid cloves that are soft, shriveled, or have started to sprout green shoots in the center, as these can be bitter and won’t pickle as nicely.
Don’t skip the cooling step. Letting the jar cool uncovered before sealing helps prevent excess condensation from building up inside, which can affect the texture and freshness of the finished pickle.
Adjust the heat to your taste. For an even spicier version, leave the jalapeño seeds in, add a second jalapeño, or increase the red pepper flakes. For a milder version, remove the jalapeño seeds and ribs before slicing.
Make sure every clove stays submerged. Any garlic poking above the brine line is more prone to spoilage or discoloration. Press the cloves down gently or top off with extra brine as needed.
Be patient for the best flavor and crunch. While the garlic is technically ready to eat after 24 hours, letting it sit for 2 to 3 days, or even up to a week, allows the tangy, spicy brine to fully penetrate each clove while still preserving that satisfying crunch.
Sterilize your jars first. Starting with a clean, sterilized glass jar helps the pickled garlic stay fresh longer and reduces the risk of contamination.
Don’t be alarmed if the garlic turns slightly blue-green. This is a harmless, natural chemical reaction that can occur when garlic is exposed to an acidic environment, particularly with young or immature garlic. It’s completely safe to eat.
How to Store Spicy Pickled Garlic
This is a refrigerator pickle, not a shelf-stable canned product, which means it must be stored in the refrigerator at all times rather than on the counter or in the pantry. Properly stored in a sealed jar with the garlic fully submerged in brine, this spicy pickled garlic will typically keep well in the refrigerator for up to 2 to 3 months. Always use a clean utensil when removing cloves from the jar to avoid introducing bacteria that could shorten its shelf life, and watch for any signs of spoilage, such as an off smell, mold, or unusual discoloration, before eating.
Ways to Use Spicy Pickled Garlic
Part of what makes this recipe so rewarding is discovering all the different ways to enjoy these crunchy, spicy cloves. Here are some of the best serving ideas.
Straight from the jar — The simplest and most classic way to enjoy this pickled garlic is chilled, straight out of the jar, as a bold, crunchy, spicy snack.
Charcuterie boards — Add a small bowl of spicy pickled garlic to any charcuterie or grazing board for a punchy, crunchy contrast to cured meats and cheeses.
Sandwiches — Slice or chop the cloves and layer them onto sandwiches for a spicy, garlicky bite that beats a regular pickle.
Burgers — Add a few sliced cloves to a burger for a bold, spicy, garlicky upgrade to your favorite toppings.
Tacos — Chop the pickled garlic and scatter it over tacos for a spicy, tangy punch that cuts through rich, savory fillings.
Salads — Slice pickled garlic thinly and toss it into green salads, grain salads, or pasta salads for an extra dimension of bold flavor.
Mixed into dressings and sauces — Mince a few cloves and whisk them into vinaigrettes, aioli, or hot sauce for an instant flavor boost.
Bloody Mary garnish — A clove or two of spicy pickled garlic makes a fun, bold garnish for a Bloody Mary.
Frequently Asked Questions
Can I use jarred, pre-peeled garlic for this recipe? Yes. Pre-peeled garlic cloves from the store work perfectly and save a significant amount of prep time. Just make sure the cloves are fresh and firm.
Is this pickled garlic shelf-stable, or does it need refrigeration? This is a refrigerator pickle, not a canned, shelf-stable product. It must be kept refrigerated at all times and doesn’t go through a full water bath canning process.
How spicy is this recipe? This recipe delivers a genuine, building heat from the combination of fresh jalapeño and red pepper flakes. For a spicier version, leave the jalapeño seeds in or add a second jalapeño. For a milder version, remove the jalapeño seeds and ribs before slicing.
Why does the garlic turn a blue-green color sometimes? This is a harmless, natural chemical reaction that can occur when garlic is exposed to an acidic environment, particularly if the garlic is young or slightly immature. It’s completely safe to eat and doesn’t affect the flavor.
Do I need to cook the garlic before pickling it? No, this recipe uses the raw-pack method, meaning the garlic cloves go directly into the jar without being cooked first, which preserves their signature crisp, crunchy texture.
How long does the garlic need to sit before it’s ready to eat? At minimum, let the jar rest in the refrigerator for 24 hours before eating. For the best, most developed flavor, wait 2 to 3 days, or up to a week.
Can I substitute the fresh jalapeño? Yes. Serrano peppers will add more heat than jalapeños, while a milder pepper like a banana pepper can be used for a gentler version.
Do I need special canning jars for this recipe? No. A standard clean glass jar with a tight-fitting lid, such as a mason jar, works perfectly well since this recipe doesn’t require pressure canning or water bath processing.
How long does this pickled garlic stay fresh in the refrigerator? Properly stored in an airtight, sealed jar, this spicy pickled garlic will generally stay fresh for up to 2 to 3 months in the refrigerator.
Final Thoughts
This Spicy Pickled Garlic proves that a handful of pantry staples and a little bit of patience can produce something truly addictive. The combination of crunchy raw garlic, tangy vinegar, fresh jalapeño heat, and warm aromatic spices transforms ordinary garlic cloves into a bold, fiery condiment that’s impossible to stop snacking on. Whether you’re piling it onto a sandwich, adding it to a charcuterie board, or simply enjoying a clove or two straight from the jar, this homemade spicy pickled garlic is guaranteed to become a staple in your refrigerator, and probably a conversation starter with anyone brave enough to try it.
Print
The Crunchiest Spicy Pickled Garlic You’ll Ever Make
Ingredients
This recipe is broken into two simple components: the garlic and aromatics, and the tangy, spiced brine.
For the Garlic
2 cups peeled whole garlic cloves — Using pre-peeled garlic cloves from the store can save significant prep time, though freshly peeled cloves work wonderfully too. Look for firm, fresh cloves without any soft spots or sprouting.
1 fresh jalapeño, thinly sliced — Fresh jalapeño brings real, building heat and a fresh, slightly grassy spice that layers beautifully with the red pepper flakes.
3 sprigs fresh dill — Fresh dill adds a bright, aromatic, herby note that pairs perfectly with the garlic and spicy elements, echoing the flavor of a classic dill pickle.
1 teaspoon mustard seeds — Mustard seeds are a pickling staple, contributing subtle tang and a bit of texture to the jar.
1/2 teaspoon black peppercorns — Whole peppercorns add warm, slightly floral heat to the brine.
1/2 teaspoon red pepper flakes — Red pepper flakes reinforce the heat from the fresh jalapeño, adding a steady, lingering spice throughout the jar.
1/2 teaspoon dried oregano — Oregano adds a warm, earthy herbal note that rounds out the overall flavor.
1 bay leaf — A bay leaf contributes a subtle herbal aroma that infuses into the brine as the garlic pickles.
For the Brine
1 cup white vinegar — White vinegar provides the sharp, clean acidity that’s essential to a great pickle.
1/2 cup water — Water dilutes the vinegar slightly, softening the acidity so the other flavors can shine through.
2 tablespoons granulated sugar — A touch of sugar balances out the sharp vinegar, rounding out the overall flavor of the brine.
1 1/2 teaspoons kosher salt — Salt is essential for both flavor and the pickling process, helping season the garlic all the way through.
Instructions
This recipe is refreshingly simple and comes together with very little hands-on time, since the garlic goes into the jar completely raw. Here’s exactly how to make it from start to finish.
Pack the peeled whole garlic cloves into a clean glass jar, tucking in the sliced jalapeño, fresh dill sprigs, mustard seeds, black peppercorns, red pepper flakes, oregano, and bay leaf as you go. Distributing the aromatics evenly throughout the jar ensures every clove gets plenty of flavor contact.
In a small saucepan, combine the white vinegar, water, sugar, and kosher salt. This straightforward combination of acid, sugar, and salt forms the base of a well-balanced pickling brine.
Place the saucepan over medium heat and warm the mixture, stirring until the sugar and salt have completely dissolved. It’s important not to bring this brine to a hard boil; a gentle warm-through is all that’s needed to dissolve the sugar and salt without altering the brine’s flavor.
Carefully pour the warm brine over the garlic cloves in the jar, making sure every single clove is completely submerged in liquid. Any cloves poking above the brine line are more likely to discolor or spoil, so top off with a little extra brine if needed.
Let the jar cool uncovered on the counter until it reaches room temperature. Allowing the jar to cool fully before sealing helps prevent excess condensation from building up inside once closed.
Once cooled, cover the jar tightly with a lid and transfer it to the refrigerator. Let the garlic pickle for at least 24 hours, which allows the brine to begin flavoring the cloves throughout.
For the best flavor, allow the garlic to pickle for 2 to 3 days before serving. The longer it sits in the refrigerator, the more the tangy, spicy, garlicky flavor develops and mellows into something truly addictive.
Once ready, keep the jar refrigerated and enjoy the crunchy, spicy pickled garlic on sandwiches, burgers, tacos, salads, charcuterie boards, or straight from the jar.