

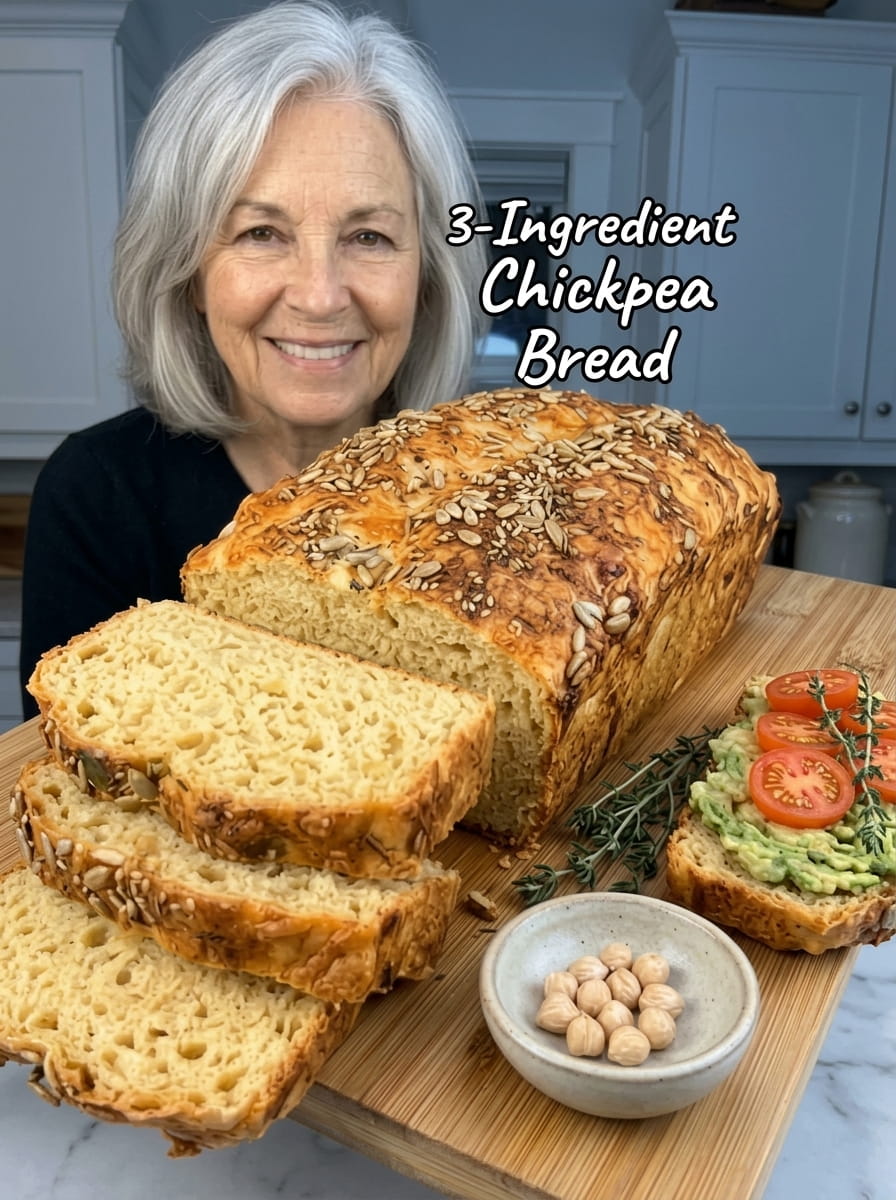
3-Ingredient High-Protein Chickpea Bread: The Easy, No-Yeast Recipe You Need to Try
If you’ve ever wanted homemade bread without the hassle of yeast, kneading, or long rise times, this 3-Ingredient High-Protein Chickpea Bread is about to change the way you think about baking. Made with just chickpeas, eggs, and baking powder, this simple recipe transforms pantry staples into a soft, hearty loaf that’s naturally packed with protein — no flour, yeast, or complicated technique required.
Whether you’re looking for a healthier bread alternative, a gluten-free option, or simply an easy way to boost your protein intake, this recipe delivers a satisfying, versatile loaf that works beautifully for toast, sandwiches, or serving warm with butter. Below, you’ll find a complete breakdown of this recipe, including ingredient details, step-by-step instructions, expert tips, variations, storage guidance, and answers to frequently asked questions.
Why This 3-Ingredient Chickpea Bread Is Worth Making
Simple, minimal-ingredient recipes don’t always deliver on flavor and texture, but this chickpea bread is a genuine exception. Here’s what makes it stand out:
- Just three ingredients. With only chickpeas, eggs, and baking powder, this recipe is about as simple as homemade bread gets.
- No yeast, kneading, or rising required. This bread skips all the traditional steps that make bread-baking intimidating, relying on baking powder for lift instead.
- Naturally high in protein. Thanks to the chickpeas and eggs, this bread offers significantly more protein than traditional wheat-based bread.
- Naturally gluten-free. Since there’s no flour involved, this bread is a great option for those avoiding gluten.
- Quick and beginner-friendly. With minimal prep and a straightforward baking process, this is an approachable recipe even for those new to baking.
- Incredibly versatile. This bread works beautifully for both sweet and savory toppings, making it a flexible addition to your weekly routine.
If you’re looking for a simple way to add more protein to your diet without sacrificing the comfort of warm, homemade bread, this recipe is exactly what you need.
Understanding the Key Ingredients
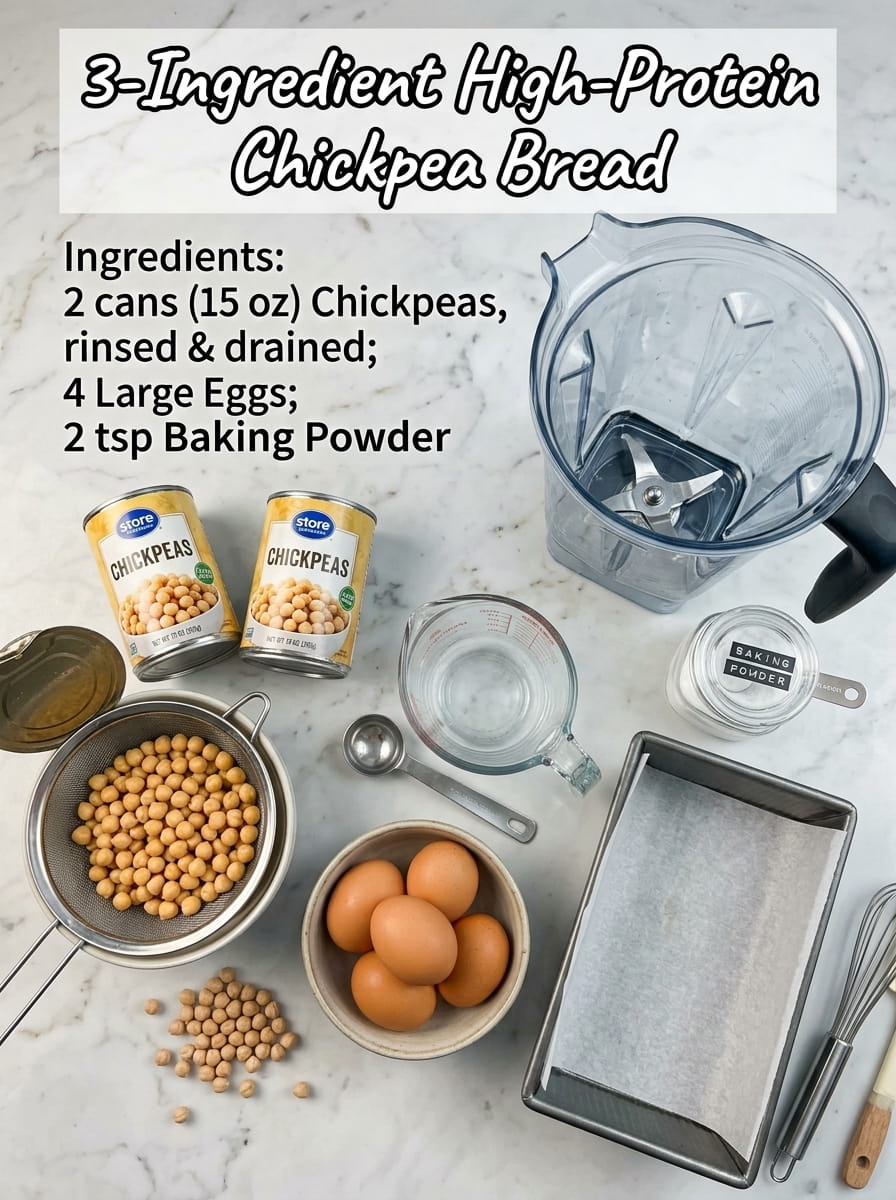
Let’s take a closer look at what goes into this recipe and why each ingredient plays an important role.
The Ingredients
- 2 cans chickpeas, 15 oz each, drained and rinsed – The foundation of this bread, chickpeas provide structure, natural density, and a substantial protein boost. Draining and rinsing them thoroughly helps remove excess starch and any canning liquid that could affect the texture of the final loaf.
- 4 large eggs – Eggs act as the primary binder in this recipe, replacing the role that gluten typically plays in traditional bread. They also contribute additional protein and help the loaf rise and set properly during baking.
- 2 tsp baking powder – Since this recipe skips yeast entirely, baking powder provides the lift needed to create a lighter, more bread-like texture rather than a dense, flat loaf.
Step-by-Step Instructions
Step 1: Preheat the Oven and Prepare the Pan
Preheat the oven to 350°F. Line a standard loaf pan with parchment paper or lightly grease it, ensuring the bread will release easily once baked.
Step 2: Blend the Ingredients
Add the drained chickpeas, eggs, and baking powder to a high-speed blender or food processor.
Step 3: Blend Until Smooth
Blend until completely smooth and creamy, scraping down the sides as needed to ensure everything is fully incorporated with no chunks of chickpea remaining.
Step 4: Pour the Batter
Pour the batter into the prepared loaf pan and smooth the top with a spatula.
Step 5: Bake
Bake for 35–45 minutes, or until the loaf is firm and a toothpick inserted in the center comes out clean.
Step 6: Cool
Let the bread cool in the pan for 10–15 minutes, then transfer it to a wire rack and cool completely before slicing.
Step 7: Slice and Serve
Slice and serve with butter, avocado, eggs, hummus, or your favorite toppings.
Tips for the Best Chickpea Bread
A few small techniques can make a noticeable difference in the final result:
- Drain and rinse the chickpeas thoroughly. Excess liquid or starch from the can can affect the texture of the batter, so take the time to rinse the chickpeas well before blending.
- Use a high-speed blender or food processor. A powerful blender ensures the chickpeas break down completely, resulting in a smooth, uniform batter rather than a grainy or chunky texture.
- Scrape down the sides as needed. Chickpeas can be dense, so pausing to scrape the sides of the blender helps ensure everything blends evenly.
- Don’t skip the cooling time. Allowing the bread to cool fully before slicing helps it set properly and makes for cleaner, more even slices.
- Check for doneness with a toothpick. Since this bread doesn’t behave exactly like traditional wheat bread, using the toothpick test is the most reliable way to know it’s fully baked.
- Store properly to maintain freshness. Because this bread lacks preservatives and has a different moisture content than traditional bread, proper storage is especially important.
Health Benefits of Chickpea Bread
Beyond its simplicity, this bread offers several nutritional advantages worth highlighting.
High in Protein
With both chickpeas and eggs contributing protein, this bread offers a substantially higher protein content than most traditional wheat-based bread, making it a great option for anyone looking to boost their protein intake throughout the day.
Naturally Gluten-Free
Since this recipe contains no flour, it’s naturally suitable for those following a gluten-free diet, without requiring any specialty gluten-free flour blends.
A Good Source of Fiber
Chickpeas are naturally rich in dietary fiber, which can contribute to feelings of fullness and support healthy digestion.
Fewer Processed Ingredients
With just three whole-food ingredients, this bread avoids the preservatives, added sugars, and processed additives often found in store-bought bread.
Ingredient Substitutions and Variations
While this recipe is intentionally simple, there are a few ways to adapt it based on your preferences:
- Add herbs or spices. Garlic powder, dried rosemary, or Italian seasoning can be blended into the batter for a savory, herbed version of this bread.
- Add a touch of salt. While not included in the original recipe, a small pinch of salt can help enhance the overall flavor of the bread.
- Make it seeded. Sprinkling sesame seeds, poppy seeds, or sunflower seeds on top of the batter before baking adds texture and visual appeal.
- Try different canned beans. While chickpeas are traditional for this recipe, white beans can sometimes be used as a substitute, though the flavor and texture will vary slightly.
- Add a touch of sweetness. For a slightly sweeter loaf, a small amount of honey or maple syrup can be blended into the batter, pairing well with toppings like nut butter or fruit preserves.
How to Serve Chickpea Bread
This bread’s mild, slightly nutty flavor makes it incredibly versatile for both sweet and savory toppings:
- Toasted with butter – A simple, classic way to enjoy this bread warm.
- Topped with avocado – A satisfying, protein-and-fiber-rich breakfast or snack option.
- With eggs – Perfect alongside scrambled or fried eggs for a high-protein breakfast.
- Spread with hummus – A natural pairing, since the bread itself is made from chickpeas.
- As a sandwich base – Use for a heartier, more filling sandwich than traditional bread.
- With nut butter and fruit – A satisfying, slightly sweet option for breakfast or a snack.
How to Store Chickpea Bread
Because this bread has a different composition than traditional wheat bread, proper storage helps maintain its texture and freshness.
Refrigerating
Store the bread in an airtight container in the refrigerator for up to 5 days, since the lack of preservatives means it won’t stay fresh at room temperature as long as store-bought bread.
Freezing
This bread freezes well, making it a great option for meal prep. Slice the loaf before freezing so you can remove individual pieces as needed. Store in a freezer-safe bag or container for up to 2 months, and toast slices directly from frozen for convenience.
Room Temperature
If storing at room temperature, keep the bread in an airtight container and plan to consume it within 1–2 days, as it doesn’t contain the preservatives found in most store-bought bread.
Frequently Asked Questions
Does this bread taste like chickpeas? The bread has a mild, slightly nutty flavor, but it doesn’t taste overwhelmingly like chickpeas or hummus. The eggs help balance and mellow the flavor, resulting in a fairly neutral base that pairs well with a variety of toppings.
Can I use dried chickpeas instead of canned? Canned chickpeas are recommended for convenience and consistency, as they’re already fully cooked and softened. If using dried chickpeas, they would need to be soaked and cooked until very tender before blending.
Why is my bread dense instead of light and fluffy? This bread naturally has a denser texture than traditional wheat bread, since it relies on baking powder rather than yeast for lift. If it’s excessively dense, double-check that your baking powder is fresh and active, as expired baking powder can significantly affect the rise.
Is this bread suitable for a gluten-free diet? Yes, this recipe is naturally gluten-free, as it contains no flour or wheat-based ingredients.
Can I add salt or other seasonings to the batter? Yes, while the original recipe keeps things simple, a pinch of salt or additional seasonings like garlic powder or herbs can be blended in to enhance the flavor.
How long does this bread stay fresh? Since this bread lacks preservatives, it’s best stored in the refrigerator for up to 5 days, or frozen for up to 2 months for longer storage.
Can I double this recipe to make a larger loaf? Doubling the recipe may require a larger loaf pan and a longer baking time. It’s recommended to monitor the bread closely and use the toothpick test to check for doneness, as baking times can vary based on pan size.
Is this bread high in protein compared to regular bread? Yes, thanks to the chickpeas and eggs, this bread offers a notably higher protein content than most traditional wheat-based bread, making it a popular choice for those looking to increase their protein intake.
Final Thoughts
This 3-Ingredient High-Protein Chickpea Bread proves that homemade bread doesn’t have to be complicated to be satisfying. With just chickpeas, eggs, and baking powder, you can create a soft, hearty loaf that’s naturally gluten-free, packed with protein, and endlessly versatile for both sweet and savory toppings. Best of all, there’s no yeast, kneading, or lengthy rise time standing between you and a warm, homemade loaf.
Whether you’re looking for a healthier bread alternative, a simple gluten-free option, or just an easy way to boost your protein intake, this chickpea bread is a recipe worth adding to your regular rotation — proof that sometimes, the simplest recipes are the most rewarding.
Print
3-Ingredient High-Protein Chickpea Bread
Ingredients
Let’s take a closer look at what goes into this recipe and why each ingredient plays an important role.
The Ingredients
- 2 cans chickpeas, 15 oz each, drained and rinsed – The foundation of this bread, chickpeas provide structure, natural density, and a substantial protein boost. Draining and rinsing them thoroughly helps remove excess starch and any canning liquid that could affect the texture of the final loaf.
- 4 large eggs – Eggs act as the primary binder in this recipe, replacing the role that gluten typically plays in traditional bread. They also contribute additional protein and help the loaf rise and set properly during baking.
- 2 tsp baking powder – Since this recipe skips yeast entirely, baking powder provides the lift needed to create a lighter, more bread-like texture rather than a dense, flat loaf.
Instructions
Preheat the oven to 350°F. Line a standard loaf pan with parchment paper or lightly grease it, ensuring the bread will release easily once baked.
Add the drained chickpeas, eggs, and baking powder to a high-speed blender or food processor.
Blend until completely smooth and creamy, scraping down the sides as needed to ensure everything is fully incorporated with no chunks of chickpea remaining.
Pour the batter into the prepared loaf pan and smooth the top with a spatula.
Bake for 35–45 minutes, or until the loaf is firm and a toothpick inserted in the center comes out clean.
Let the bread cool in the pan for 10–15 minutes, then transfer it to a wire rack and cool completely before slicing.
Slice and serve with butter, avocado, eggs, hummus, or your favorite toppings.






