


Easy 3-Ingredient Greek Yogurt Dinner Rolls: Soft, Fluffy, and No Yeast Needed
These Easy 3-Ingredient Greek Yogurt Dinner Rolls are soft, fluffy, and wonderfully simple to make. Made without yeast, kneading, or rising time, they are perfect for busy weeknights when you want fresh, homemade bread without the extra work. The Greek yogurt adds moisture and a subtle tang, while self-rising flour helps create tender rolls with lightly golden tops. Serve them warm with butter, alongside your favorite soup, or as a delicious addition to any family dinner.
Homemade bread has a reputation for being time-consuming, but these rolls prove it does not have to be. There is no proofing, no waiting for dough to double, and no kneading. You stir two ingredients together, shape the dough into six rolls, brush them with butter, and bake. From bowl to table, you can have warm rolls in about 30 minutes.
In this guide, you will find the full recipe, a step-by-step walkthrough, tips for the best texture, a simple substitute for self-rising flour, serving ideas, flavor variations, storage and freezing advice, troubleshooting help, and answers to frequently asked questions.
Why You’ll Love These Greek Yogurt Dinner Rolls
They only need three ingredients. Plain Greek yogurt, self-rising flour, and melted butter are all it takes. Most kitchens already have them on hand.
There is no yeast and no rising time. The leavening in the self-rising flour does all of the work, so you can skip the waiting and go straight to the oven.
They are ready in about 30 minutes. With only a few minutes of prep and less than 25 minutes in the oven, these rolls fit easily into a busy weeknight.
They are soft and tender. The Greek yogurt adds moisture and a subtle tang, which keeps the inside soft and gives the rolls a pleasant flavor.
They are beginner friendly. The dough comes together in one bowl with a spoon or spatula. There is no kneading technique to master.
They go with almost anything. Serve them with soup, salad, pasta, roasted chicken, or breakfast eggs, or split them for small sandwiches.
They are easy to customize. Brush them with garlic butter, sprinkle on herbs, or top them with cheese for a different flavor each time.
What Are Greek Yogurt Dinner Rolls?
Greek yogurt dough is a simple, quick-bread style dough made from just two main ingredients: Greek yogurt and self-rising flour. Self-rising flour already contains baking powder and salt, so when it is mixed with the acidic, moist yogurt, the dough rises in the oven without any yeast. The dough is shaped into balls and baked until golden, producing rolls with a soft interior and a lightly golden top.
These rolls are closer to a soft biscuit or a tender quick bread roll than a traditional yeasted dinner roll. The crumb is tender and slightly dense rather than airy and stretchy, and the flavor is mildly tangy. They are quick, comforting, and ideal when you want fresh bread in a hurry.
Ingredients for Greek Yogurt Dinner Rolls
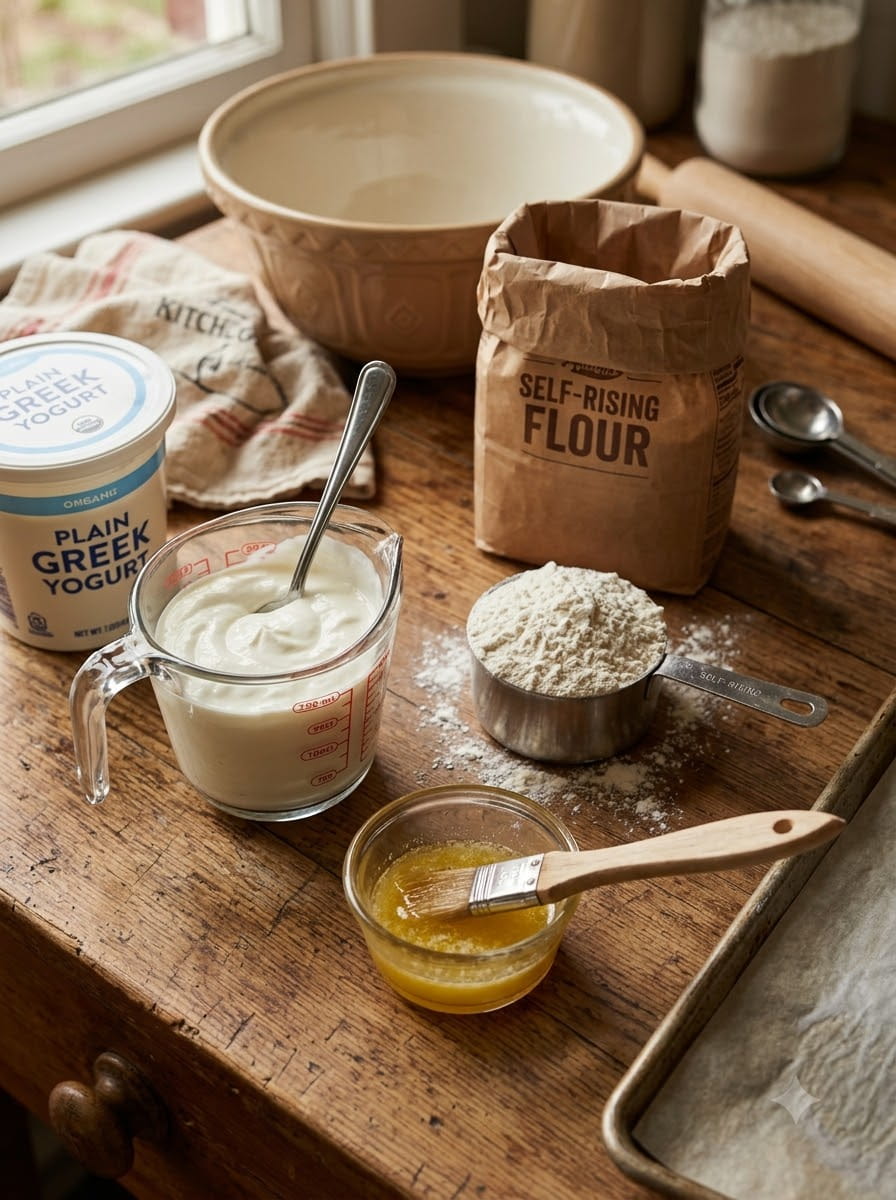
- 1 cup plain Greek yogurt
- 1 cup self-rising flour
- 1 tablespoon melted butter
You will also need parchment paper to line your baking sheet. A little extra flour for dusting your hands and work surface can also be helpful.
A Closer Look at the Ingredients
Plain Greek yogurt. Greek yogurt is thicker and richer than regular yogurt, which gives the dough the right consistency. Choose plain, unsweetened yogurt. Full-fat or low-fat yogurt both work, though full-fat usually gives a softer, richer roll. Avoid flavored or sweetened yogurts, which can change the taste and the texture.
Self-rising flour. Self-rising flour is all-purpose flour that has baking powder and salt already added. This is what makes the rolls rise without yeast. Make sure your self-rising flour is fresh, as the leavening loses strength over time.
Melted butter. Brushing the tops with melted butter adds flavor and helps the rolls turn lightly golden and soft on the outside. Salted or unsalted butter both work.
Can I Make My Own Self-Rising Flour?
Yes. If you do not have self-rising flour, you can make a simple substitute. For each 1 cup of self-rising flour, whisk together 1 cup of all-purpose flour, 1½ teaspoons of baking powder, and ¼ teaspoon of salt. Use this mixture in place of the self-rising flour in the recipe. Whisk the ingredients thoroughly so the baking powder is evenly distributed.
How to Make Greek Yogurt Dinner Rolls: Step-by-Step Instructions
Step 1: Preheat the Oven and Prepare the Baking Sheet
Preheat the oven to 375°F (190°C) and line a baking sheet with parchment paper. Parchment prevents sticking and makes cleanup easy.
Step 2: Mix the Dough
Mix the Greek yogurt and self-rising flour in a bowl until a soft dough forms. Stir with a spoon or spatula until no dry flour remains, then use your hands to gently bring the dough together. The dough should be soft and slightly sticky but manageable. If it feels too sticky to handle, dust your hands with a little extra flour. Avoid overworking the dough, since mixing too much can make the rolls tough.
Step 3: Divide and Shape the Rolls
Divide the dough into 6 equal portions and shape each into a ball. To shape, roll each portion gently between your palms, tucking the edges underneath to create a smooth top. Try to keep the portions the same size so they bake evenly.
Step 4: Arrange on the Baking Sheet
Place the dough balls on the prepared baking sheet, leaving space between them. The rolls will puff up as they bake, so give each one room to expand.
Step 5: Brush with Butter
Brush the tops with melted butter. This adds richness and helps the tops turn a lovely golden color.
Step 6: Bake
Bake for 18 to 22 minutes, or until lightly golden and cooked through. Ovens vary, so start checking at 18 minutes. The rolls should feel set and spring back slightly when pressed, and the bottoms should be lightly browned.
Step 7: Cool Slightly and Serve
Allow the rolls to cool slightly before serving warm. A few minutes on the pan lets the insides finish setting. Then serve them with butter, soup, or your favorite family meal.
Helpful Tips for the Best Dinner Rolls
Use thick Greek yogurt. The thickness of the yogurt matters. If your yogurt is very thin or watery, drain off any liquid on top or the dough may be too sticky.
Do not overmix. Mix only until the dough comes together. Overworking develops the flour too much and can make the rolls dense and tough.
Flour your hands lightly. The dough is a little sticky, so a light dusting of flour makes shaping easier. Use only as much as you need, since too much flour can make the rolls dry.
Shape evenly sized rolls. Divide the dough carefully, perhaps by weighing the dough or cutting it in half and then each half into thirds, so the rolls finish baking at the same time.
Check the center. Make sure the rolls are cooked through. They should look set, not pale or doughy, when you break one open.
Serve them warm. These rolls are at their best soon after baking, when the outside is lightly crisp and the inside is soft and tender.
Use fresh self-rising flour. Old flour may not rise well, which can lead to flat, dense rolls.
Troubleshooting Common Problems
The dough is too sticky. The consistency of Greek yogurt varies by brand. If the dough is too sticky to shape, add flour one tablespoon at a time until it is manageable. Keep in mind that the dough should still be soft.
The dough is too dry or crumbly. If the dough will not come together, your yogurt may be very thick or your flour measurement may be heavy. Add a teaspoon of yogurt or water at a time until the dough holds.
The rolls are dense. This is usually the result of overmixing, old self-rising flour, or too much added flour. Mix gently and use fresh flour for the best rise.
The rolls are doughy inside. They may need a few more minutes in the oven. Bake until golden and cooked through, and consider making slightly smaller rolls if your oven runs cool.
The rolls are pale on top. Make sure the tops are brushed with butter. You can also bake for a couple of extra minutes or move the pan to a higher rack for the last few minutes.
The rolls spread instead of rising. This can happen if the dough was too wet. Use thicker yogurt or add a little more flour next time.
Delicious Ways to Serve Greek Yogurt Dinner Rolls
With soup. These rolls are made for dipping into tomato soup, chicken noodle soup, vegetable soup, or a hearty stew.
With butter. A warm roll with a pat of butter is simple and satisfying.
With pasta or salad. Serve them next to a bowl of pasta, a green salad, or a casserole as a quick side.
As sandwich rolls. Split the rolls and fill them with sliced turkey, chicken salad, or roasted vegetables for small sandwiches.
With breakfast. Pair a warm roll with scrambled eggs, jam, or honey for a quick weekend breakfast.
At holiday meals. These rolls come together fast enough to bake while the main dish rests, making them a handy addition to family dinners.
As sliders. Fill them with pulled chicken, shredded beef, or a small burger patty for mini sandwiches.
Flavor Variations to Try
The plain version is delicious on its own, but it also makes a great base for flavors. Start with small additions so the dough keeps its soft texture.
- Garlic butter rolls. Mix a little minced garlic or garlic powder into the melted butter before brushing, and add a sprinkle of parsley.
- Herb rolls. Mix a teaspoon of dried herbs, such as rosemary, thyme, or Italian seasoning, into the dough.
- Cheese rolls. Fold a small handful of shredded cheese into the dough, or sprinkle it on top during the last few minutes of baking.
- Everything seasoning. Brush the tops with butter and sprinkle on everything bagel seasoning before baking.
- Sesame or poppy seeds. Add a sprinkle of seeds on top for a bakery-style finish.
- Sweet cinnamon rolls. Brush the tops with butter and sprinkle with cinnamon sugar for a quick, sweet version.
- Whole wheat style. Use a self-rising whole wheat flour blend if you can find one, which creates a heartier roll.
Keep in mind that mix-ins can change the moisture of the dough, so adjust slightly if needed.
How to Store Greek Yogurt Dinner Rolls
At room temperature. Let the rolls cool completely, then store them in an airtight container or a sealed bag for up to a day or two. They are best on the first day.
In the refrigerator. For longer storage, keep the rolls in an airtight container in the refrigerator. Refrigeration can firm up the texture, so reheat them before serving.
In the freezer. Freeze cooled rolls in a freezer-safe bag or container. Thaw at room temperature or in the refrigerator, then warm them in the oven.
Reheating. Wrap the rolls in foil and warm them in a 300°F (150°C) oven for about 10 minutes, or microwave them briefly with a damp paper towel for a soft texture.
Are These Dinner Rolls Healthy?
Greek yogurt adds protein and moisture to these rolls, and with only three ingredients, you know exactly what goes into each roll. Compared with many store-bought dinner rolls, which can contain extra sugar, preservatives, and additives, this recipe is short and simple.
Still, these are rolls made with flour and butter, and they are best enjoyed as part of a balanced meal. Nutritional values vary depending on the type of yogurt, flour, and butter you use, as well as the size of each roll. If you track nutrition closely, calculate it using your own products.
If you have food allergies, intolerances, or specific dietary needs, check the labels on your ingredients. The recipe contains dairy and wheat, and it is not suitable for anyone avoiding them.
Can I Make These Rolls Gluten-Free?
This recipe was developed with regular self-rising flour, which contains gluten. Gluten-free self-rising flour blends exist and may work, though the texture and the amount of yogurt needed can differ by brand, and this recipe has not been tested with them. If you try a gluten-free blend, check that the label is certified gluten-free and expect to adjust the dough slightly.
Frequently Asked Questions
Can I use regular yogurt instead of Greek yogurt?
Regular yogurt is thinner and contains more liquid, which will make the dough too wet and sticky. If you only have regular yogurt, strain it through a fine mesh sieve or cheesecloth for a while to thicken it, or add more flour gradually. Greek yogurt gives the best, most consistent results.
Can I use flavored yogurt?
It is best to use plain yogurt. Flavored yogurts contain sugar and other ingredients that can change the taste and texture of the rolls.
Do I have to use self-rising flour?
Self-rising flour is what makes the rolls rise without yeast. If you do not have it, you can make a homemade version by combining all-purpose flour, baking powder, and salt, as described above.
Can I use non-fat Greek yogurt?
Yes, non-fat Greek yogurt works, though the rolls may be slightly less rich and tender than those made with full-fat yogurt. Choose a thick brand and adjust the flour if the dough feels sticky.
Can I make the dough ahead of time?
This dough is best baked right away, because the leavening begins working as soon as the flour and yogurt are mixed. For the best rise, shape and bake the rolls soon after mixing.
Can I double the recipe?
Yes. You can double all the ingredients and divide the dough into 12 rolls. Use two baking sheets or bake in batches, and check for doneness, as the baking time may change slightly.
Why are my rolls tough?
Tough rolls are usually caused by overmixing or too much extra flour. Mix just until the dough comes together and use as little flour as possible when shaping.
How do I know when the rolls are done?
The rolls should be lightly golden on top and bottom, feel set when pressed, and be cooked through in the center. If you are unsure, break one open to check that the middle is no longer doughy.
Can I bake these rolls in a muffin tin?
Yes. A muffin tin helps the rolls rise upward and keeps their shape. Lightly grease the tin, place a ball of dough in each cup, and bake until golden, checking for doneness a little earlier.
Can I freeze the unbaked dough?
This recipe has not been tested with frozen dough, because the leavening begins to work once the dough is mixed. It is generally better to freeze the rolls after they are baked and cooled.
What can I serve with these rolls?
They pair well with soups, stews, salads, pasta dishes, roasted meats, and breakfast eggs. They are also great on their own with butter, honey, or jam.
Final Thoughts
These Easy 3-Ingredient Greek Yogurt Dinner Rolls show that fresh, homemade bread does not have to take hours. With just plain Greek yogurt, self-rising flour, and melted butter, you can bake soft, fluffy rolls with lightly golden tops in about 30 minutes.
The method is straightforward: preheat, mix, divide, shape, brush with butter, and bake. Once you are comfortable with the base recipe, you can add garlic, herbs, cheese, or seeds to make it your own. Serve the rolls warm with butter, alongside your favorite soup, or at any family dinner.
If you want fresh homemade bread on a busy weeknight without yeast, kneading, or rising time, give these rolls a try. Pull them from the oven, serve them warm, and enjoy the simple pleasure of homemade bread. 🍞✨
Print
Easy 3-Ingredient Greek Yogurt Dinner Rolls
Ingredients
- 1 cup plain Greek yogurt
- 1 cup self-rising flour
- 1 tablespoon melted butter
You will also need parchment paper to line your baking sheet. A little extra flour for dusting your hands and work surface can also be helpful.
Instructions
Preheat the oven to 375°F (190°C) and line a baking sheet with parchment paper. Parchment prevents sticking and makes cleanup easy.
Mix the Greek yogurt and self-rising flour in a bowl until a soft dough forms. Stir with a spoon or spatula until no dry flour remains, then use your hands to gently bring the dough together. The dough should be soft and slightly sticky but manageable. If it feels too sticky to handle, dust your hands with a little extra flour. Avoid overworking the dough, since mixing too much can make the rolls tough.
Divide the dough into 6 equal portions and shape each into a ball. To shape, roll each portion gently between your palms, tucking the edges underneath to create a smooth top. Try to keep the portions the same size so they bake evenly.
Place the dough balls on the prepared baking sheet, leaving space between them. The rolls will puff up as they bake, so give each one room to expand.
Brush the tops with melted butter. This adds richness and helps the tops turn a lovely golden color.
Bake for 18 to 22 minutes, or until lightly golden and cooked through. Ovens vary, so start checking at 18 minutes. The rolls should feel set and spring back slightly when pressed, and the bottoms should be lightly browned.
Allow the rolls to cool slightly before serving warm. A few minutes on the pan lets the insides finish setting. Then serve them with butter, soup, or your favorite family meal.





