

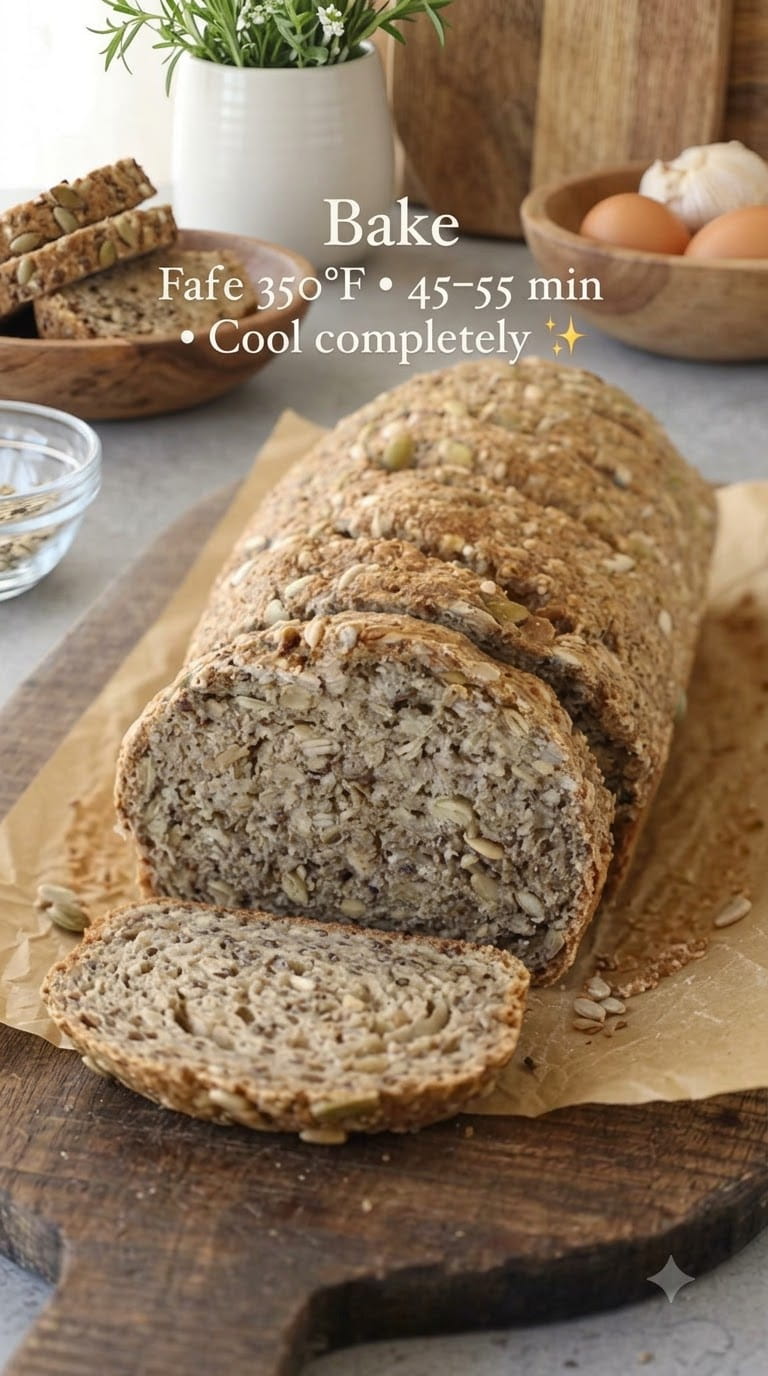
Easy Gluten-Free Chia Seed Bread: The Simple, Fiber-Rich Loaf You Need to Try
If you’re looking for a wholesome, gluten-free bread that’s easy to make without specialty ingredients like psyllium husk, this Easy Gluten-Free Chia Seed Bread is exactly what your kitchen needs. Chia seeds are transformed into a thick, gel-like base, then combined with gluten-free oat flour and a handful of pantry staples to create a hearty, tender loaf that’s naturally rich in fiber and incredibly simple to make.
Whether you’re following a gluten-free diet, looking to boost your fiber intake, or simply want a wholesome homemade bread without complicated techniques, this recipe delivers a satisfying loaf perfect for toast, sandwiches, or serving warm with butter. Below, you’ll find a complete breakdown of this recipe, including ingredient details, step-by-step instructions, expert tips, variations, storage guidance, and answers to frequently asked questions.
Why This Chia Seed Bread Is Worth Making
Gluten-free bread recipes can sometimes be complicated or require hard-to-find ingredients, but this chia seed version keeps things refreshingly simple. Here’s what makes it stand out:
- No psyllium husk required. Many gluten-free bread recipes rely on psyllium husk to mimic the binding properties of gluten, but this recipe uses chia seeds’ natural gel-forming ability instead.
- Naturally high in fiber. Both chia seeds and oat flour contribute significant dietary fiber, making this bread a nutritious choice.
- Simple, accessible ingredients. With just six ingredients, most of which are common pantry staples, this recipe is easy to make without a special shopping trip.
- No yeast or kneading required. This bread relies on baking powder for lift, skipping the traditional yeast-proofing and kneading process entirely.
- Naturally gluten-free. Using gluten-free oat flour ensures this bread is safe for those avoiding gluten, as long as the oat flour is certified gluten-free.
- A great way to use chia seeds. If you have chia seeds sitting in your pantry without a clear use, this recipe puts them to delicious, practical use.
If you’ve been searching for a gluten-free bread recipe that’s both nutritious and genuinely easy to make, this chia seed bread is worth adding to your regular baking rotation.
Understanding the Key Ingredients
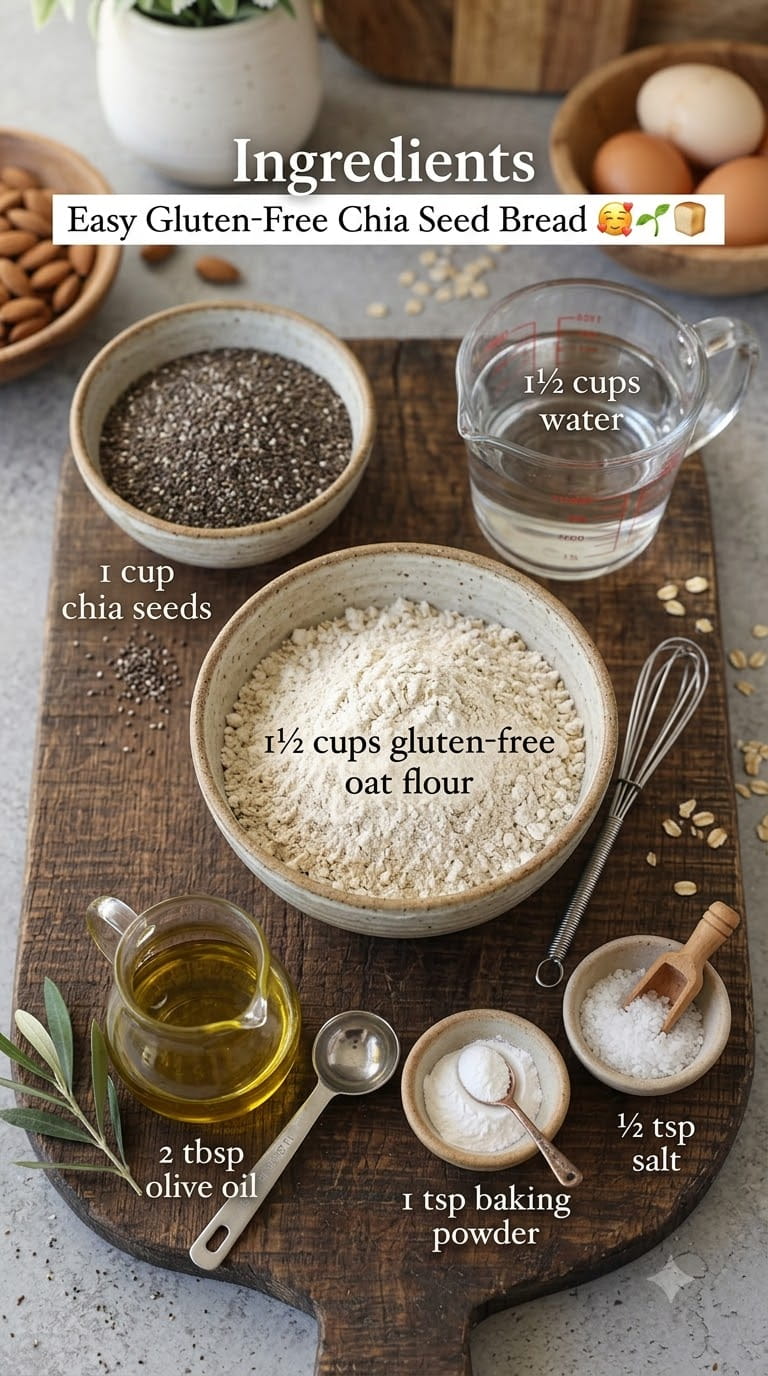
Let’s take a closer look at what goes into this recipe and why each ingredient plays an important role.
The Ingredients
- 1 cup chia seeds – The foundation of this bread. When combined with water, chia seeds form a thick, gel-like consistency that acts as a natural binder, replacing the role that gluten typically plays in traditional bread.
- 1½ cups water – Essential for activating the chia seeds’ natural gelling properties, creating the base that holds the bread together.
- 1½ cups gluten-free oat flour – Provides structure and a soft, hearty texture to the bread. Using certified gluten-free oat flour is important for those with celiac disease or severe gluten sensitivity, since regular oats can sometimes be cross-contaminated with gluten during processing.
- 2 tbsp olive oil – Adds richness and helps keep the finished bread moist and tender rather than dry or crumbly.
- 1 tsp baking powder – Since this recipe skips yeast entirely, baking powder provides the lift needed to create a lighter texture rather than a dense, flat loaf.
- ½ tsp salt – Essential for properly seasoning the bread and enhancing all the other flavors.
Step-by-Step Instructions
Step 1: Preheat the Oven and Prepare the Pan
Preheat the oven to 350°F (175°C). Line a loaf pan with parchment paper, ensuring the bread will release easily once baked.
Step 2: Make the Chia Gel
Combine the chia seeds and water in a bowl. Let sit for 15–20 minutes, until the mixture becomes thick and gel-like. This step is essential, as the chia gel acts as the primary binder for the entire loaf.
Step 3: Add the Remaining Ingredients
Add the oat flour, olive oil, baking powder, and salt to the chia gel. Mix until a thick, even dough forms.
Step 4: Transfer to the Pan
Transfer the mixture to the prepared loaf pan and smooth the top with a spatula.
Step 5: Bake
Bake for 45–55 minutes, until the loaf is firm and lightly golden on top.
Step 6: Cool Completely
Let the bread cool completely before slicing for the best texture. Cutting into the loaf too soon can result in a gummier texture, since the bread needs time to fully set.
Step 7: Slice and Serve
Slice and serve with avocado, eggs, butter, or your favorite toppings.
Tips for the Best Gluten-Free Chia Seed Bread
A few small techniques can make a noticeable difference in the final result:
- Don’t rush the chia gel step. Allowing the chia seeds and water to sit for the full 15–20 minutes ensures the mixture properly thickens into a gel, which is essential for the bread’s structure.
- Use certified gluten-free oat flour. If you’re baking for someone with celiac disease or a severe gluten sensitivity, make sure your oat flour is specifically labeled gluten-free, as regular oats can be cross-contaminated during processing.
- Mix until just combined. Once the oat flour is added, mix until a thick, even dough forms, without overworking the mixture.
- Let the bread cool completely before slicing. This step is crucial for achieving clean slices and the best possible texture — cutting too early can result in a gummy interior.
- Check for doneness carefully. Since this bread behaves differently than traditional wheat bread, look for a firm, lightly golden top as your primary indicator of doneness, alongside a toothpick test if desired.
- Store properly to maintain freshness. Because this bread lacks preservatives, proper storage is especially important for maintaining its texture over time.
Health Benefits of Chia Seed Bread
Beyond its simplicity, this bread offers several nutritional advantages worth highlighting.
Exceptionally High in Fiber
Chia seeds are one of the richest natural sources of dietary fiber, and combined with the fiber in oat flour, this bread offers a substantial fiber boost compared to most traditional wheat-based bread.
Naturally Gluten-Free
Using certified gluten-free oat flour makes this bread suitable for those following a gluten-free diet, without requiring complicated flour blends or hard-to-find binding agents like psyllium husk.
Rich in Omega-3 Fatty Acids
Chia seeds are well known for containing plant-based omega-3 fatty acids, making this bread a flavorful way to incorporate more of these beneficial fats into your diet.
A Good Source of Plant-Based Nutrients
Between the chia seeds and oat flour, this bread offers a range of nutrients, including minerals like calcium and magnesium, commonly associated with both ingredients.
Ingredient Substitutions and Variations
This recipe is easy to adapt based on your preferences or what you have on hand:
- Add seeds or nuts. Sunflower seeds, pumpkin seeds, or chopped walnuts can be mixed into the dough for added texture and flavor.
- Add herbs or spices. Dried rosemary, garlic powder, or Italian seasoning can be mixed into the dough for a savory version of this bread.
- Adjust the sweetness. A small amount of honey or maple syrup can be added for a slightly sweeter loaf that pairs well with nut butter or fruit preserves.
- Try a different oil. Melted coconut oil or avocado oil can be used in place of olive oil for a different flavor profile.
- Add cinnamon and raisins. For a sweeter, breakfast-style variation, cinnamon and a handful of raisins can be mixed into the dough before baking.
How to Serve Gluten-Free Chia Seed Bread
This bread’s hearty, slightly nutty flavor makes it a versatile addition to a variety of meals:
- Toasted with butter – A simple, satisfying way to enjoy this bread warm.
- Topped with avocado – A filling, fiber-rich breakfast or snack option.
- With eggs – A hearty pairing for a nutritious breakfast.
- As a sandwich base – Use for a wholesome, fiber-packed sandwich.
- With nut butter and fruit – A satisfying, slightly sweet option for breakfast or a snack.
- Alongside soups or salads – Serve as a hearty, fiber-rich side for a light meal.
How to Store Gluten-Free Chia Seed Bread
Because this bread has a different composition than traditional wheat bread, proper storage helps maintain its texture and freshness.
Refrigerating
Store the bread in an airtight container in the refrigerator for up to 5 days, since the lack of preservatives means it won’t stay fresh at room temperature as long as store-bought bread.
Freezing
This bread freezes well, making it a great option for meal prep. Slice the loaf before freezing so you can remove individual pieces as needed. Store in a freezer-safe bag or container for up to 2 months, and toast slices directly from frozen for convenience.
Room Temperature
If storing at room temperature, keep the bread in an airtight container and plan to consume it within 1–2 days, as it doesn’t contain the preservatives found in most store-bought bread.
Frequently Asked Questions
Can I use chia seeds without soaking them first? No, soaking the chia seeds in water is an essential step, as this creates the gel-like consistency that binds the bread together. Skipping this step will result in a mixture that doesn’t hold together properly.
Do I need to use certified gluten-free oat flour? If you or the person you’re baking for has celiac disease or a severe gluten sensitivity, yes — regular oats can sometimes be cross-contaminated with gluten during growing or processing, so look specifically for oat flour labeled gluten-free.
Can I make my own oat flour instead of buying it? Yes, gluten-free oat flour can be made at home by blending certified gluten-free rolled oats in a high-speed blender or food processor until they reach a fine, flour-like consistency.
Why is my bread dense instead of light and fluffy? This bread naturally has a denser, heartier texture than traditional wheat bread, since it relies on chia gel and baking powder rather than gluten and yeast. This is expected and characteristic of the recipe.
Does this bread taste like chia seeds? The bread has a mild, slightly nutty flavor from the oat flour, with the chia seeds contributing more to texture than a strong, distinct flavor. It pairs well with a variety of both sweet and savory toppings.
How long does this bread stay fresh? Since this bread lacks preservatives, it’s best stored in the refrigerator for up to 5 days, or frozen for up to 2 months for longer storage.
Can I add mix-ins like seeds or dried fruit? Yes, this recipe is easy to customize with additional seeds, nuts, dried fruit, or herbs and spices, depending on whether you’re going for a sweeter or more savory loaf.
Why do I need to let the bread cool completely before slicing? Slicing too soon can result in a gummy, undercooked-feeling interior, since the bread needs time to fully set as it cools. Allowing it to cool completely ensures the best possible texture.
Final Thoughts
This Easy Gluten-Free Chia Seed Bread proves that gluten-free baking doesn’t have to be complicated or require hard-to-find ingredients like psyllium husk. With just chia seeds, oat flour, and a few pantry staples, you can create a hearty, tender loaf that’s naturally rich in fiber and endlessly versatile for both sweet and savory toppings. Best of all, there’s no yeast, kneading, or complicated technique standing between you and a warm, homemade loaf.
Whether you’re looking for a gluten-free bread alternative, a fiber-rich addition to your diet, or simply an easy way to use up chia seeds in your pantry, this bread is a recipe worth adding to your regular rotation — proof that simple, wholesome ingredients can create something truly satisfying.
Print
Easy Gluten-Free Chia Seed Bread
Ingredients
Let’s take a closer look at what goes into this recipe and why each ingredient plays an important role.
The Ingredients
- 1 cup chia seeds – The foundation of this bread. When combined with water, chia seeds form a thick, gel-like consistency that acts as a natural binder, replacing the role that gluten typically plays in traditional bread.
- 1½ cups water – Essential for activating the chia seeds’ natural gelling properties, creating the base that holds the bread together.
- 1½ cups gluten-free oat flour – Provides structure and a soft, hearty texture to the bread. Using certified gluten-free oat flour is important for those with celiac disease or severe gluten sensitivity, since regular oats can sometimes be cross-contaminated with gluten during processing.
- 2 tbsp olive oil – Adds richness and helps keep the finished bread moist and tender rather than dry or crumbly.
- 1 tsp baking powder – Since this recipe skips yeast entirely, baking powder provides the lift needed to create a lighter texture rather than a dense, flat loaf.
- ½ tsp salt – Essential for properly seasoning the bread and enhancing all the other flavors.
Instructions
Preheat the oven to 350°F (175°C). Line a loaf pan with parchment paper, ensuring the bread will release easily once baked.
Combine the chia seeds and water in a bowl. Let sit for 15–20 minutes, until the mixture becomes thick and gel-like. This step is essential, as the chia gel acts as the primary binder for the entire loaf.
Add the oat flour, olive oil, baking powder, and salt to the chia gel. Mix until a thick, even dough forms.
Transfer the mixture to the prepared loaf pan and smooth the top with a spatula.
Bake for 45–55 minutes, until the loaf is firm and lightly golden on top.
Let the bread cool completely before slicing for the best texture. Cutting into the loaf too soon can result in a gummier texture, since the bread needs time to fully set.
Slice and serve with avocado, eggs, butter, or your favorite toppings.






