

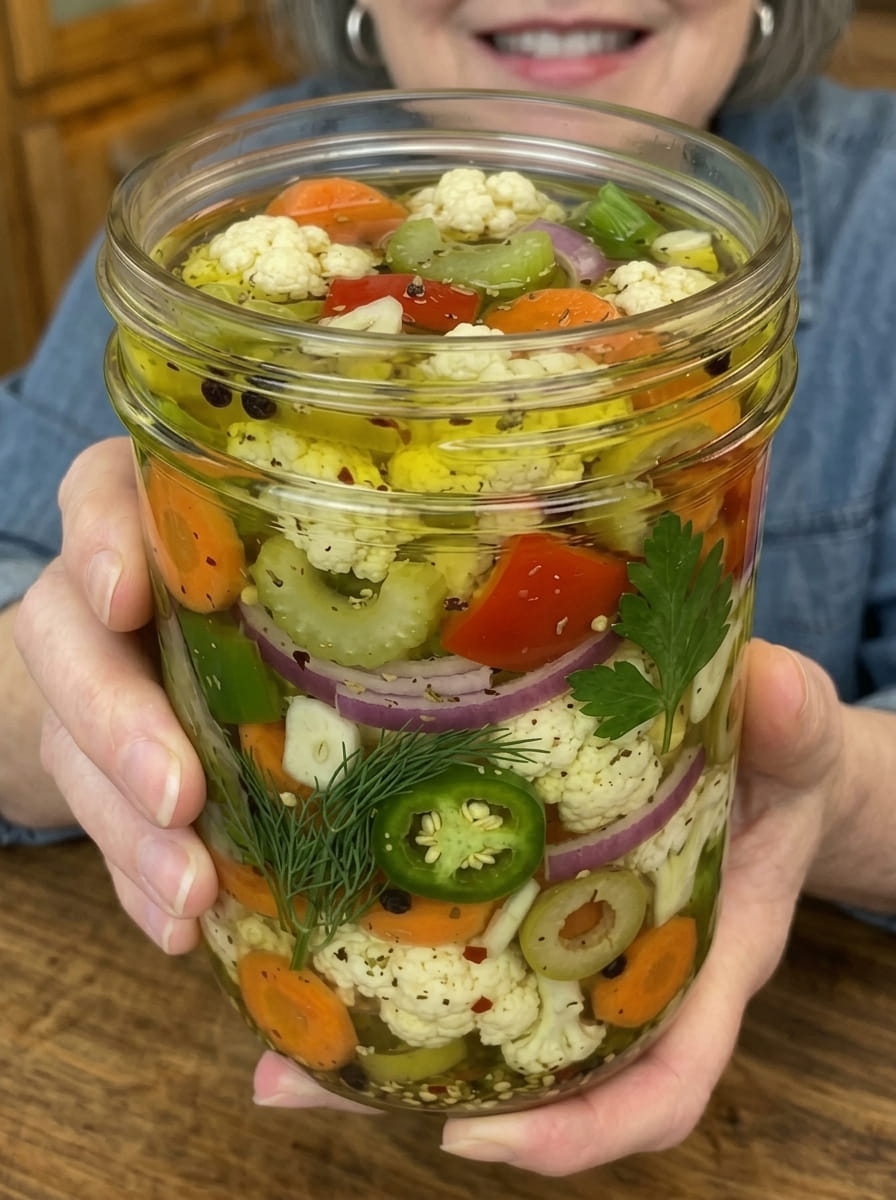
Italian Giardiniera Pickles with Olives: Crisp, Colorful, and Full of Bold Flavor
Meta Description: Make these Italian Giardiniera Pickles with cauliflower, peppers, green olives, and a zesty herb-infused vinegar brine finished with olive oil. Bold, crunchy, and easy.
Giardiniera is one of those recipes that never gets old, and this version — loaded with crisp cauliflower, colorful peppers, garlic, jalapeños, and briny green olives — brings even more depth to the classic Italian pickled vegetable mix. Everything is tossed in a warm, herb-infused vinegar brine seasoned with both dried oregano and Italian seasoning, then finished with a generous pour of extra-virgin olive oil for that classic glossy, antipasto-style richness. The addition of sliced green olives and fresh parsley gives this version an extra briny, herbaceous dimension that sets it apart from a more basic giardiniera recipe.
This bold, colorful vegetable pickle is a staple of Italian-American cuisine, beloved for its versatility, satisfying crunch, and vibrant flavor. Whether piled onto a sandwich, served alongside cured meats on an antipasto platter, or eaten straight from the jar as a crunchy, tangy snack, giardiniera brings bright, punchy flavor to whatever it touches. This olive-studded version takes that beloved formula and adds an extra layer of briny complexity that pairs beautifully with the other classic ingredients.
Below, you’ll find the complete recipe along with ingredient breakdowns, step-by-step instructions, storage guidance, flavor variations, and plenty of serving ideas to help you make the most of this vibrant, crowd-pleasing pickle.
Why You’ll Love This Recipe
- Extra briny depth. The addition of sliced green olives brings a classic Mediterranean brininess that complements the other vegetables beautifully.
- Bold, herb-forward flavor. A combination of dried oregano and Italian seasoning gives this version a distinctly herby, Italian character.
- Colorful and vibrant. Red and green bell peppers, orange carrots, white cauliflower, and green olives create a beautifully colorful jar.
- Balanced heat. Fresh jalapeños provide a noticeable, but approachable, level of spice that can easily be adjusted.
- Finished with real olive oil. The olive oil poured over the top gives this giardiniera an authentic, rich, glossy finish.
- Great make-ahead condiment. It keeps well in the fridge for weeks and only gets better with time.
Ingredients You’ll Need
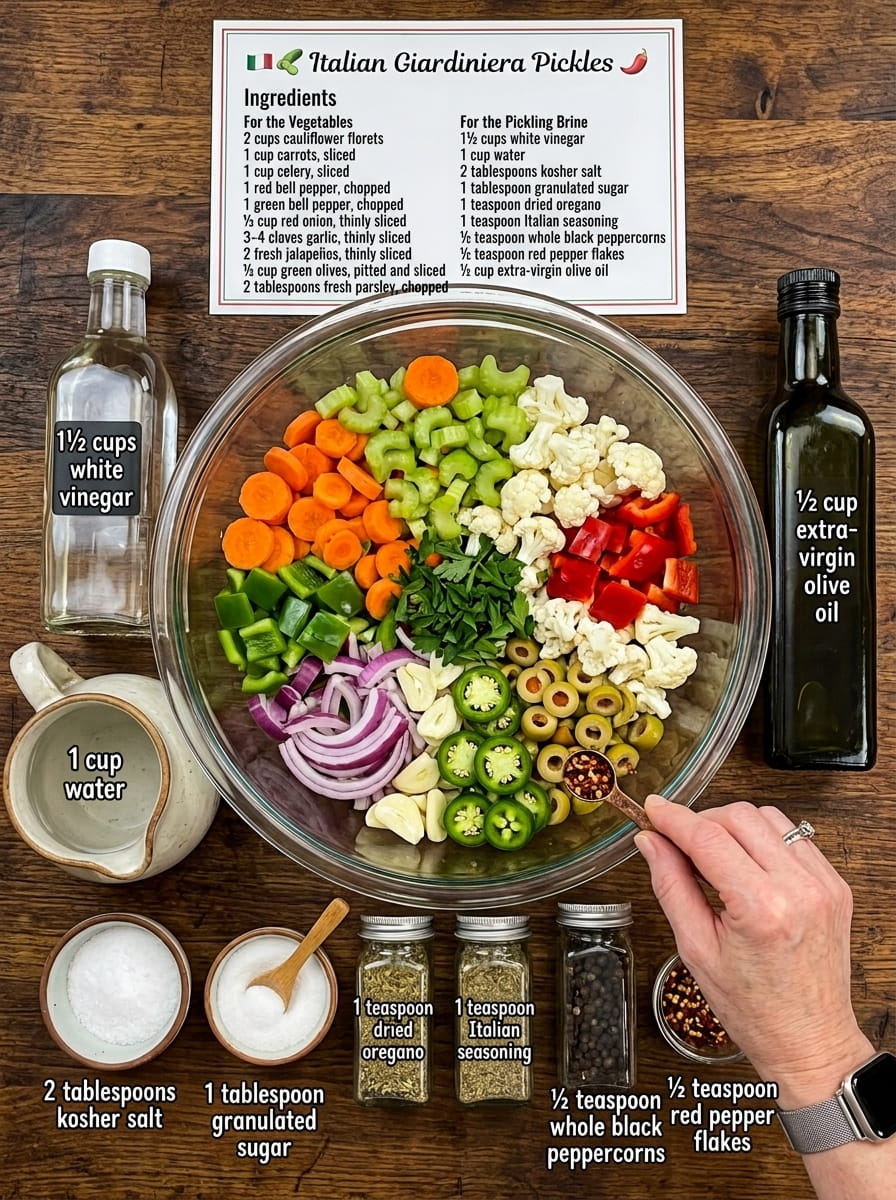
This recipe uses a colorful mix of fresh vegetables and briny olives combined with a zesty herb-infused vinegar brine and finished with olive oil. Here’s what you’ll need:
For the Vegetables
- 2 cups cauliflower florets
- 1 cup carrots, sliced
- 1 cup celery, sliced
- 1 red bell pepper, chopped
- 1 green bell pepper, chopped
- ½ cup red onion, thinly sliced
- 3–4 cloves garlic, thinly sliced
- 2 fresh jalapeños, thinly sliced
- ½ cup green olives, pitted and sliced
- 2 tablespoons fresh parsley, chopped
For the Pickling Brine
- 1½ cups white vinegar
- 1 cup water
- 2 tablespoons kosher salt
- 1 tablespoon granulated sugar
- 1 teaspoon dried oregano
- 1 teaspoon Italian seasoning
- ½ teaspoon whole black peppercorns
- ½ teaspoon red pepper flakes
- ½ cup extra-virgin olive oil
Understanding Each Ingredient’s Role
- Cauliflower provides a hearty, satisfying crunch and readily absorbs the brine’s tangy, herby flavor.
- Carrots add natural sweetness, vibrant color, and a firm bite that holds up well in the brine.
- Celery contributes a fresh, slightly peppery crunch that balances the richer vegetables.
- Red and green bell peppers bring sweetness, color, and classic giardiniera flavor.
- Red onion offers a milder, slightly sweet bite along with a beautiful pop of color.
- Garlic cloves infuse the entire mix with a bold, aromatic, savory backbone.
- Fresh jalapeños deliver the primary source of heat in this recipe, giving the giardiniera a noticeable kick.
- Green olives add classic briny, savory depth that’s a distinctive addition to this version of giardiniera.
- Fresh parsley brings bright, herbaceous freshness that ties the whole mixture together.
- White vinegar provides the essential tangy, acidic base of the brine and acts as a natural preservative.
- Water balances the vinegar’s acidity while maintaining enough acidity for safe pickling.
- Kosher salt enhances flavor throughout the brine and supports the pickling process.
- Granulated sugar softens the brine’s sharp edges with a touch of sweetness.
- Dried oregano and Italian seasoning bring classic, herb-forward Mediterranean flavor that defines this recipe.
- Black peppercorns and red pepper flakes add layered background heat and warm spice.
- Extra-virgin olive oil finishes the giardiniera with richness and authentic Italian flavor, giving the jar its classic glossy appearance.
Step-by-Step Instructions
This recipe comes together with a quick warm-brine toss, followed by time in the fridge to let the flavors fully develop.
Step 1: Prep the Vegetables
Wash and prepare all the vegetables. Cut the cauliflower into bite-sized florets and slice the carrots, celery, peppers, onion, garlic, and jalapeños.
Step 2: Combine the Main Vegetables
Place the cauliflower, carrots, celery, bell peppers, red onion, garlic, and jalapeños in a large bowl.
Step 3: Build the Brine
In a saucepan, combine the white vinegar, water, kosher salt, sugar, dried oregano, Italian seasoning, black peppercorns, and red pepper flakes.
Step 4: Simmer the Brine
Bring the brine to a gentle simmer, stirring until the salt and sugar fully dissolve.
Step 5: Pour Over the Vegetables
Carefully pour the hot brine over the vegetables in the bowl and toss gently to coat everything evenly.
Step 6: Add the Olives and Parsley
Let the vegetables cool slightly, then add the sliced green olives and fresh chopped parsley, tossing gently to combine.
Step 7: Transfer to Jars
Transfer the mixture to clean glass jars and pour in enough of the remaining brine to completely cover the vegetables.
Step 8: Add the Olive Oil
Add the extra-virgin olive oil over the top of each jar.
Step 9: Seal and Refrigerate
Seal the jars and refrigerate for at least 24 hours to allow the flavors to develop.
Step 10: Let the Flavor Deepen
For the best flavor, let the giardiniera marinate for 2 to 3 days before serving. This extended resting period allows the vegetables and olives to fully absorb the herby, tangy brine.
How Long Does This Giardiniera Last?
When stored properly in an airtight jar in the refrigerator, this giardiniera will typically stay fresh for up to 3 to 4 weeks. Because olive oil is incorporated into the jars, it’s best to keep them refrigerated at all times and always use clean utensils when serving to help prevent contamination and extend freshness.
This recipe is intended as a refrigerator pickle and is not suitable for shelf-stable, room-temperature storage, since combining vegetables with oil outside of a proper canning process is not considered food-safe for pantry storage.
Tips for the Best Olive Giardiniera
- Cut the vegetables into similar-sized pieces. This helps everything pickle evenly and creates a more consistent bite throughout the jar.
- Add the olives after the brine has cooled slightly. This helps preserve their texture and prevents them from becoming overly soft from prolonged exposure to hot liquid.
- Don’t skip the 2-3 day rest. This is when the vegetables and olives really absorb the brine’s flavor — resist the urge to serve it too soon.
- Use good-quality green olives. Since the olives play a starring role in this version, choosing a good-quality variety makes a real difference in the final flavor.
- Adjust the heat to your preference. Remove the seeds and membranes from the jalapeños for a milder giardiniera, or add an extra jalapeño for more heat.
- Use clean utensils every time. This simple habit goes a long way toward extending the shelf life of your giardiniera.
Flavor Variations to Try
Once you’ve made this version, try these variations to switch things up:
- Extra Spicy: Add a sliced serrano or fresno chili alongside the jalapeños for more heat.
- Kalamata Olive Swap: Substitute kalamata olives for the green olives for a richer, more robust briny flavor.
- Fennel Addition: Add thinly sliced fennel bulb for a subtle anise flavor and extra crunch.
- Extra Garlicky: Double the garlic for a bolder, more pungent flavor throughout the jar.
- Herb-Forward Version: Add fresh basil alongside the parsley for a brighter, more herbaceous finish.
- Balsamic Twist: Replace a small portion of the white vinegar with balsamic vinegar for a slightly sweeter, more complex flavor.
Delicious Ways to Use Italian Giardiniera with Olives
This vibrant, briny vegetable mix is endlessly versatile. Here are some of the best ways to enjoy it:
- Antipasto Platters – A classic addition to any antipasto spread, pairing beautifully with cured meats, cheeses, and crusty bread.
- Italian Beef Sandwiches – A tangy, briny topping that’s a must for classic Chicago-style Italian beef.
- Sandwiches and Subs – Layer it onto any deli sandwich for an instant flavor and texture upgrade.
- Salads – Chop and toss into green salads, pasta salads, or grain bowls for tangy, briny flavor.
- Pizza Topping – Scatter over pizza after baking for a fresh, tangy contrast to melted cheese.
- Grilled Meats – Serve alongside grilled sausages, chicken, or steak as a crunchy, tangy side.
- Charcuterie Boards – Add a generous bowl to any charcuterie or grazing board for color, crunch, and brininess.
- Grain Bowls – Mix into rice, quinoa, or farro bowls alongside a protein and other fresh vegetables.
- Snacking Straight From the Jar – Simple, refreshing, and endlessly satisfying on its own.
Why Add Olives to Giardiniera?
While not every giardiniera recipe includes olives, their addition is a natural fit for the dish’s Mediterranean roots. Green olives bring a briny, slightly bitter contrast that plays beautifully against the sweetness of the bell peppers and carrots, while also echoing the flavors you’d typically find alongside giardiniera on an antipasto platter — cured meats, cheeses, and marinated olives are classic companions. By pickling the olives directly in the same jar as the vegetables, this version essentially builds a mini antipasto spread into a single, cohesive condiment.
This also means you get more out of a single jar: instead of needing a separate bowl of olives on your antipasto board, this giardiniera already has that briny element built right in, saving you a step when it’s time to set out a spread for guests. It’s a small addition that makes a noticeable difference in both flavor complexity and convenience.
Frequently Asked Questions
Why are green olives added after the brine instead of with the other vegetables? Adding the olives once the mixture has cooled slightly helps preserve their texture, preventing them from becoming overly soft from prolonged exposure to the hot brine.
Can I use black olives instead of green? Yes, black or kalamata olives can be substituted for green olives, resulting in a richer, more robust briny flavor throughout the jar.
Is this giardiniera very spicy? It has a moderate level of heat from the two jalapeños. For a milder version, remove the seeds and membranes, or reduce to just one jalapeño; for more heat, add an extra pepper.
Do I need to pit the olives myself? Pre-pitted olives work perfectly for this recipe and save significant prep time. If your olives aren’t pitted, pit them yourself before slicing and adding them to the mixture.
How long should I wait before eating it? While the flavor starts developing right away, waiting 2 to 3 days allows the vegetables and olives to properly absorb the brine, resulting in a much more flavorful giardiniera.
Can I make a larger batch of this recipe? Yes, this recipe scales up easily. Simply increase the vegetables, olives, and brine ingredients proportionally, and divide the mixture among multiple clean jars as needed.
Final Thoughts
This olive-studded version of Italian Giardiniera Pickles brings an extra layer of briny, savory depth to an already beloved classic. With a colorful mix of crisp vegetables, sliced green olives, fresh parsley, and a zesty herb-infused vinegar brine finished with rich olive oil, this recipe delivers bold, authentic Mediterranean flavor in every crunchy bite.
Whether you’re building an antipasto platter, topping an Italian beef sandwich, or simply snacking straight from the jar, this giardiniera is guaranteed to become a fridge staple. Make a batch, let it marinate for a couple of days, and enjoy bold, colorful, Italian-inspired flavor all week long.
Print
Italian Giardiniera Pickles
Ingredients
This recipe uses a colorful mix of fresh vegetables and briny olives combined with a zesty herb-infused vinegar brine and finished with olive oil. Here’s what you’ll need:
For the Vegetables
- 2 cups cauliflower florets
- 1 cup carrots, sliced
- 1 cup celery, sliced
- 1 red bell pepper, chopped
- 1 green bell pepper, chopped
- ½ cup red onion, thinly sliced
- 3–4 cloves garlic, thinly sliced
- 2 fresh jalapeños, thinly sliced
- ½ cup green olives, pitted and sliced
- 2 tablespoons fresh parsley, chopped
For the Pickling Brine
- 1½ cups white vinegar
- 1 cup water
- 2 tablespoons kosher salt
- 1 tablespoon granulated sugar
- 1 teaspoon dried oregano
- 1 teaspoon Italian seasoning
- ½ teaspoon whole black peppercorns
- ½ teaspoon red pepper flakes
- ½ cup extra-virgin olive oil
Instructions
This recipe comes together with a quick warm-brine toss, followed by time in the fridge to let the flavors fully develop.
Wash and prepare all the vegetables. Cut the cauliflower into bite-sized florets and slice the carrots, celery, peppers, onion, garlic, and jalapeños.
Place the cauliflower, carrots, celery, bell peppers, red onion, garlic, and jalapeños in a large bowl.
In a saucepan, combine the white vinegar, water, kosher salt, sugar, dried oregano, Italian seasoning, black peppercorns, and red pepper flakes.
Bring the brine to a gentle simmer, stirring until the salt and sugar fully dissolve.
Carefully pour the hot brine over the vegetables in the bowl and toss gently to coat everything evenly.
Let the vegetables cool slightly, then add the sliced green olives and fresh chopped parsley, tossing gently to combine.
Transfer the mixture to clean glass jars and pour in enough of the remaining brine to completely cover the vegetables.
Add the extra-virgin olive oil over the top of each jar.
Seal the jars and refrigerate for at least 24 hours to allow the flavors to develop.
For the best flavor, let the giardiniera marinate for 2 to 3 days before serving. This extended resting period allows the vegetables and olives to fully absorb the herby, tangy brine.






