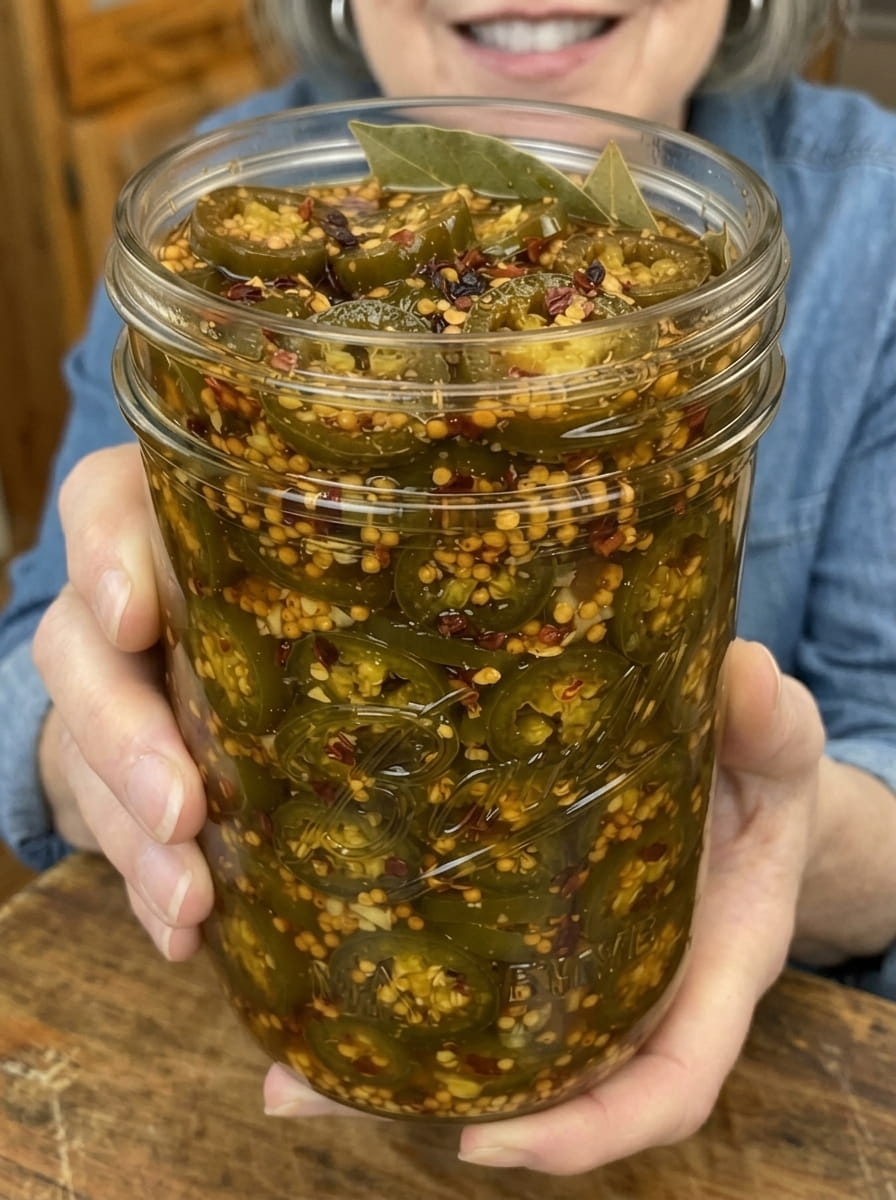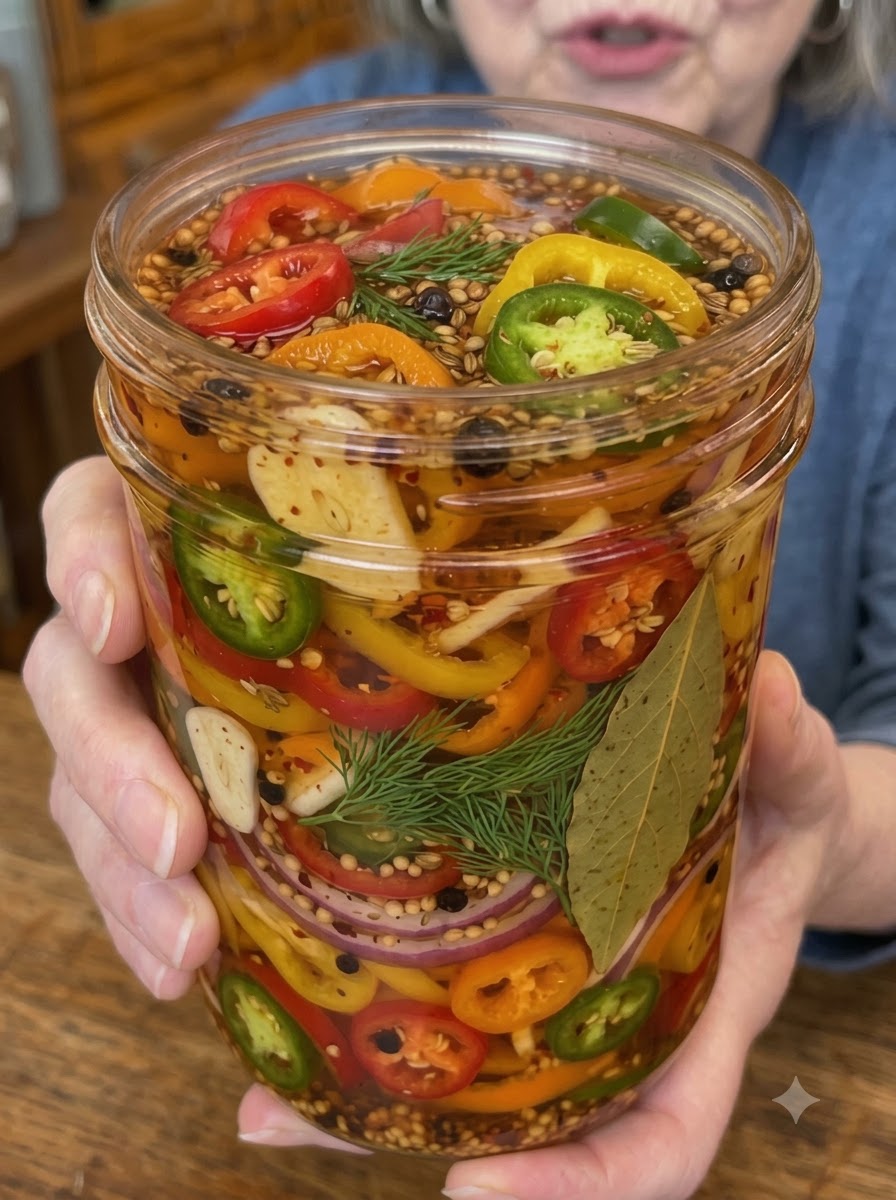
Loaded Pickled Bell Peppers: Crisp, Sweet, Tangy, and Packed with Bold Flavor
If you’ve ever wished your jar of pickles had more color, more heat, and a lot more personality, these loaded pickled bell peppers are the answer. They are crisp, sweet, tangy, and garlicky, with a bold mix of herbs, spicy peppers, and zesty pickling spices in every colorful bite. Sweet bell peppers bring the crunch and natural sugar, while jalapeños, serrano, and crushed red pepper flakes add a slow, satisfying heat. Garlic, red onion, smoked paprika, and Italian seasoning round everything out into a pickle that tastes complex, vibrant, and completely addictive.
Best of all, this is an easy refrigerator pickle recipe. There is no canning equipment, no complicated technique, and no need for a pantry full of specialty ingredients. You’ll spend about 15 minutes slicing and packing and 5 minutes warming a simple brine, and then your refrigerator does the rest. Pile these peppers onto charcuterie boards, sandwiches, salads, pizzas, and burgers, or eat them straight from the jar with a fork. In this guide, you’ll find the full recipe, detailed step-by-step instructions, pro tips for the best texture, flavor variations, serving ideas, storage advice, and answers to the most common questions about pickling peppers at home.
What Are Loaded Pickled Bell Peppers?
Loaded pickled bell peppers are quick-pickled sweet peppers that are “loaded” with extra flavor. A basic pickled pepper recipe might use only peppers, vinegar, and salt. This version goes much further. In addition to the sliced bell peppers, the jar is packed with thinly sliced garlic, jalapeños, serrano pepper, and red onion, then seasoned with black peppercorns, mustard seeds, coriander seeds, dill seeds, Italian seasoning, smoked paprika, crushed red pepper flakes, and bay leaves.
The result is a pickle that hits every note at once. You get sweetness from the bell peppers, sharp tang from the vinegar, savory depth from the garlic and onion, herbal warmth from the Italian seasoning and dill, a subtle smoky quality from the paprika, and a lingering kick from the hot peppers. Because the brine is only warmed, never boiled, and the jar goes straight into the refrigerator, the peppers keep a pleasant snap instead of turning soft.
Why You’ll Love This Recipe
There are countless ways to pickle vegetables, but this recipe earns a permanent spot in your fridge for good reasons.
Bold, layered flavor. Sweet, spicy, tangy, smoky, and herby all show up together. Every ingredient has a job, and nothing gets lost.
Easy and beginner friendly. If you can slice vegetables and stir a pot, you can make this recipe. It requires no special skills and no canning.
Gorgeous to look at. A jar of red, yellow, orange, and green pepper slices with flecks of red onion, garlic, and spices looks like something from a gourmet deli. It also makes a lovely homemade gift.
Incredibly versatile. These peppers go with almost anything. Use them as a topping, a side, a salad add-in, or a snack.
Customizable heat. You control the spice level by adjusting the jalapeños, serrano, and crushed red pepper flakes. It’s simple to make a mild version or a fiery one.
Budget friendly. Mini sweet peppers and basic pantry spices cost far less than store-bought specialty pickled peppers, and you get a larger jar with fresher flavor.
Make-ahead friendly. The peppers actually improve with time, which makes them ideal for meal prep, party planning, and summer cookouts.
Ingredients You’ll Need
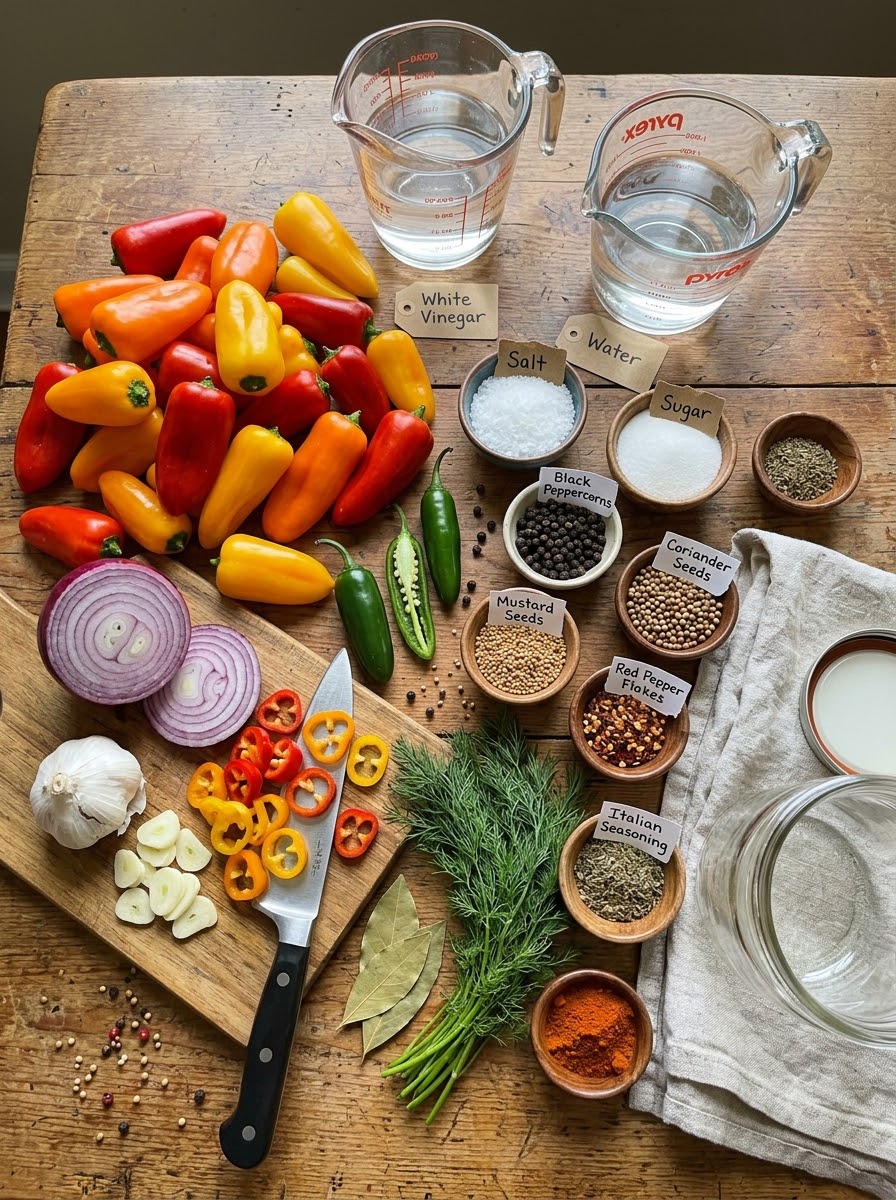
Here is everything you need to make about 10 servings of loaded pickled bell peppers:
- 2 lbs mini sweet bell peppers (or 4 to 5 large bell peppers), sliced into rings or strips
- 2 cups white vinegar
- 2 cups water
- 2 tbsp pickling salt or kosher salt
- 1 tbsp sugar
- 6 cloves garlic, thinly sliced
- 2 jalapeños, thinly sliced
- 1 serrano pepper, thinly sliced
- 1 small red onion, thinly sliced
- 1 tsp crushed red pepper flakes
- 1 tsp whole black peppercorns
- 1 tsp mustard seeds
- 1 tsp coriander seeds
- 1 tsp dill seeds (or 2 sprigs fresh dill)
- 1 tsp Italian seasoning
- 1/2 tsp smoked paprika
- 2 bay leaves
Prep Time: 15 minutes Cook Time: 5 minutes Total Time: 20 minutes (plus pickling time) Servings: 10 Calories: about 30 per serving
Ingredient Notes and Substitutions
Knowing why each ingredient is there makes it easier to customize the recipe and fix problems if something doesn’t turn out the way you hoped.
Mini Sweet Bell Peppers or Large Bell Peppers
Mini sweet peppers are a fantastic choice because they come in a colorful bag of red, orange, and yellow, have thin walls and few seeds, and slice quickly into neat rings. If you prefer large bell peppers, choose firm, glossy ones with thick walls and no soft spots. A mix of colors makes the prettiest jar. Red, yellow, and orange peppers are sweeter, while green bell peppers are more bitter and grassy, which gives a nice contrast. Avoid peppers that are wrinkled or soft, because they will not pickle well.
White Vinegar
Distilled white vinegar with 5% acidity creates a clean, sharp brine that lets the peppers and spices stand out. Apple cider vinegar can be swapped in for a fruitier, mellower flavor, though it will tint the brine slightly. Whatever vinegar you use, check that the label says 5% acidity for reliable results.
Pickling Salt or Kosher Salt
Pickling salt is pure salt with no anti-caking agents, so it keeps the brine clear. Kosher salt works well too. Avoid iodized table salt, which can cloud the brine and add an off taste.
Sugar
Just one tablespoon rounds out the sharpness of the vinegar without making the peppers dessert-sweet. The bell peppers already provide natural sweetness, so you don’t need much. For a sweeter pickle, increase the sugar to 2 tablespoons.
Garlic
Thinly sliced garlic infuses the brine and turns mellow and tender as it sits. You may notice the garlic developing a bluish or greenish tint. This is a harmless chemical reaction between garlic and acid, and it does not affect flavor or safety.
Jalapeños and Serrano Pepper
The jalapeños bring moderate, fresh, grassy heat, while the serrano adds a sharper, hotter kick. Together they create layers of spice. For a milder pickle, remove the seeds and white membranes from the hot peppers, or use only one jalapeño and skip the serrano. For more fire, leave the seeds in or swap the serrano for a habanero. Wear gloves when slicing hot peppers and avoid touching your face.
Red Onion
Red onion adds a mild savory bite and a beautiful pink-purple color that stains the brine slightly. The slices also become tangy pickled onions you can enjoy on tacos, burgers, and salads.
The Pickling Spices
Black peppercorns, mustard seeds, coriander seeds, and dill seeds are classic pickling spices. Peppercorns add warm heat, mustard seeds bring a gentle sharpness, coriander contributes a citrusy, floral note, and dill seeds give the signature pickle aroma. If you have fresh dill, two sprigs work as a substitute for the dill seeds.
Italian Seasoning and Smoked Paprika
These two ingredients are what make this recipe different from an ordinary pickled pepper. Italian seasoning, a blend of dried herbs like oregano, basil, thyme, and rosemary, adds a savory, pizzeria-style herbal note. Smoked paprika adds a subtle campfire depth that complements the sweet peppers perfectly.
Crushed Red Pepper Flakes and Bay Leaves
Crushed red pepper flakes bring steady background heat and tiny flecks of color. Bay leaves add a subtle, tea-like richness that ties all the flavors together.
How to Make Loaded Pickled Bell Peppers (Step by Step)
Follow these simple steps for crisp, flavorful peppers every time.
Step 1: Wash and Slice the Peppers
Wash the bell peppers thoroughly under cool running water. Remove the stems and seeds, then slice the peppers into rings or strips. For mini sweet peppers, rings of about 1/4 inch work beautifully. For large bell peppers, cut them into strips about 1/4 to 1/2 inch wide. Try to keep the pieces uniform so they pickle evenly.
Step 2: Pack the Jar
Pack the sliced peppers into a clean glass jar or airtight container. Press them in firmly enough that they stay put, but don’t crush them. A large 64-ounce jar works well, or you can divide the peppers between two quart-size jars.
Step 3: Add the Aromatics and Spices
Tuck the sliced garlic, jalapeños, serrano pepper, and red onion throughout the jar, layering them between the bell peppers. Sprinkle in the black peppercorns, mustard seeds, coriander seeds, dill seeds, Italian seasoning, crushed red pepper flakes, and smoked paprika, then nestle in the bay leaves. Spreading the seasonings as you pack helps every bite taste balanced.
Step 4: Make the Brine
In a saucepan, combine the white vinegar, water, pickling salt, and sugar. Heat over medium heat, stirring until the salt and sugar dissolve completely, about 4 to 5 minutes. Do not let the brine boil. A hot but not boiling brine dissolves the salt and sugar while protecting the crisp texture of the peppers.
Step 5: Pour and Submerge
Carefully pour the warm brine over the peppers until they are fully submerged. Press down any floating pieces with a clean spoon, and gently tap the jar on the counter to release trapped air bubbles. Everything should be covered by the liquid.
Step 6: Cool and Seal
Let the jar cool to room temperature on the counter, then seal tightly with a lid. Cooling first helps avoid condensation inside the jar.
Step 7: Refrigerate and Wait
Refrigerate the peppers for at least 48 hours before serving. For the boldest flavor, let them pickle for 5 to 7 days. The longer they sit, the more the garlic, spices, and heat infuse into the peppers.
Step 8: Shake Gently Each Day
Shake the jar gently once a day to distribute the seasonings evenly. This simple habit helps every pepper absorb flavor from the brine.
Tips for the Best Pickled Peppers
A few simple techniques make the difference between good pickled peppers and great ones.
- Choose firm, fresh peppers. Fresh, crisp peppers stay crunchy. Soft or wrinkled peppers turn limp in brine.
- Slice evenly. Uniform slices pickle at the same rate and look neater in the jar.
- Don’t boil the brine. Warm the liquid only until the salt and sugar dissolve. Boiling can soften the peppers.
- Keep everything submerged. Any pieces sticking above the brine can soften or spoil faster. If needed, weigh them down with a small fermentation weight or a clean piece of onion.
- Be patient. The peppers are good at 48 hours but excellent at 5 to 7 days.
- Mix colors. Red, yellow, orange, and green peppers make the jar visually stunning and give a nice range of sweetness.
- Adjust the heat to your taste. Remove the seeds and membranes for mild peppers or keep them in for a spicier result.
- Use clean tools and jars. Wash jars and lids in hot, soapy water and rinse well. Always use a clean fork to remove peppers from the jar.
Flavor Variations to Try
Once you’ve made the base recipe, you can easily put your own spin on it.
Extra Spicy Loaded Peppers. Add a sliced habanero or a few Thai chilies, or double the crushed red pepper flakes.
Mild and Sweet Peppers. Skip the serrano, seed the jalapeños, and increase the sugar to 2 tablespoons for a family-friendly jar.
Garlic Lovers’ Peppers. Double the garlic and add a few whole peeled cloves for a bold, punchy flavor.
Lemon Herb Peppers. Add a few thin lemon slices and a sprig of fresh oregano or thyme for a bright, Mediterranean twist.
Smoky Peppers. Increase the smoked paprika to 1 teaspoon for a deeper smoky note.
Pickled Pepper Rings. Slice large peppers into thin rings for sandwiches, hot dogs, and nachos.
Mixed Veggie Jar. Use the same brine and spices with carrots, cauliflower, banana peppers, or sliced cucumbers for a colorful giardiniera-style mix.
How to Serve Loaded Pickled Bell Peppers
These peppers are ready to brighten up almost any meal. Here are some of the best ways to enjoy them.
- On charcuterie boards. Pair them with cured meats, sharp cheeses, olives, crackers, and nuts. Their sweet-tangy bite cuts through rich and salty flavors.
- On sandwiches and wraps. Layer them onto Italian subs, grilled cheese, turkey sandwiches, roast beef, and chicken wraps.
- On pizza. Scatter them over a hot pizza as a tangy, spicy topping, or add them after baking to keep their crunch.
- On burgers. Top a juicy burger with a few pepper rings for sweetness, acidity, and heat.
- In salads. Toss them into green salads, pasta salads, potato salad, antipasto salad, or grain bowls.
- On tacos and nachos. Use them in place of store-bought pickled jalapeños for a sweeter, more colorful topping.
- With eggs. Add them to omelets, frittatas, breakfast burritos, or avocado toast.
- On hot dogs and sausages. Chop them up as a relish or pile them on whole.
- With grilled meats. Serve alongside grilled chicken, steak, pork chops, or sausages at cookouts.
- In dips and spreads. Finely chop and stir into cream cheese, hummus, or tuna salad for a flavor boost.
- Straight from the jar. A crunchy, tangy, low-calorie snack that needs nothing else.
Storage Information
Store loaded pickled bell peppers in an airtight jar in the refrigerator for up to 1 month. Keep the peppers completely submerged in the pickling brine to maintain their crisp texture and vibrant flavor.
Because this is a refrigerator pickle recipe and not a shelf-stable canned recipe, the jar must stay cold at all times. Use a clean fork or tongs every time you remove peppers, since utensils and fingers can introduce bacteria that shorten the shelf life.
Signs that the peppers have spoiled: a yeasty or unpleasant smell, slimy or mushy texture, mold on the peppers or brine, or unusual fizzing. If you notice any of these, discard the whole jar.
Can you freeze them? Freezing is not recommended. Peppers have a high water content, so they turn soft and watery after thawing.
Can you reuse the brine? You can reuse the brine once for a quick batch of onions or carrots if it has stayed refrigerated and still looks and smells fresh. Expect a milder flavor.
Nutrition at a Glance
Each serving contains roughly 30 calories, which makes these peppers a light, flavorful addition to almost any meal. They are low in fat and naturally rich in color and flavor, though the brine is high in sodium. If you’re watching your salt intake, enjoy them in moderation and skip drinking the brine. Nutrition information is an estimate and will vary depending on ingredients and portion size.
Common Mistakes to Avoid
Boiling the brine. Overheating can make the peppers soft. Warm the brine only until the salt and sugar dissolve.
Skipping the wait. The peppers taste fine after two days, but the flavor truly peaks between days 5 and 7.
Using soft or old peppers. Starting with limp peppers guarantees limp pickles. Choose firm, fresh ones.
Leaving peppers above the brine. Exposed pieces can spoil or soften. Press everything under the liquid.
Using iodized salt. It can cloud the brine and change the flavor. Stick to pickling or kosher salt.
Cutting pieces too thin. Very thin slices lose their crunch quickly. Aim for about 1/4 inch.
Underestimating the heat. Serrano and jalapeño heat varies from pepper to pepper. If you’re sensitive to spice, remove the seeds and membranes or start with one hot pepper.
Forgetting to wash your hands. After handling hot peppers, wash your hands thoroughly with soap before touching your eyes or face.
Frequently Asked Questions
How long do loaded pickled bell peppers last in the fridge?
They keep for up to 1 month when stored in an airtight jar in the refrigerator with the peppers fully submerged in the brine. For the best crunch, enjoy them within the first two to three weeks.
How long should I wait before eating them?
Wait at least 48 hours. For the boldest flavor, let the peppers pickle for 5 to 7 days, shaking the jar gently each day.
Do I need to boil the brine?
No, and it’s better not to. Heat the brine only until the salt and sugar dissolve completely. This helps the peppers stay crisp.
Can I use large bell peppers instead of mini sweet peppers?
Yes. Use 4 to 5 large bell peppers, remove the stems, seeds, and white ribs, and slice them into rings or strips. A mix of red, yellow, and orange peppers will taste sweetest.
Can I make this recipe less spicy?
Absolutely. Remove the seeds and white membranes from the jalapeños, skip the serrano, and reduce or omit the crushed red pepper flakes. The peppers will still taste bold and flavorful.
Can I make it extra spicy?
Yes. Leave the seeds in, double the crushed red pepper flakes, or add a habanero or a few Thai chilies.
Can I use apple cider vinegar instead of white vinegar?
Yes, as long as it has at least 5% acidity. It will give a slightly fruitier flavor and a warmer-colored brine.
Why are my pickled peppers soft?
Soft peppers are usually caused by old or wilted peppers, boiling the brine, slicing too thin, or leaving pieces above the liquid. Start with firm, fresh peppers and follow the tips above.
Why is my brine cloudy?
Some cloudiness is normal because of the garlic, herbs, and spices. Iodized salt can also cause cloudiness. If the brine smells bad or the peppers feel slimy, discard the jar.
Why did my garlic turn blue or green?
This is a harmless reaction between garlic compounds and the acid in the brine. It does not affect safety or taste.
Is this recipe safe for canning?
This recipe is designed as a refrigerator pickle and has not been developed or tested for shelf-stable water-bath canning. Keep the jar in the refrigerator at all times. If you want to can peppers, use a recipe specifically tested for canning and follow trusted food-safety guidelines.
Can I leave out the sugar?
Yes. The sugar balances the acidity, but you can omit it or use a sugar-free sweetener. The peppers will taste slightly sharper.
Can I use the leftover brine?
You can use a little of the brine in salad dressings, marinades, or cocktails, or reuse it once for a small batch of onions or carrots. Keep it refrigerated.
What can I do with the pickled onions and garlic from the jar?
Eat them! The pickled red onions and garlic slices are delicious on tacos, burgers, salads, sandwiches, and grain bowls.
Final Thoughts
Loaded pickled bell peppers are everything a great pickle should be: crisp, sweet, tangy, garlicky, and packed with bold herbs, spicy peppers, and zesty pickling flavor in every colorful bite. They take only about 20 minutes of hands-on time, use simple ingredients, and give you a gorgeous jar that tastes like it came from a gourmet deli.
Make a batch this weekend, give the flavors a few days to develop, and then start piling them onto charcuterie boards, sandwiches, salads, pizzas, and burgers, or just enjoy them straight from the jar. Once you try them, you’ll want to keep a jar in the fridge at all times.
Did you try this recipe? Leave a comment and rating below, and tell us your favorite way to enjoy these loaded pickled bell peppers. Don’t forget to save this recipe on Pinterest for later!
Print
Loaded Pickled Bell Peppers
Ingredients
Here is everything you need to make about 10 servings of loaded pickled bell peppers:
- 2 lbs mini sweet bell peppers (or 4 to 5 large bell peppers), sliced into rings or strips
- 2 cups white vinegar
- 2 cups water
- 2 tbsp pickling salt or kosher salt
- 1 tbsp sugar
- 6 cloves garlic, thinly sliced
- 2 jalapeños, thinly sliced
- 1 serrano pepper, thinly sliced
- 1 small red onion, thinly sliced
- 1 tsp crushed red pepper flakes
- 1 tsp whole black peppercorns
- 1 tsp mustard seeds
- 1 tsp coriander seeds
- 1 tsp dill seeds (or 2 sprigs fresh dill)
- 1 tsp Italian seasoning
- 1/2 tsp smoked paprika
- 2 bay leaves
Instructions
Follow these simple steps for crisp, flavorful peppers every time.
Wash the bell peppers thoroughly under cool running water. Remove the stems and seeds, then slice the peppers into rings or strips. For mini sweet peppers, rings of about 1/4 inch work beautifully. For large bell peppers, cut them into strips about 1/4 to 1/2 inch wide. Try to keep the pieces uniform so they pickle evenly.
Pack the sliced peppers into a clean glass jar or airtight container. Press them in firmly enough that they stay put, but don’t crush them. A large 64-ounce jar works well, or you can divide the peppers between two quart-size jars.
Tuck the sliced garlic, jalapeños, serrano pepper, and red onion throughout the jar, layering them between the bell peppers. Sprinkle in the black peppercorns, mustard seeds, coriander seeds, dill seeds, Italian seasoning, crushed red pepper flakes, and smoked paprika, then nestle in the bay leaves. Spreading the seasonings as you pack helps every bite taste balanced.
In a saucepan, combine the white vinegar, water, pickling salt, and sugar. Heat over medium heat, stirring until the salt and sugar dissolve completely, about 4 to 5 minutes. Do not let the brine boil. A hot but not boiling brine dissolves the salt and sugar while protecting the crisp texture of the peppers.
Carefully pour the warm brine over the peppers until they are fully submerged. Press down any floating pieces with a clean spoon, and gently tap the jar on the counter to release trapped air bubbles. Everything should be covered by the liquid.
Let the jar cool to room temperature on the counter, then seal tightly with a lid. Cooling first helps avoid condensation inside the jar.
Refrigerate the peppers for at least 48 hours before serving. For the boldest flavor, let them pickle for 5 to 7 days. The longer they sit, the more the garlic, spices, and heat infuse into the peppers.
Shake the jar gently once a day to distribute the seasonings evenly. This simple habit helps every pepper absorb flavor from the brine.