

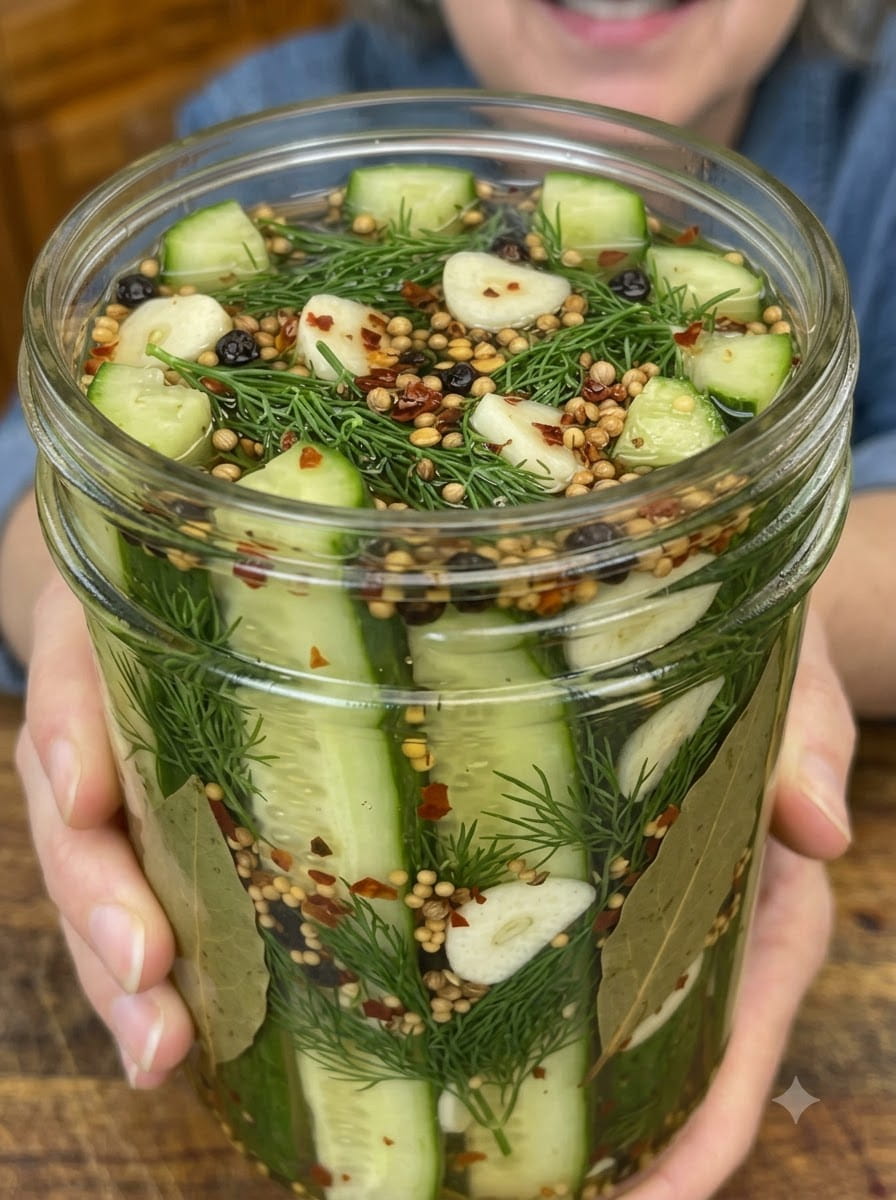
Pickled Cucumber Spears: The Crisp, Garlicky Dill Pickles You’ll Never Buy From a Store Again 🥒🧄🌿✨
There’s a reason homemade dill pickles have such a devoted following: nothing from a jar on a grocery store shelf compares to the crisp, garlicky, herb-packed crunch of pickles made in your own kitchen. These Pickled Cucumber Spears are cool, crisp, and bursting with garlicky dill flavor and bold pickling spices in every single bite. One taste of these homemade spears — snappy, tangy, deeply garlicky, with just a whisper of heat from crushed red pepper flakes — and you’ll understand exactly why so many people swear off store-bought pickles for good.
What makes this recipe so satisfying is how simple it is. There’s no complicated canning process, no specialized equipment, and no need to be an experienced home cook. All it takes is a bag of pickling cucumbers, a handful of pantry staples, some fresh garlic and dill, and a little patience while the jars work their magic in the refrigerator. In under half an hour of hands-on time, you can have a batch of pickles that puts anything from a store shelf to shame.
In this guide, we’ll cover everything you need to know to make the crispest, most flavorful pickled cucumber spears possible: a full ingredient breakdown, step-by-step instructions, expert tips for guaranteeing crunch, flavor variations to try, the best ways to serve your pickles, storage guidance, and answers to the most frequently asked questions about homemade dill pickles. Whether you’re pickling for the first time or you’re a seasoned home cook looking for a reliable go-to recipe, this one deserves a permanent spot in your refrigerator.
Why Homemade Pickled Cucumber Spears Beat Store-Bought Every Time
The crunch is unbeatable. Store-bought pickles are often processed and shelf-stabilized in ways that soften their texture over time. Because this is a fresh refrigerator pickle made with quality cucumbers, you get that satisfying, audible crunch in every single bite.
You control the garlic and dill. Many mass-produced pickles use dried, powdered versions of garlic and dill, or barely any at all. This recipe uses fresh sliced garlic and fresh dill sprigs layered generously throughout the jar, giving you a bold, aromatic flavor that powdered seasonings simply can’t replicate.
You control the flavor balance. Store-bought pickles can be inconsistent — sometimes too salty, sometimes too sweet, sometimes lacking any real spice complexity. When you make your own, you decide exactly how much heat, tang, and sweetness goes into every jar.
No preservatives or artificial ingredients. This recipe is made entirely from real, recognizable ingredients: vinegar, water, sugar, salt, garlic, dill, and whole spices. There’s nothing artificial keeping these pickles crunchy or flavorful — it’s all technique and quality ingredients.
It’s a fraction of the cost. A couple of pounds of pickling cucumbers and a handful of pantry spices will yield a much larger, better-tasting batch of pickles than you’d get from an equivalent number of store-bought jars, making this an easy way to save money while upgrading your flavor.
The Secret to Crisp, Crunchy Pickles
If you’ve ever made pickles at home before and ended up with a soft, underwhelming result, you’re not alone — cucumber texture is the single biggest challenge in any pickling recipe. Fortunately, there are a few key factors this recipe gets right that make all the difference.
First, using pickling cucumbers rather than standard slicing cucumbers is essential. Pickling cucumbers (often labeled Kirby cucumbers) have thinner skins, fewer watery seeds, and denser flesh than the cucumbers typically used for salads, which makes them far better suited to absorbing brine while holding onto their crunch.
Second, trimming a thin slice from both ends of each cucumber before cutting them into spears is a small but important step. The blossom end of a cucumber in particular contains enzymes that can contribute to softening during the pickling process, so removing it helps preserve that crisp texture over the following weeks.
Finally, this recipe keeps things simple by skipping any cooking of the cucumbers themselves — they go into the jar raw, and only the brine is heated. Pouring a properly cooled brine over raw cucumber spears, rather than blanching the cucumbers first, is the best way to maintain maximum crunch in a quick refrigerator pickle like this one.
Ingredients You’ll Need
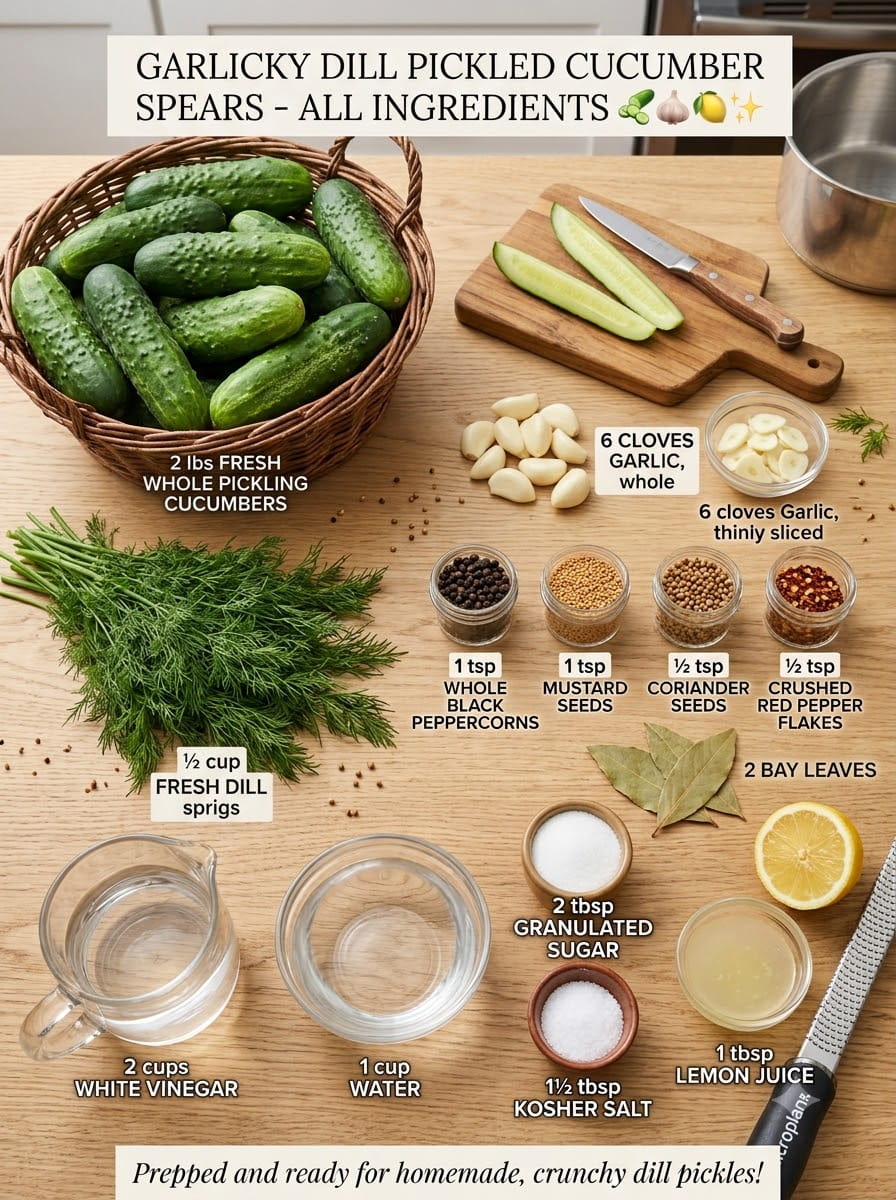
- 2 lbs pickling cucumbers
- 2 cups white vinegar
- 1 cup water
- 2 tablespoons granulated sugar
- 1½ tablespoons kosher salt
- 6 cloves garlic, thinly sliced
- ½ cup fresh dill sprigs
- 1 teaspoon whole black peppercorns
- 1 teaspoon mustard seeds
- ½ teaspoon coriander seeds
- ½ teaspoon crushed red pepper flakes
- 2 bay leaves
- 1 tablespoon fresh lemon juice
A quick note on why these ingredients matter: white vinegar provides a clean, sharp acidity that’s classic in dill pickle recipes and lets the garlic and dill flavors take center stage. Kosher salt is preferred over table salt because it dissolves cleanly without any additives that could cloud the brine. A modest amount of granulated sugar softens the sharp edge of the vinegar just slightly without making these taste like a sweet pickle — this is very much a savory, garlicky, dill-forward recipe. And the combination of whole black peppercorns, mustard seeds, coriander seeds, and crushed red pepper flakes builds a warm, slightly spicy background flavor that classic deli-style dill pickles are known for.
Step-by-Step Directions
Step 1: Wash and Trim the Cucumbers
Wash the cucumbers thoroughly and trim a thin slice from both ends of each one. Trimming the ends, especially the blossom end, helps remove enzymes that can lead to softer pickles over time.
Step 2: Cut Into Spears
Cut each cucumber lengthwise into even spears. Aim for spears of a similar size and thickness so they pickle at a consistent rate — spears that are too thick may take longer to develop flavor all the way through, while inconsistent sizes can lead to some pieces being more flavorful than others.
Step 3: Pack the Jars
Pack the cucumber spears tightly into clean glass jars, layering them with the sliced garlic and fresh dill sprigs as you go. Packing the spears snugly (without crushing them) helps keep them submerged in the brine and ensures the garlic and dill are evenly distributed throughout the jar.
Step 4: Combine the Brine Ingredients
In a medium saucepan, combine the white vinegar, water, sugar, kosher salt, black peppercorns, mustard seeds, coriander seeds, crushed red pepper flakes, bay leaves, and lemon juice.
Step 5: Simmer the Brine
Bring the pickling brine to a gentle simmer over medium heat, stirring until the sugar and salt have completely dissolved. The brine is ready once it looks clear (aside from the visible spices) and no longer feels gritty when tested with a spoon.
Step 6: Cool Slightly
Remove the saucepan from the heat and allow the brine to cool slightly before pouring. This step is important for texture — pouring a rapidly boiling brine directly over raw cucumber spears can start to soften them too much before they even reach the refrigerator.
Step 7: Pour the Brine Over the Cucumbers
Carefully pour the warm brine over the cucumber spears until they are completely submerged. Make sure the liquid reaches every spear, including any tucked toward the bottom or sides of the jar.
Step 8: Release Air Bubbles
Gently press the cucumbers down with a clean spoon to release any trapped air bubbles and ensure the garlic, dill, and spices are evenly distributed throughout the jar. This step also helps confirm that every spear stays fully submerged in the brine.
Step 9: Cool and Seal
Allow the jars to cool to room temperature before sealing them tightly with their lids. Sealing while the jars are still warm can trap condensation inside, which isn’t ideal for a refrigerator pickle meant to last several weeks.
Step 10: Refrigerate and Wait
Refrigerate for at least 24 hours before serving. For the best crisp, garlicky dill flavor, let the cucumber spears pickle for 3 to 5 days. As the days pass, the vinegar, garlic, and dill fully penetrate the cucumbers, resulting in that classic deli-style pickle flavor throughout every spear.
Tips for the Crispiest Pickled Cucumber Spears
Always use pickling cucumbers. Standard slicing cucumbers have a higher water content and thicker skin that doesn’t hold up nearly as well in brine. Look for small, firm pickling or Kirby cucumbers at the grocery store or farmers market for the best results.
Choose the freshest cucumbers you can find. Cucumbers that have been sitting in the refrigerator for a while before pickling tend to produce softer results. If possible, pickle your cucumbers within a day or two of purchasing them.
Don’t skip trimming the ends. This small step genuinely makes a difference in preventing mushy pickles, especially over the several weeks these spears will be stored.
Let the brine cool slightly before pouring. As mentioned above, this simple step helps protect the crunch of the cucumber spears by preventing them from being shocked by extremely hot liquid.
Pack the jars tightly. Snugly packed cucumber spears are less likely to float above the brine line, which helps ensure even pickling and reduces the risk of spoilage on any exposed pieces.
Use fresh dill and garlic. Fresh dill sprigs and fresh sliced garlic provide a much more vibrant, aromatic flavor than dried substitutes. This is where a lot of the signature “homemade” flavor in this recipe comes from.
Be patient before digging in. While these are safe to eat after 24 hours, the 3-to-5-day mark is when the garlicky dill flavor truly develops throughout the whole spear, not just the surface.
Always use a clean utensil. Every time you reach into the jar, use a clean fork or tongs. This simple habit helps your pickles stay fresh and crisp for their entire storage window.
Flavor Variations to Try
This recipe is a fantastic base for experimenting with different pickle styles. Here are some ideas:
- Extra garlicky: Add a few whole peeled garlic cloves directly into the jar in addition to the sliced garlic for an even bolder, more pungent bite.
- Spicy dill pickles: Increase the crushed red pepper flakes, or add a few slices of fresh jalapeño to the jar for a spicier version.
- Sweet and tangy twist: Increase the sugar slightly for a bread-and-butter style pickle while keeping the same garlicky dill base.
- Extra herby: Add a sprig of fresh tarragon or a few celery seeds to the brine for additional herbal complexity.
- Smoky flavor: Add a small pinch of smoked paprika to the brine for a subtle smoky background note.
- Half-sour style: Reduce the vinegar slightly and increase the water for a milder, less acidic pickle reminiscent of classic half-sour deli pickles.
How to Serve Pickled Cucumber Spears
One of the best things about homemade pickled cucumber spears is just how many ways there are to enjoy them. Here are some of the most popular serving ideas:
- Straight from the jar as a crunchy, refreshing snack
- Served alongside burgers, sandwiches, and wraps in place of store-bought pickles
- Piled onto barbecue plates and grilled meats for a tangy contrast
- Arranged on charcuterie boards for color, crunch, and acidity
- Chopped and added to salads, potato salad, or egg salad for extra texture and tang
- Served as part of a classic deli-style platter alongside cured meats and cheese
- Paired with a sandwich or burger the same way you would a classic dill spear from the deli counter
Because these pickles carry that familiar, beloved garlicky dill flavor, they fit seamlessly into almost any meal where you’d normally reach for a jar of store-bought pickles — just with noticeably better crunch and flavor.
Storage Information
Store the Pickled Cucumber Spears in airtight glass jars in the refrigerator for up to 3 to 4 weeks. Keep the cucumbers fully submerged in the brine at all times, and always use a clean utensil when serving to help prevent introducing bacteria that could shorten the shelf life of your pickles.
Because this is a refrigerator pickle rather than a shelf-stable canned product, it’s essential to keep the jars chilled at all times rather than storing them at room temperature. Give the pickles a quick visual and smell check before eating — if you notice any off odor, unusual cloudiness beyond the visible spices, or any sign of mold, it’s best to discard that batch.
Recipe Quick Facts
- Prep Time: 15 minutes
- Cook Time: 5 minutes
- Total Time: 20 minutes, plus chilling time
- Servings: 10
- Calories: Approximately 30 per serving
Frequently Asked Questions
Do I need to use pickling cucumbers, or can I use regular cucumbers? Pickling cucumbers (often labeled Kirby cucumbers) are strongly recommended for the best texture. They have thinner skins, denser flesh, and fewer watery seeds than standard slicing cucumbers, which helps them stay crisp throughout the pickling process rather than turning soft or watery.
Why do I need to trim the ends of the cucumbers? Trimming a thin slice from both ends, especially the blossom end, helps remove enzymes that can contribute to softening over the course of pickling. This small step plays a real role in keeping your pickles crisp for the full 3-to-4-week storage window.
Do I need to can these pickles to make them shelf-stable? No. This recipe is a refrigerator (quick) pickle, not a shelf-stable canned pickle. There’s no water bath processing involved, which means the jars must stay refrigerated at all times and be enjoyed within the recommended 3-to-4-week window.
How long do I need to wait before eating these pickles? They’re technically safe to eat after 24 hours in the refrigerator, but the flavor really develops between days 3 and 5, once the garlic and dill have had time to fully penetrate the cucumber spears.
Why did my pickles turn out soft instead of crunchy? Soft pickles are usually the result of using standard slicing cucumbers instead of pickling cucumbers, skipping the step of trimming the ends, using cucumbers that weren’t fresh to begin with, or pouring brine that was too hot directly over the cucumbers.
Can I reuse the brine for a new batch of cucumbers? It’s best to make a fresh batch of brine each time you pickle a new batch of cucumbers. Reused brine has already lost some of its salt and sugar balance and picked up extra moisture from the previous batch, which increases the risk of spoilage.
Can I make this recipe spicier? Absolutely. Increasing the crushed red pepper flakes or adding a few slices of fresh jalapeño or a dried chile to the jar are both easy ways to turn these into a spicier, more fiery version of the classic garlicky dill spear.
Final Thoughts
Pickled Cucumber Spears prove that some of the best condiments come from the simplest ingredients. With crisp pickling cucumbers, fresh garlic, fragrant dill, and a well-balanced blend of pickling spices, this recipe delivers everything you love about a classic deli-style pickle — crunch, tang, garlic, and just the right amount of spice — all made right in your own kitchen. Once you taste homemade pickles done right, with that satisfying snap and bold, garlicky dill flavor in every bite, it’s genuinely hard to go back to anything from a store shelf.
Give this recipe a try, adjust the garlic and spice level to your taste, and get ready to keep a jar of these in your refrigerator at all times.
Print
Pickled Cucumber Spears
Ingredients
- 2 lbs pickling cucumbers
- 2 cups white vinegar
- 1 cup water
- 2 tablespoons granulated sugar
- 1½ tablespoons kosher salt
- 6 cloves garlic, thinly sliced
- ½ cup fresh dill sprigs
- 1 teaspoon whole black peppercorns
- 1 teaspoon mustard seeds
- ½ teaspoon coriander seeds
- ½ teaspoon crushed red pepper flakes
- 2 bay leaves
- 1 tablespoon fresh lemon juice
A quick note on why these ingredients matter: white vinegar provides a clean, sharp acidity that’s classic in dill pickle recipes and lets the garlic and dill flavors take center stage. Kosher salt is preferred over table salt because it dissolves cleanly without any additives that could cloud the brine. A modest amount of granulated sugar softens the sharp edge of the vinegar just slightly without making these taste like a sweet pickle — this is very much a savory, garlicky, dill-forward recipe. And the combination of whole black peppercorns, mustard seeds, coriander seeds, and crushed red pepper flakes builds a warm, slightly spicy background flavor that classic deli-style dill pickles are known for.
Instructions
Wash the cucumbers thoroughly and trim a thin slice from both ends of each one. Trimming the ends, especially the blossom end, helps remove enzymes that can lead to softer pickles over time.
Cut each cucumber lengthwise into even spears. Aim for spears of a similar size and thickness so they pickle at a consistent rate — spears that are too thick may take longer to develop flavor all the way through, while inconsistent sizes can lead to some pieces being more flavorful than others.
Pack the cucumber spears tightly into clean glass jars, layering them with the sliced garlic and fresh dill sprigs as you go. Packing the spears snugly (without crushing them) helps keep them submerged in the brine and ensures the garlic and dill are evenly distributed throughout the jar.
In a medium saucepan, combine the white vinegar, water, sugar, kosher salt, black peppercorns, mustard seeds, coriander seeds, crushed red pepper flakes, bay leaves, and lemon juice.
Bring the pickling brine to a gentle simmer over medium heat, stirring until the sugar and salt have completely dissolved. The brine is ready once it looks clear (aside from the visible spices) and no longer feels gritty when tested with a spoon.
Remove the saucepan from the heat and allow the brine to cool slightly before pouring. This step is important for texture — pouring a rapidly boiling brine directly over raw cucumber spears can start to soften them too much before they even reach the refrigerator.
Carefully pour the warm brine over the cucumber spears until they are completely submerged. Make sure the liquid reaches every spear, including any tucked toward the bottom or sides of the jar.
Gently press the cucumbers down with a clean spoon to release any trapped air bubbles and ensure the garlic, dill, and spices are evenly distributed throughout the jar. This step also helps confirm that every spear stays fully submerged in the brine.
Allow the jars to cool to room temperature before sealing them tightly with their lids. Sealing while the jars are still warm can trap condensation inside, which isn’t ideal for a refrigerator pickle meant to last several weeks.
Refrigerate for at least 24 hours before serving. For the best crisp, garlicky dill flavor, let the cucumber spears pickle for 3 to 5 days. As the days pass, the vinegar, garlic, and dill fully penetrate the cucumbers, resulting in that classic deli-style pickle flavor throughout every spear.






