

Pickled Red Onions: The Quick, Tangy Condiment That Belongs on Everything
If there’s one homemade condiment that deserves a permanent spot in your refrigerator, it’s this one. These Pickled Red Onions are crisp, tangy, slightly sweet, and packed with garlic, warm spices, and a subtle chili kick — the ultimate quick homemade condiment that takes almost no effort but delivers an outsized flavor payoff. One bite of these vibrant, magenta-hued onions and you’ll understand why so many home cooks keep a jar going at all times, ready to top everything from tacos to avocado toast at a moment’s notice.
What makes pickled red onions so beloved isn’t just their flavor — it’s how ridiculously easy they are to make and how much they elevate even the simplest dishes. A basic taco, a plain burger, or a simple bowl of rice and beans instantly feels more exciting with a handful of these bright, tangy onions piled on top. They add crunch, acidity, a touch of sweetness, and just enough heat to wake up your taste buds, all while cutting through richness and balancing heavier dishes.
In this guide, we’ll cover everything you need to know to make the perfect batch of pickled red onions at home: a full ingredient breakdown, step-by-step instructions, tips for the best texture and color, flavor variations to try, the many ways to serve them, storage guidance, and answers to the most frequently asked questions about quick-pickling onions. Whether you’ve never pickled anything before or you’re a seasoned home cook looking for your go-to recipe, this one is about to become an everyday staple.
Why Pickled Red Onions Deserve a Permanent Spot in Your Fridge
They’re incredibly fast to make. Unlike many pickling projects that require hours of prep or cooking, this recipe comes together in just 15 minutes of active time. Slice the onions, make a quick brine, pour it over, and let the refrigerator do the rest.
They transform ordinary meals. A sprinkle of these tangy, crisp onions can take a simple taco, sandwich, or salad from basic to genuinely craveable. Their bright acidity and subtle sweetness make them one of the most versatile flavor boosters you can keep on hand.
They mellow the sharpness of raw onion. Raw red onion can be overpoweringly sharp and pungent, but the pickling process softens that intensity while preserving the onion’s satisfying crunch, resulting in a milder, more balanced bite that’s easier to enjoy in larger quantities.
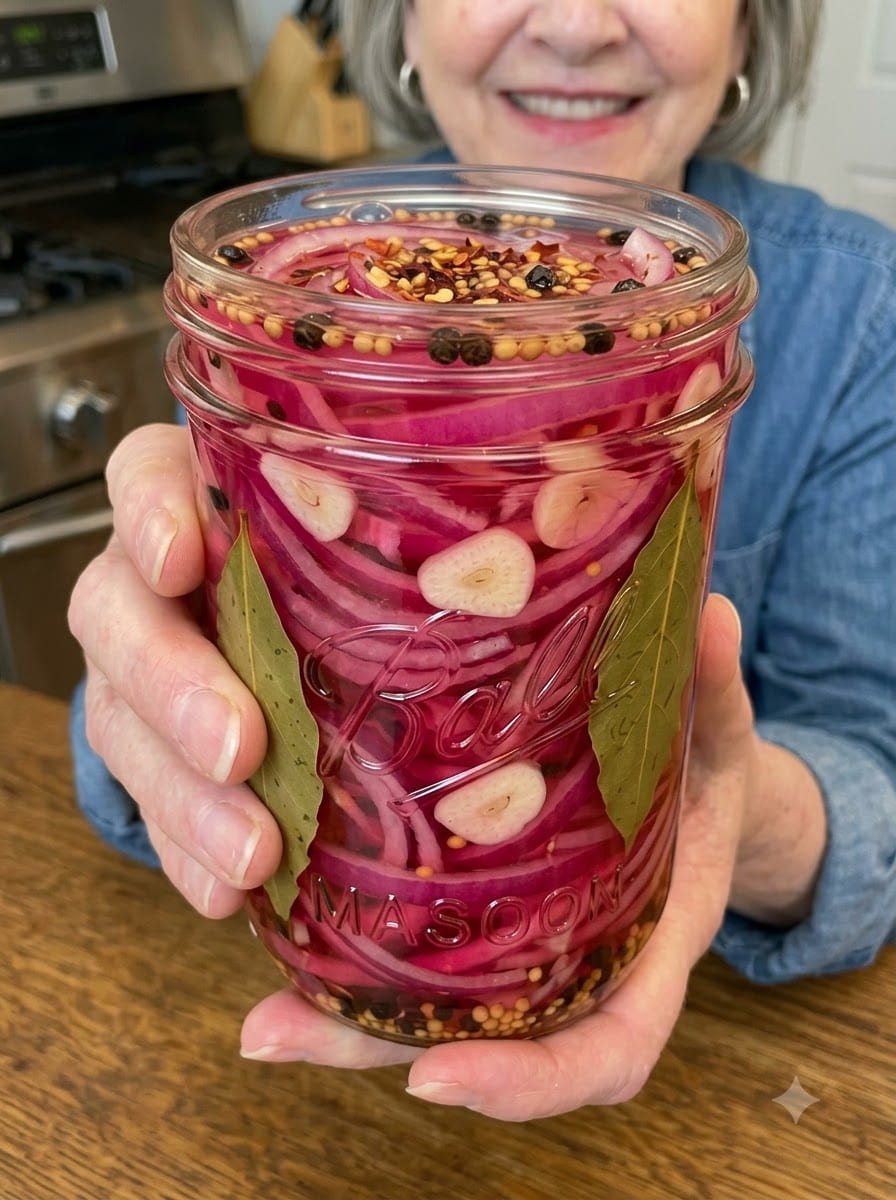
They’re strikingly beautiful. As the onions sit in the vinegar brine, they take on a vivid, almost neon-pink hue that makes any dish they’re added to instantly more vibrant and appetizing.
They’re low in calories and big in flavor. At approximately 25 calories per serving, pickled red onions offer a huge amount of flavor impact without adding meaningful calories, making them an easy way to add excitement to a meal without derailing any health goals.
They only require a handful of pantry ingredients. This is a recipe built on staples most people already have on hand — vinegar, sugar, salt, garlic, and a few whole spices — which means you can whip up a batch any time the craving strikes.
The Secret to Vibrant, Perfectly Balanced Pickled Onions
The magic of pickled red onions lies in a simple but well-calibrated brine. Apple cider vinegar is the backbone of this recipe, chosen for its slightly fruity, rounded acidity that’s a touch gentler than white vinegar, allowing the natural sweetness of the red onion to still come through. A modest amount of granulated sugar balances that tang without making the onions taste like a sweet pickle, while kosher salt rounds out the seasoning and helps draw out some of the onion’s natural sharpness.
Fresh garlic slices infuse the brine with warmth and depth, while whole black peppercorns and mustard seeds add subtle background spice without overwhelming the onion’s natural flavor. A pinch of crushed red pepper flakes brings a gentle, lingering heat that builds slowly rather than hitting all at once, and a splash of fresh lime juice at the end adds an extra layer of brightness that pairs perfectly with the onion’s naturally vibrant color.
One of the most satisfying parts of making pickled red onions at home is watching the color transform in real time. As soon as the hot brine hits the onions, they begin shifting from a deep purple-red to a striking, almost fluorescent pink — a visual cue that the pickling process is well underway.
Ingredients You’ll Need
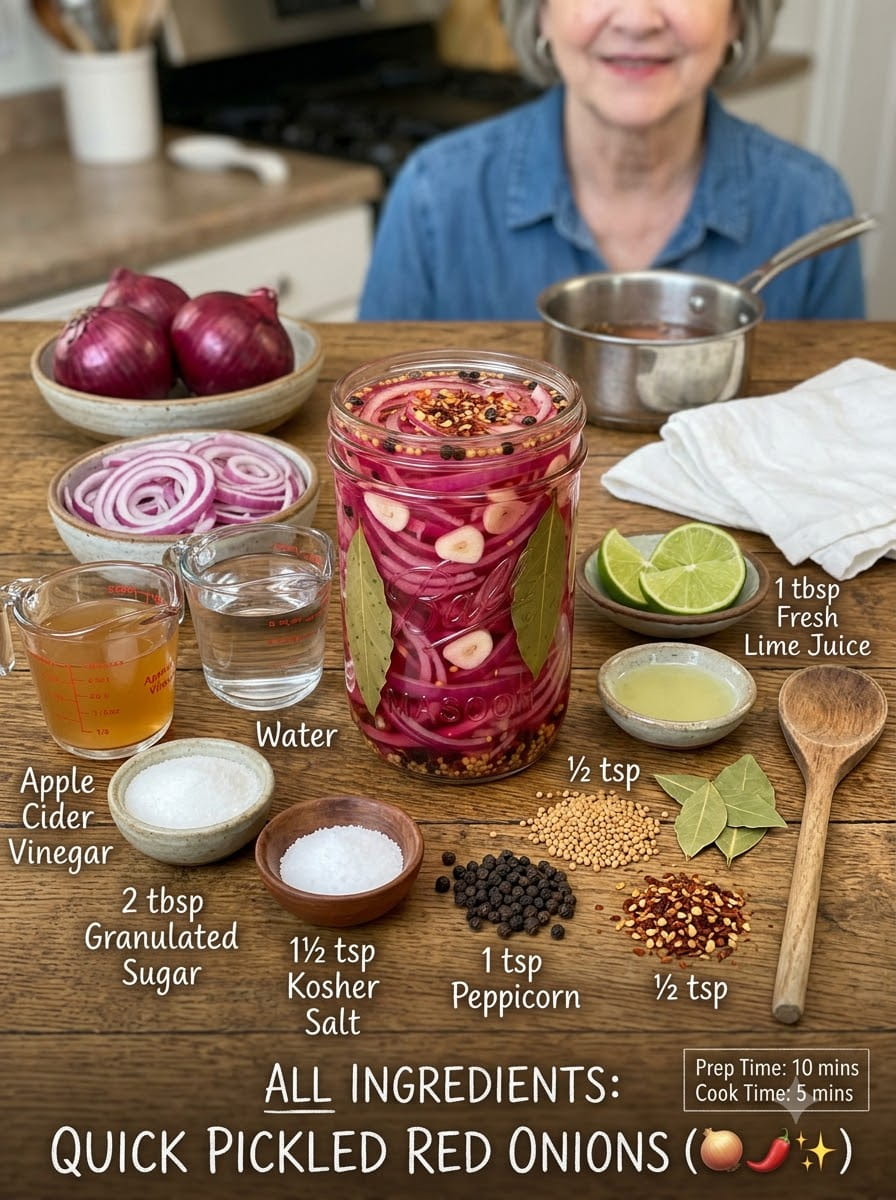
- 2 large red onions, thinly sliced
- 1 cup apple cider vinegar
- ½ cup water
- 2 tablespoons granulated sugar
- 1½ teaspoons kosher salt
- 2 cloves garlic, thinly sliced
- 1 teaspoon whole black peppercorns
- ½ teaspoon mustard seeds
- ½ teaspoon crushed red pepper flakes
- 1 bay leaf
- 1 tablespoon fresh lime juice
A quick note on ingredient choices: apple cider vinegar is preferred over white vinegar here for its slightly fruitier, more rounded acidity that complements the onion’s natural sweetness rather than overpowering it. If you prefer a sharper, more classic tang, white vinegar or a mix of the two can be substituted. Kosher salt dissolves cleanly without additives that could cloud the brine, and fresh lime juice at the end adds a bright, citrusy finish that pairs especially well with the Mexican and Tex-Mex dishes these onions are so often served alongside.
Step-by-Step Directions
Step 1: Slice the Onions
Peel the red onions and slice them into thin, even rings or half-moons. Slicing the onions as thinly and evenly as possible ensures they pickle quickly and consistently, and it also gives you that classic, delicate texture that’s easy to pile onto tacos, sandwiches, and salads.
Step 2: Pack the Jar
Pack the sliced onions tightly into a clean glass jar, leaving a little space at the top. Packing them snugly helps the onions stay submerged in the brine once it’s poured over, and it also allows you to fit a generous amount of onion into a single jar.
Step 3: Combine the Brine Ingredients
In a small saucepan, combine the apple cider vinegar, water, granulated sugar, kosher salt, garlic, black peppercorns, mustard seeds, crushed red pepper flakes, bay leaf, and fresh lime juice.
Step 4: Simmer the Brine
Bring the mixture to a gentle simmer over medium heat, stirring until the sugar and salt have completely dissolved. You’ll know the brine is ready once it looks clear (aside from the visible garlic and spices) and no longer feels gritty when tested with a spoon.
Step 5: Pour Over the Onions
Carefully pour the hot pickling liquid over the onions until they are completely submerged. Unlike some pickle recipes that call for cooling the brine first, pouring it hot over thinly sliced onions is intentional here — it helps soften the onions just slightly while jump-starting that vivid pink color transformation.
Step 6: Release Air Bubbles
Press the onions gently with a clean spoon to release any trapped air bubbles and ensure every slice is covered with the brine. This step helps guarantee even pickling throughout the jar.
Step 7: Cool Uncovered
Allow the jar to cool uncovered to room temperature. Leaving the jar uncovered while it cools helps prevent excess condensation from building up inside once it’s sealed.
Step 8: Seal and Refrigerate
Seal tightly and refrigerate for at least 1 hour before serving. For deeper flavor and a brighter color, refrigerate for 24 hours. While these onions are ready to eat surprisingly quickly, letting them sit longer allows the flavors to fully develop and the color to reach its most vibrant point.
Tips for the Best Pickled Red Onions
Slice as thin and even as possible. Thin, uniform slices not only look more appealing in the jar, they also pickle faster and more evenly, giving you that perfect balance of crisp texture and tangy flavor in every bite.
Use a mandoline for consistent slices, if you have one. A mandoline slicer can help achieve paper-thin, uniform onion slices much more quickly and consistently than slicing by hand with a knife.
Pour the brine while it’s still hot. Unlike recipes that call for cooling the brine first, pouring it hot over the onions here helps kick-start the pickling process and encourages that signature vibrant pink color to develop more quickly.
Don’t skip the fresh garlic and lime juice. These two ingredients add layers of flavor that elevate this recipe beyond a basic vinegar-and-onion pickle, giving it a more complex, well-rounded taste.
Keep the onions fully submerged. Any slices poking above the brine line are more likely to dry out or turn an unappealing color. Press them down well and make sure the liquid fully covers the onions before sealing the jar.
Be patient for the best color and flavor. While these onions are technically ready after just 1 hour, letting them sit for a full 24 hours results in a deeper flavor and a more vivid, appealing color throughout every slice.
Always use a clean utensil when serving. This simple habit helps extend the shelf life of your pickled onions and keeps them tasting fresh throughout their full storage window.
Flavor Variations to Try
This recipe is a fantastic base for experimenting with different flavor profiles:
- Extra spicy: Add a few slices of fresh jalapeño or increase the crushed red pepper flakes for a bolder, spicier version.
- Citrus twist: Add a splash of fresh orange juice along with the lime juice for a brighter, slightly sweeter citrus note, especially delicious with Mexican-inspired dishes.
- Herb-infused: Add a sprig of fresh oregano or a few coriander seeds to the brine for additional aromatic complexity.
- Sweeter version: Increase the granulated sugar slightly for a milder, sweeter onion that pairs especially well with rich or fatty dishes.
- White wine vinegar swap: Substitute white wine vinegar for a lighter, more delicate tang if you prefer a milder pickled onion.
- Beet-pickled twist: Add a slice of raw beet to the jar for an even deeper, more vibrant color and a subtle earthy sweetness.
How to Serve Pickled Red Onions
Few condiments are as versatile as pickled red onions. Here are just a few of the countless ways to enjoy them:
- Piled onto tacos for a classic, tangy topping
- Layered onto burgers and sandwiches for extra crunch and acidity
- Tossed into salads for a bright, tangy contrast to leafy greens
- Served alongside grilled meats and barbecue for a palate-cleansing bite
- Piled onto avocado toast for an easy, flavorful upgrade
- Added to grain bowls and rice bowls for extra texture and tang
- Spooned over fried or scrambled eggs for a quick, flavorful breakfast boost
- Layered into wraps for added crunch and brightness
- Scattered over nachos for a tangy contrast to rich, cheesy toppings
- Arranged on charcuterie boards for color, acidity, and visual appeal
Because their flavor is bright, tangy, and just slightly sweet, pickled red onions pair beautifully with rich, fatty, or heavily seasoned dishes, helping to balance and lighten nearly any meal they’re added to.
Storage Information
Store the Pickled Red Onions in an airtight glass jar in the refrigerator for up to 3 weeks. Keep the onions fully submerged in the pickling liquid at all times, and always use a clean utensil when serving to help prevent introducing bacteria that could shorten their shelf life.
Because this is a refrigerator pickle rather than a shelf-stable canned product, it’s important to keep the jar chilled at all times rather than storing it at room temperature. Give the onions a quick visual check before eating — if you notice any off smell, unusual cloudiness beyond the visible spices, or signs of mold, it’s best to discard that batch.
Recipe Quick Facts
- Prep Time: 10 minutes
- Cook Time: 5 minutes
- Total Time: 15 minutes, plus chilling time
- Servings: 12
- Calories: Approximately 25 per serving
Frequently Asked Questions
How long do I actually need to wait before eating pickled red onions? These onions are ready to eat after just 1 hour of refrigeration, making them one of the quickest pickling projects you can do. That said, refrigerating them for a full 24 hours results in deeper flavor and a more vivid pink color throughout every slice.
Why did my onions turn such a bright pink color? This vivid color transformation is a natural reaction between the red onion’s pigments and the acidity of the vinegar brine. It’s completely normal and is actually a good sign that the pickling process is working as expected.
Can I use a different type of onion? Red onions are traditional for this recipe because of their color transformation and slightly sweeter flavor compared to yellow or white onions, but you can substitute other onion varieties if needed. Keep in mind that the signature bright pink color is specific to red onions and won’t develop the same way with other types.
Do I need to cook the onions before pickling them? No. This is a quick refrigerator pickle, and the onions are used raw — they’re never cooked, only briefly softened by the hot brine poured over them. This preserves their satisfying crunch while allowing them to absorb plenty of tangy flavor.
Can I make this recipe less spicy? Yes. Simply reduce or omit the crushed red pepper flakes for a milder version. The onions will still have plenty of tang and depth of flavor from the vinegar, garlic, and warm spices even without the heat.
How long do pickled red onions last in the refrigerator? For the best quality and flavor, plan to enjoy them within 3 weeks of making them, always keeping them fully submerged in the brine and stored in the refrigerator.
Can I reuse the pickling liquid for a new batch of onions? It’s best to make a fresh batch of brine each time. The leftover liquid has already lost some of its salt and sugar balance and picked up extra moisture from the onions, which increases the risk of spoilage if reused for a new batch.
Final Thoughts
Pickled Red Onions are proof that some of the best homemade condiments require almost no effort at all. With just a handful of pantry staples, 15 minutes of hands-on time, and a little patience while they chill in the refrigerator, you get a jar of crisp, tangy, slightly sweet onions that instantly elevate nearly anything you’re cooking. From tacos and burgers to avocado toast and grain bowls, these onions are one of the most versatile, high-impact condiments you can keep stocked at all times.
Give this recipe a try, and don’t be surprised if this becomes the one jar in your refrigerator you can never let run empty.
Print
Pickled Red Onions
Ingredients
- 2 large red onions, thinly sliced
- 1 cup apple cider vinegar
- ½ cup water
- 2 tablespoons granulated sugar
- 1½ teaspoons kosher salt
- 2 cloves garlic, thinly sliced
- 1 teaspoon whole black peppercorns
- ½ teaspoon mustard seeds
- ½ teaspoon crushed red pepper flakes
- 1 bay leaf
- 1 tablespoon fresh lime juice
A quick note on ingredient choices: apple cider vinegar is preferred over white vinegar here for its slightly fruitier, more rounded acidity that complements the onion’s natural sweetness rather than overpowering it. If you prefer a sharper, more classic tang, white vinegar or a mix of the two can be substituted. Kosher salt dissolves cleanly without additives that could cloud the brine, and fresh lime juice at the end adds a bright, citrusy finish that pairs especially well with the Mexican and Tex-Mex dishes these onions are so often served alongside.
Instructions
Peel the red onions and slice them into thin, even rings or half-moons. Slicing the onions as thinly and evenly as possible ensures they pickle quickly and consistently, and it also gives you that classic, delicate texture that’s easy to pile onto tacos, sandwiches, and salads.
Pack the sliced onions tightly into a clean glass jar, leaving a little space at the top. Packing them snugly helps the onions stay submerged in the brine once it’s poured over, and it also allows you to fit a generous amount of onion into a single jar.
In a small saucepan, combine the apple cider vinegar, water, granulated sugar, kosher salt, garlic, black peppercorns, mustard seeds, crushed red pepper flakes, bay leaf, and fresh lime juice.
Bring the mixture to a gentle simmer over medium heat, stirring until the sugar and salt have completely dissolved. You’ll know the brine is ready once it looks clear (aside from the visible garlic and spices) and no longer feels gritty when tested with a spoon.
Carefully pour the hot pickling liquid over the onions until they are completely submerged. Unlike some pickle recipes that call for cooling the brine first, pouring it hot over thinly sliced onions is intentional here — it helps soften the onions just slightly while jump-starting that vivid pink color transformation.
Press the onions gently with a clean spoon to release any trapped air bubbles and ensure every slice is covered with the brine. This step helps guarantee even pickling throughout the jar.
Allow the jar to cool uncovered to room temperature. Leaving the jar uncovered while it cools helps prevent excess condensation from building up inside once it’s sealed.
Seal tightly and refrigerate for at least 1 hour before serving. For deeper flavor and a brighter color, refrigerate for 24 hours. While these onions are ready to eat surprisingly quickly, letting them sit longer allows the flavors to fully develop and the color to reach its most vibrant point.






