Sourdough Mini Baguettes: Crispy Homemade French Bread with a Soft, Airy Crumb
There is something special about homemade sourdough baguettes fresh from the oven. The crackling golden crust, the soft and airy interior, and the subtle tangy flavor make these Sourdough Mini Baguettes a delicious addition to almost any meal. Made with just four basic ingredients—bread flour, water, active sourdough starter, and salt—these rustic little loaves deliver the wonderful taste and texture of artisan bread right from your own kitchen.
Unlike traditional baguettes made with commercial yeast, sourdough mini baguettes rely on a lively sourdough starter and natural fermentation to develop their flavor. This slower process gives the dough time to become more aromatic while building the structure needed for an open crumb and crisp crust. Although the recipe requires patience, the hands-on work is manageable, making it a rewarding project for home bakers who enjoy fresh bread.
These mini baguettes are perfect for breakfast toast, homemade sandwiches, cheese boards, and family dinners. Serve them with olive oil and herbs, use them to make crispy garlic bread, or tear off a piece to enjoy with a bowl of warm soup. Their smaller size also makes them convenient to portion, serve, and freeze.
If you have an active sourdough starter and want to make beautiful bakery-style bread at home, this Sourdough Mini Baguettes recipe is an excellent place to begin. Below, you will find the complete recipe, detailed shaping and fermentation instructions, baking tips, serving ideas, troubleshooting advice, and answers to common sourdough questions.
Why You Will Love These Homemade Sourdough Mini Baguettes
Homemade baguettes may look impressive, but the ingredients and basic method are surprisingly simple. Once you understand fermentation, shaping, and steam baking, you can produce delicious bread with a crisp crust and a flavorful interior.
1. Only Four Basic Ingredients
This recipe uses bread flour, water, active sourdough starter, and salt. You do not need commercial yeast, sugar, milk, butter, or oil.
Each ingredient has an important purpose. Bread flour provides the gluten-forming proteins needed for structure, water hydrates the flour, sourdough starter supplies natural leavening and flavor, and salt enhances taste while helping regulate fermentation.
Because the ingredient list is short, the quality and handling of each ingredient matter. Using a healthy starter and measuring accurately will help you achieve more consistent results.
2. Naturally Fermented Sourdough Flavor
The sourdough starter gives these baguettes their distinctive flavor. During fermentation, wild yeast and lactic acid bacteria transform the dough, creating aromatic compounds and a gentle tang.
The flavor can vary depending on your starter, fermentation temperature, feeding schedule, and the length of fermentation. A longer fermentation may develop a more pronounced flavor, although over-fermenting can weaken the dough.
The goal is to allow the dough to become airy and sufficiently developed while retaining enough strength for shaping.
3. A Crispy, Golden Crust
A classic baguette is known for its thin, crisp crust. Baking at a high temperature helps the surface brown and develop a satisfying crunch.
Steam during the early stage of baking keeps the outer surface flexible for longer, allowing the baguettes to expand before the crust fully sets. After the steam dissipates, the crust can dry and become crisp.
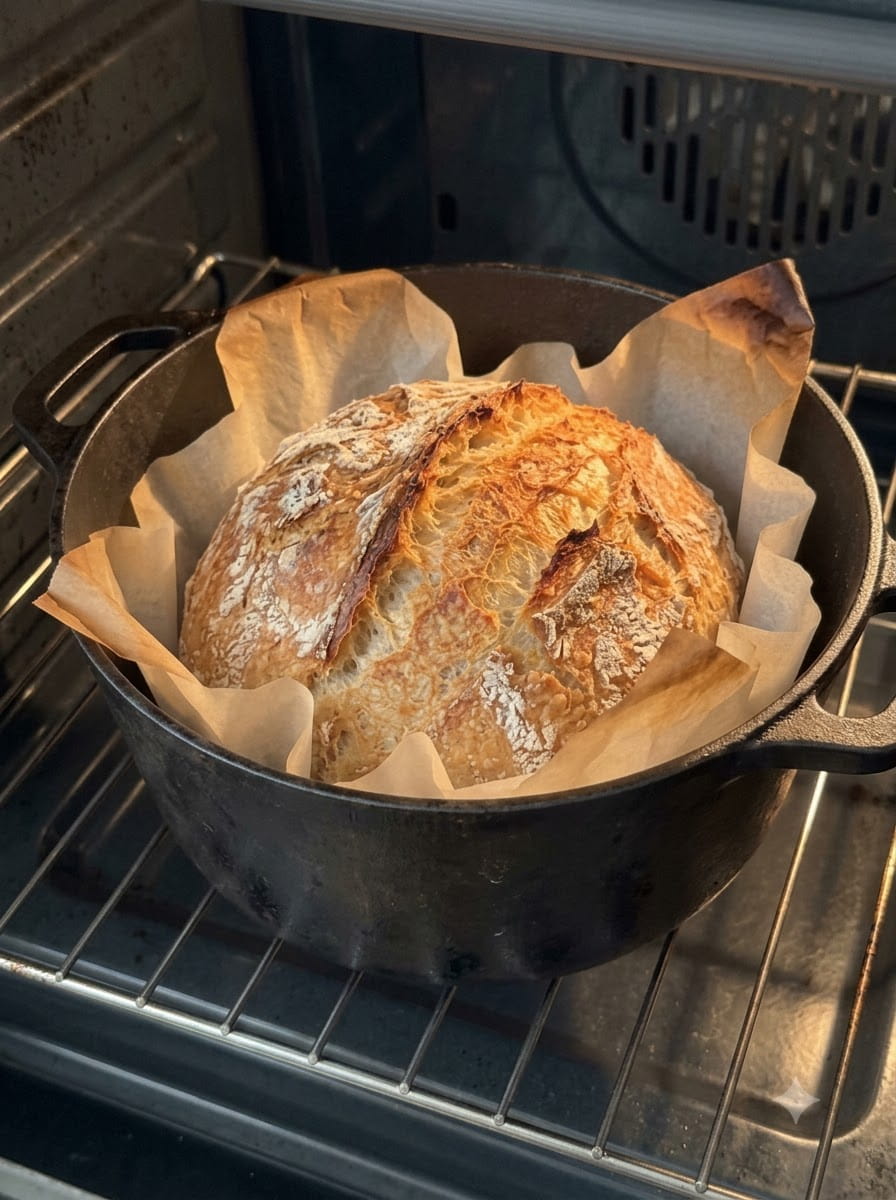
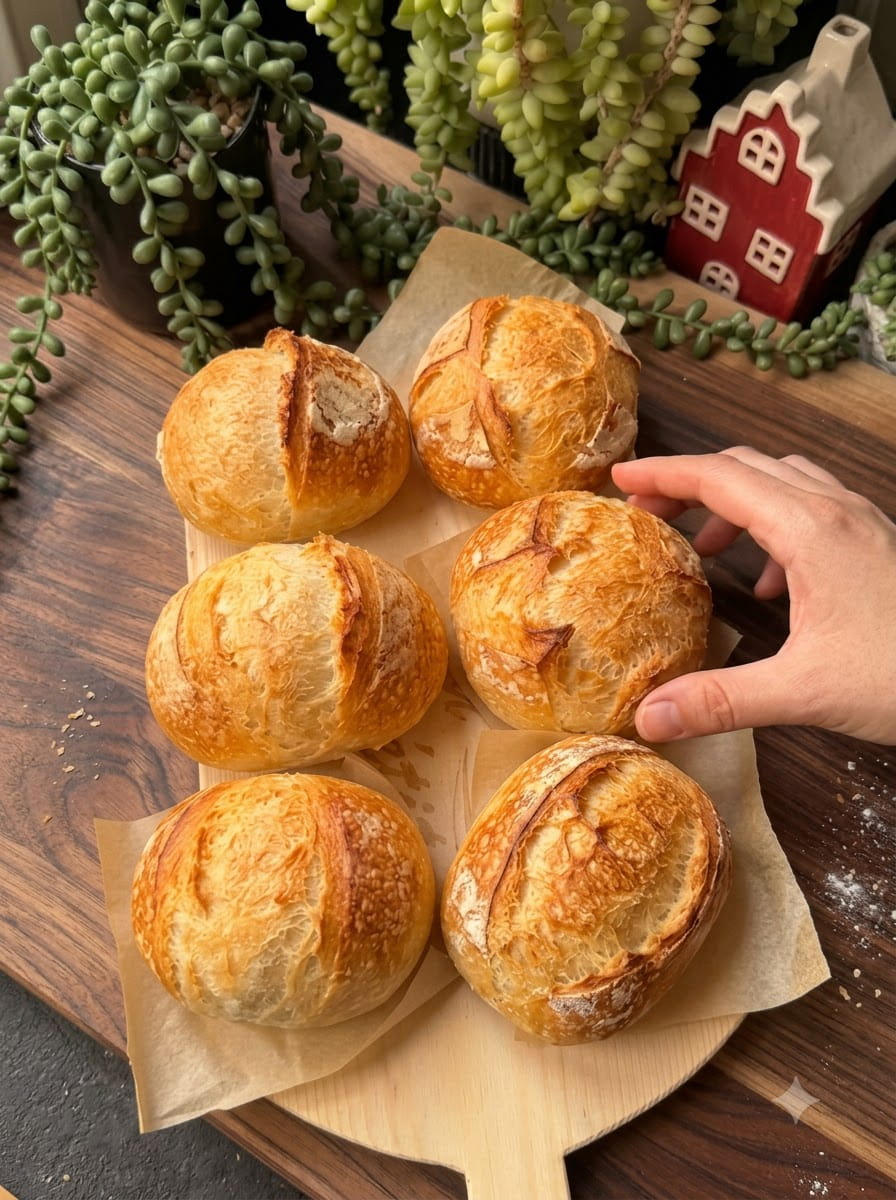
The result is a rustic loaf with an appealing golden color and a delicate crackle as it cools.
4. A Soft, Airy Interior
When the dough is properly fermented and shaped, the finished baguettes can develop an open, airy crumb. Stretch-and-fold techniques strengthen the gluten network without requiring extensive kneading.
Good fermentation is essential. Dough that has not fermented enough may produce a dense loaf, while dough that has fermented too far may become weak and difficult to shape.
Learning to recognize the dough’s appearance and feel is more reliable than following a fixed number of hours.
5. Perfect for Everyday Meals
These mini baguettes are versatile enough for breakfast, lunch, dinner, and entertaining.
Use them for sandwiches, serve them with soup, or slice them into small pieces for a cheese board. They also make excellent crostini when sliced and toasted with a little olive oil.
Their compact size makes them practical for households that want artisan-style bread without baking one large loaf.
Ingredients for Sourdough Mini Baguettes
The recipe uses four ingredients, but understanding how each one works will help you achieve the best results.
Bread Flour – 510 Grams
Bread flour forms the foundation of the dough. Its relatively high protein content helps develop gluten, which gives the baguettes their structure and allows them to expand during fermentation and baking.
For best results, use a bread flour intended for yeast or sourdough baking. Different brands absorb water differently, so the dough may feel slightly firmer or softer depending on the flour.
Weigh the flour with a kitchen scale rather than relying on cups. Weight measurements are especially useful for bread recipes because small differences in flour quantity can noticeably affect hydration and dough handling.
Water – 350 Milliliters
Water hydrates the flour and allows gluten to develop. It also helps distribute the starter and salt throughout the dough.
The recipe uses 350 milliliters of water, which is approximately 350 grams. This amount produces a moderately hydrated dough when the flour and starter are considered together.
If your flour absorbs water differently, the dough may feel slightly stickier or firmer than expected. Avoid adding extra flour automatically. Give the dough time to rest and strengthen before deciding whether adjustments are necessary.
Active Sourdough Starter – 100 Grams
The sourdough starter provides the natural leavening that makes the dough rise. It also contributes the distinctive aroma and flavor associated with sourdough bread.
Use an active, recently fed starter that shows clear signs of fermentation. Depending on the flour and temperature, a healthy starter typically becomes bubbly and expands noticeably after feeding.
For this recipe, the starter is assumed to contain approximately equal weights of flour and water, often called a 100% hydration starter. If your starter has a different hydration level, the dough’s overall hydration will change.
A weak or inactive starter may cause slow fermentation and dense baguettes, so check its activity before mixing the dough.
Salt – 10 Grams
Salt improves the flavor of the bread and helps regulate fermentation. It also influences gluten strength, contributing to a more manageable dough.
Measure the salt accurately and distribute it evenly when adding it after the initial dough rest.
Do not omit salt casually. Besides making the bread taste bland, leaving it out changes the dough’s fermentation behavior.
Complete Recipe: Sourdough Mini Baguettes
Preparation time: About 30–45 minutes of hands-on work, spread across fermentation and shaping
Bulk fermentation: Several hours, depending on starter activity and room temperature
Final proof: Approximately 45–90 minutes, depending on dough condition
Baking time: Approximately 20–25 minutes
Oven temperature: 475°F (245°C)
Yield: 4 mini baguettes
Ingredients
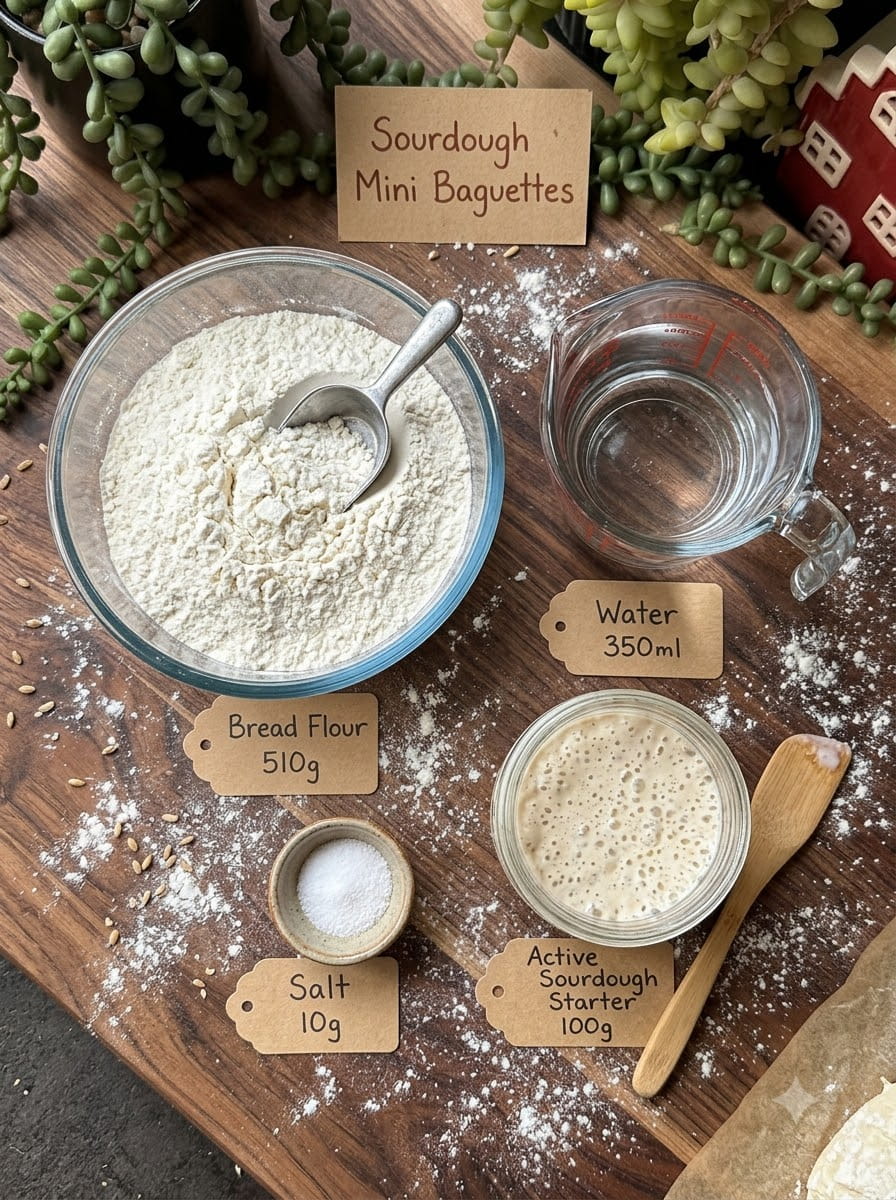
- 510 g bread flour
- 350 ml water
- 100 g active sourdough starter
- 10 g salt
Instructions
Step 1: Mix the Dough
In a large mixing bowl, combine the water and active sourdough starter. Stir until the starter is mostly dispersed in the water.
Add the bread flour and mix until no dry flour remains. You can use your hands, a sturdy spoon, or a dough scraper.
The dough may look rough and uneven at this stage. That is normal. You do not need to develop the gluten completely during the initial mixing.
Cover the bowl and let the dough rest for 30 minutes. This resting period allows the flour to absorb the water and begins gluten development naturally.
Step 2: Add the Salt
Sprinkle the salt over the dough.
Use damp fingers to pinch and fold the dough repeatedly until the salt is evenly incorporated. The dough may initially feel firmer or slightly resistant, but it should become more cohesive as you work it.
If the dough is difficult to handle, wet your hands lightly rather than adding large amounts of extra flour.
Cover the bowl again before beginning the next stage.
Step 3: Develop the Dough with Stretch-and-Folds
Over the next two hours, perform three or four sets of stretch-and-folds, spacing them approximately 30 minutes apart.
To complete one set:
- Wet your hand lightly to prevent sticking.
- Lift one side of the dough gently until you feel resistance.
- Fold that section over the center.
- Rotate the bowl and repeat around the dough.
- Cover the bowl and allow the dough to rest until the next set.
The dough should gradually become smoother, stronger, and more elastic. It may initially spread out in the bowl, but after several sets it should hold its shape better.
Avoid pulling so forcefully that the dough tears. Gentle, consistent movements are more effective than aggressive stretching.
Step 4: Complete Bulk Fermentation
After the stretch-and-fold sessions, cover the dough and let it continue fermenting at room temperature.
The total bulk fermentation time varies according to the strength of your starter, the temperature of your kitchen, and the dough itself. In a warm kitchen, fermentation may progress much faster than in a cool room.
Instead of relying only on the clock, look for signs that the dough has become aerated and expanded noticeably. You may see bubbles along the sides of the bowl, and the surface may look slightly domed.
The dough should feel lighter and more elastic than it did after mixing. It does not always need to double in size, especially if you plan a longer final proof.
Avoid letting the dough over-ferment. If it becomes extremely slack, loses its structure, and collapses easily, it may have gone too far.
Step 5: Divide the Dough
Lightly flour your work surface and gently turn out the dough.
Use a bench scraper to divide it into four equal portions. A kitchen scale can help you achieve evenly sized baguettes.
Handle the dough gently to preserve as much of the gas created during fermentation as possible. Avoid pressing out all the air.
Shape each portion into a loose short cylinder, then allow the pieces to rest for about 10–20 minutes, covered with a clean towel or lightly greased reusable cover.
This brief rest relaxes the gluten and makes the dough easier to elongate.
Step 6: Shape the Mini Baguettes
Take one portion of dough and gently flatten it into a small rectangle.
Fold the upper edge toward the center and press lightly to seal. Fold the opposite edge toward the center, then fold the dough over itself to create a compact cylinder.
Pinch the seam closed. Place the dough seam-side down on the work surface.
Using both hands, roll the cylinder gently outward from the center toward the ends. Gradually lengthen it until it resembles a small baguette.
Taper the ends slightly if you prefer the classic baguette shape. Keep the thickness relatively even along the middle so the loaf bakes uniformly.
Repeat with the remaining portions. If the dough resists stretching or springs back, let it rest for a few minutes before continuing rather than forcing it.
Step 7: Arrange the Baguettes for Final Proofing
Place the shaped baguettes seam-side down on a floured couche or a parchment-lined baking tray.
A couche is a thick, flour-dusted cloth that supports the dough during proofing. You can create folds in the cloth between the loaves to help them maintain their shape.
If using parchment paper, leave sufficient space between the baguettes for expansion.
Cover the dough to prevent the surface from drying out. Let the baguettes proof for approximately 45–90 minutes, adjusting the time according to temperature and dough activity.
They should become slightly puffy and lighter. A gentle touch may leave a shallow indentation that slowly begins to recover.
If the dough springs back immediately, it may need more time. If it feels extremely fragile and the indentation does not recover at all, it may be over-proofed.
Step 8: Preheat the Oven
Preheat your oven to 475°F (245°C).
Position a baking stone, steel, or sturdy baking tray in the oven if you have one. Preheating the baking surface helps the baguettes receive strong heat when they are loaded.
For steam, place a separate sturdy metal tray on a lower rack before heating the oven. Use a tray that is suitable for the high temperature and the steam method you intend to use.
Allow the oven and baking surface to heat thoroughly. A fully preheated oven is important for good oven spring and crust development.
Safety note: Never pour water onto the oven floor, glass, or an unsuitable tray. Adding water to hot metal can create a sudden burst of steam and splashing. Use a method appropriate for your oven, keep your face and hands away from the steam path, and follow the oven manufacturer’s guidance.
Step 9: Score the Baguettes
Just before baking, use a sharp bread lame or a suitable sharp blade to score each baguette.
Make three or four shallow diagonal slashes along the top of each loaf. Angle the blade slightly rather than cutting straight down, and use confident movements.
Scoring gives the expanding dough controlled places to open during baking. It also creates the familiar appearance of a traditional baguette.
Avoid making the cuts excessively deep, as this may weaken the structure. If the blade drags or pulls the dough, it may not be sharp enough.
Step 10: Bake with Steam
Transfer the baguettes to the hot baking surface, leaving space between them.
Introduce steam using a safe method designed for your oven. If using a preheated metal tray, carefully add a small amount of hot water to that tray while keeping your hands and face away from the escaping steam.
Bake for approximately 10 minutes with steam present during the initial stage. The moist environment delays crust formation and helps the baguettes expand.
Do not open the oven repeatedly during this stage, because escaping heat and steam can interfere with oven spring.
Step 11: Finish Baking Until Deeply Golden
After the initial steaming period, carefully vent the oven or remove the steam tray if your setup allows you to do so safely. Never handle a hot tray of water without suitable protection.
Continue baking for another 10–15 minutes, or until the baguettes are deeply golden and the crust feels crisp.
The exact baking time depends on the size of the baguettes, the oven, and the baking surface. If you prefer a darker, crunchier crust, you may need a few additional minutes.
Watch the loaves near the end of baking to avoid excessive browning.
Step 12: Cool Completely
Remove the baguettes from the oven and transfer them to a wire rack.
Let them cool before slicing. During this time, moisture redistributes within the crumb and the crust continues to develop its final texture.
Cutting too early can cause the interior to appear gummy or compress the airy structure.
Once cooled, enjoy the baguettes plain or with your favorite toppings.
The Secret to a Great Sourdough Baguette
Great baguettes depend on more than the ingredient list. Starter activity, dough strength, fermentation, shaping, and baking conditions all influence the final result.
Use an Active Starter
A healthy starter is one of the most important factors in sourdough baking. Feed it according to your usual routine and mix the dough when it is showing strong fermentation activity.
The starter should smell pleasantly fermented, often with a mildly tangy, fruity, or yeasty aroma. Its exact smell varies according to the flour and feeding schedule.
If your starter has been refrigerated for a long time or has been sluggish, give it one or more regular feedings until it becomes active before baking.
Watch the Dough, Not Just the Clock
Fermentation is influenced by temperature, starter strength, flour type, and hydration. A timetable that works in a warm kitchen may be too short in a cool kitchen.
During bulk fermentation, look for expansion, bubbles, and a lighter texture. During final proofing, look for a slightly puffy loaf that still retains enough strength to score and transfer.
Learning these visual and tactile signs will improve your results over time.
Build Strength Gradually
Stretch-and-folds help organize the gluten network and give the dough more strength. This is particularly useful when making baguettes because the dough needs to retain its elongated shape.
Perform the folds gently and consistently. If the dough becomes resistant, allow it to rest before handling it again.
Shape Without Crushing the Dough
The goal of shaping is to create surface tension while retaining much of the gas developed during fermentation.
Pressing too hard can remove too much air, while shaping too loosely may allow the baguettes to spread rather than rise.
Use gentle but deliberate movements, seal the seam well, and make sure the dough has enough support during proofing.
Create Steam Safely
Steam helps keep the dough surface flexible during the early part of baking. This allows the baguettes to expand before the crust becomes rigid.
A covered baking vessel or an oven designed for steam baking may provide alternatives to an open tray. Choose a method compatible with your equipment and always follow the manufacturer’s safety instructions.
Common Mistakes to Avoid
Using an Inactive Starter
If your starter is weak, the dough may take much longer to rise and the finished baguettes may be dense.
Make sure your starter is actively fermenting before mixing. If the dough is not showing signs of fermentation, allow more time rather than moving immediately to shaping.
Adding Too Much Flour During Shaping
A sticky dough can be frustrating, but adding large amounts of flour may create dry patches and change the dough’s hydration.
Use only a light dusting on your work surface. Damp hands and a dough scraper can make handling easier without changing the recipe.
Under-Fermenting the Dough
Under-fermented dough often feels tight and may not contain enough gas to produce an airy interior. The baguettes may also split unpredictably during baking.
Give the dough sufficient time to develop bubbles and expand. In cooler conditions, fermentation may take significantly longer than expected.
Over-Fermenting the Dough
Dough that ferments too long can lose strength and become sticky, slack, or difficult to shape. The finished baguettes may spread and have less oven spring.
If the dough is becoming fragile or collapsing, avoid extending fermentation unnecessarily. Adjust your schedule next time according to the room temperature and starter activity.
Skipping the Final Proof
Shaped baguettes need time to relax and expand before baking. Baking them too early can produce tight crumb and limited volume.
Use the appearance and feel of the dough to judge readiness rather than following the shortest possible proofing time.
Scoring with a Dull Blade
A dull blade can drag the dough and create ragged cuts. Use a sharp blade and make confident diagonal slashes just before baking.
If the dough is sticking to the blade, work quickly and keep the blade clean between cuts.
Baking Without Enough Initial Heat
A poorly preheated oven can limit oven spring and produce a pale or less crisp crust.
Allow the oven and baking surface to heat thoroughly. Use the recommended temperature and avoid opening the door unnecessarily during the first stage of baking.
Slicing Before the Baguettes Cool
The crumb is still setting as the bread cools. Cutting too soon can make the interior gummy and compress the open structure.
Allow the baguettes to cool on a wire rack before slicing.
How to Serve Sourdough Mini Baguettes
These rustic loaves are delicious on their own, but they also work well in a variety of meals.
Classic Buttered Baguette
Slice a baguette and spread a little butter over the warm interior. The butter melts into the crumb while the crisp crust provides a satisfying contrast.
For a savory variation, add chopped parsley or a pinch of garlic powder to softened butter.
Olive Oil and Herbs
Pour extra-virgin olive oil into a small dish and add dried oregano, black pepper, or finely chopped fresh herbs.
Dip pieces of baguette into the seasoned oil as an appetizer or alongside a Mediterranean-style meal.
Homemade Sandwiches
Slice the mini baguettes lengthwise and fill them with turkey, chicken, cheese, lettuce, tomatoes, or roasted vegetables.
For a sturdier sandwich, let the bread cool completely before cutting. You can also lightly toast the interior before adding moist fillings.
Garlic Bread
Combine softened butter or olive oil with minced garlic and chopped parsley. Spread the mixture over sliced baguettes and bake briefly until aromatic and lightly crisp.
Keep an eye on the bread so the garlic does not burn.
Soup and Stew
Serve the baguettes alongside tomato soup, vegetable soup, lentil soup, beef stew, or chicken soup.
Their crusty exterior makes them excellent for dipping, while the soft interior absorbs flavorful broth.
Cheese and Charcuterie Boards
Slice the baguettes into small rounds and arrange them beside cheeses, olives, roasted peppers, grapes, and spreads.
For extra crunch, toast the slices lightly to create crostini.
Breakfast Toast
Toast a slice and top it with scrambled eggs, avocado, cream cheese, or fruit preserves.
The tangy sourdough flavor pairs particularly well with both savory and sweet toppings.
Bruschetta
Slice the baguettes diagonally and toast them. Top with chopped tomatoes, basil, olive oil, and a little salt for a simple bruschetta.
You can also try toppings such as white beans, roasted peppers, or sautéed mushrooms.
Easy Variations to Try
The basic four-ingredient recipe produces classic sourdough baguettes, but a few additions can create different flavors.
Whole Wheat Sourdough Mini Baguettes
Replace a portion of the bread flour with whole wheat flour. Whole wheat flour adds a deeper, nuttier flavor and increases the amount of bran in the dough.
Because whole wheat flour absorbs water differently and bran can affect gluten development, the dough may require a small hydration adjustment. Start with a modest substitution and observe how the dough feels.
Herb Sourdough Baguettes
Add a small amount of dried rosemary, thyme, or oregano during mixing.
Herbs complement the sourdough flavor and make the baguettes particularly good with soups, roasted vegetables, and cheese.
Use modest amounts so the herbs do not dominate the bread.
Garlic Sourdough Baguettes
Mix a small quantity of garlic powder into the flour before adding the wet ingredients.
Garlic adds savory flavor, making these baguettes ideal for sandwiches and dinner bread. Avoid adding large amounts of fresh garlic unless you have adjusted the recipe for the additional moisture and flavor intensity.
Sesame Seed Baguettes
Sprinkle sesame seeds over the shaped baguettes before baking. Lightly misting or brushing the surface with water can help the seeds adhere, although the added moisture should be minimal.
Sesame seeds add a pleasant crunch and toasted flavor.
Rustic Whole-Grain Baguettes
Experiment with a small proportion of rye or whole wheat flour for a more complex flavor.
Different flours affect fermentation and dough strength, so avoid replacing all the bread flour at once. Begin with a small substitution and adjust as you become familiar with the dough.
Extra-Crispy Baguettes
For a crispier crust, bake until the loaves are deeply golden and allow moisture to escape during the final stage.
After baking, leave the baguettes on a wire rack so air can circulate around them. Avoid placing hot bread directly into a sealed container, because trapped steam will soften the crust.
How to Store Sourdough Mini Baguettes
Fresh baguettes are best on the day they are baked, when the crust is crisp and the interior is soft. Over time, the crust naturally softens and the crumb becomes firmer.
Once the baguettes have cooled completely, store them in a paper bag or bread box if you plan to eat them within a day. Plastic bags retain moisture and may soften the crust, although they can help prevent the interior from drying out.
Avoid refrigerating plain bread when possible, as refrigeration can accelerate staling and affect the texture.
Can You Freeze Sourdough Mini Baguettes?
Yes. Freezing is an excellent way to preserve extra baguettes.
Allow the loaves to cool completely, then wrap each one securely in a freezer-safe bag or suitable wrapping. Remove excess air and label the package with the date.
For best quality, use the frozen baguettes within about two to three months. They may remain safe longer when continuously frozen at 0°F (-18°C), but flavor and texture can gradually deteriorate.
You can freeze whole mini baguettes or slice them first. Sliced bread is convenient for toast, while whole loaves are useful when you want to serve a baguette with dinner.
How to Refresh a Day-Old Baguette
If the crust has softened, lightly dampen the exterior with water and place the baguette in a preheated oven at approximately 350°F (175°C) for several minutes.
Watch carefully and remove it once the crust feels crisp again. The exact time depends on the size and dryness of the loaf.
This method can improve the texture of stale bread, but it cannot reverse spoilage. Discard bread that shows mold or signs of contamination.
Frequently Asked Questions
Can I Make Sourdough Mini Baguettes Without Commercial Yeast?
Yes. This recipe uses an active sourdough starter as its only leavening source. No commercial yeast is needed.
The dough may ferment more slowly than a commercial-yeast baguette, so allow enough time for the starter to develop the dough.
How Do I Know When My Sourdough Starter Is Ready?
A healthy starter usually shows visible bubbles and rises noticeably after feeding. Many starters reach their peak activity within several hours, but timing depends on temperature, flour, and feeding ratio.
Use a starter that is lively and reliably raises dough rather than one that has been inactive for an extended period.
Why Are My Baguettes Dense?
Dense baguettes can result from a weak starter, insufficient fermentation, inadequate dough strength, or shaping that removes too much gas.
Check that the starter is active, allow the dough to become airy during bulk fermentation, and handle it gently during shaping.
Why Did My Baguettes Spread Out?
The dough may have been too weak, over-fermented, or insufficiently supported during final proofing.
Build strength with stretch-and-folds, avoid extending fermentation too far, and use a floured couche or parchment-lined tray to help the loaves retain their shape.
Why Is My Crust Not Crispy?
A soft crust can result from insufficient baking, inadequate ventilation during cooling, or moisture trapped during storage.
Bake until the baguettes are deeply golden and cool them on a wire rack. Avoid sealing them while they are still warm.
Why Did the Crust Split in Unexpected Places?
Unexpected splitting may occur when the dough is under-proofed, the scoring is insufficient, or the crust sets before the loaf can expand properly.
Allow the dough to proof until slightly puffy, score it just before baking, and use a fully preheated oven with an appropriate steam method.
Can I Make the Dough Ahead of Time?
Yes. Sourdough dough can often be fermented slowly in the refrigerator, but the schedule may need to be adjusted.
A common approach is to allow some initial fermentation at room temperature, cover the dough, and refrigerate it to slow activity. The following day, assess the dough before dividing and shaping. Cold dough may need additional time to become workable and complete its proof.
Because starter strength and refrigerator temperature vary, use the dough’s condition rather than relying entirely on a fixed schedule.
Can I Use All-Purpose Flour Instead of Bread Flour?
All-purpose flour may work, but it often contains less protein than bread flour and may produce dough with slightly less strength.
The finished baguettes may have a different crumb and may spread more easily. If substituting, observe the dough carefully and avoid adding extra flour unless it is genuinely necessary.
Do I Need a Baking Stone?
No. A baking stone or steel can help transfer heat efficiently, but a thoroughly preheated sturdy baking tray can also work.
Use the equipment you have, and allow it to preheat adequately before loading the baguettes.
Can I Bake These Baguettes Without Steam?
Yes, although the crust may form earlier and the loaves may have less oven spring. A suitable covered baking setup or another oven-safe steam method can help create a moist environment during the initial baking stage.
Always use a method appropriate for your oven and avoid unsafe practices such as pouring water directly onto the oven floor or glass.
How Can I Get a More Open Crumb?
A more open crumb depends on active fermentation, adequate gluten development, careful shaping, and strong oven spring.
Avoid under-fermenting the dough, strengthen it with stretch-and-folds, and handle it gently so you preserve the gas already present. Results also depend on flour quality, hydration, and the consistency of your starter.
Are Sourdough Mini Baguettes Suitable for Sandwiches?
Absolutely. Their crisp crust and chewy interior make them excellent for sandwiches.
Let the loaves cool completely before slicing. Fill them with meats, cheese, eggs, or vegetables, and consider lightly toasting the interior if you are adding moist ingredients.
Final Thoughts
These Sourdough Mini Baguettes bring the flavor and texture of artisan bread into your home kitchen with just four basic ingredients. Bread flour, water, active sourdough starter, and salt transform through natural fermentation into rustic loaves with a crisp golden crust and a soft, flavorful interior.
Although sourdough baking requires patience, the process becomes easier as you learn to recognize the signs of a well-fermented dough. Gentle stretch-and-folds build strength, careful shaping creates the classic baguette form, and high-heat baking with safe steam helps develop the crust.
Serve these mini baguettes with butter, olive oil, cheese, homemade sandwiches, or your favorite soup. They are equally delicious as breakfast toast, garlic bread, or crisp crostini for entertaining.
For the best results, begin with a lively starter, allow the dough to ferment until it looks airy, and cool the finished loaves before slicing. Once you have mastered the basic recipe, you can experiment with whole wheat flour, herbs, or seeds to create your own variations.
If you enjoy baking fresh bread from scratch, these homemade Sourdough Mini Baguettes are a rewarding recipe to keep in your regular baking collection.
Print
Sourdough Mini Baguettes
Ingredients
- 510 g bread flour
- 350 ml water
- 100 g active sourdough starter
- 10 g salt
Instructions
Step 1: Mix the Dough
In a large mixing bowl, combine the water and active sourdough starter. Stir until the starter is mostly dispersed in the water.
Add the bread flour and mix until no dry flour remains. You can use your hands, a sturdy spoon, or a dough scraper.
The dough may look rough and uneven at this stage. That is normal. You do not need to develop the gluten completely during the initial mixing.
Cover the bowl and let the dough rest for 30 minutes. This resting period allows the flour to absorb the water and begins gluten development naturally.
Step 2: Add the Salt
Sprinkle the salt over the dough.
Use damp fingers to pinch and fold the dough repeatedly until the salt is evenly incorporated. The dough may initially feel firmer or slightly resistant, but it should become more cohesive as you work it.
If the dough is difficult to handle, wet your hands lightly rather than adding large amounts of extra flour.
Cover the bowl again before beginning the next stage.
Step 3: Develop the Dough with Stretch-and-Folds
Over the next two hours, perform three or four sets of stretch-and-folds, spacing them approximately 30 minutes apart.
To complete one set:
- Wet your hand lightly to prevent sticking.
- Lift one side of the dough gently until you feel resistance.
- Fold that section over the center.
- Rotate the bowl and repeat around the dough.
- Cover the bowl and allow the dough to rest until the next set.
The dough should gradually become smoother, stronger, and more elastic. It may initially spread out in the bowl, but after several sets it should hold its shape better.
Avoid pulling so forcefully that the dough tears. Gentle, consistent movements are more effective than aggressive stretching.
Step 4: Complete Bulk Fermentation
After the stretch-and-fold sessions, cover the dough and let it continue fermenting at room temperature.
The total bulk fermentation time varies according to the strength of your starter, the temperature of your kitchen, and the dough itself. In a warm kitchen, fermentation may progress much faster than in a cool room.
Instead of relying only on the clock, look for signs that the dough has become aerated and expanded noticeably. You may see bubbles along the sides of the bowl, and the surface may look slightly domed.
The dough should feel lighter and more elastic than it did after mixing. It does not always need to double in size, especially if you plan a longer final proof.
Avoid letting the dough over-ferment. If it becomes extremely slack, loses its structure, and collapses easily, it may have gone too far.
Step 5: Divide the Dough
Lightly flour your work surface and gently turn out the dough.
Use a bench scraper to divide it into four equal portions. A kitchen scale can help you achieve evenly sized baguettes.
Handle the dough gently to preserve as much of the gas created during fermentation as possible. Avoid pressing out all the air.
Shape each portion into a loose short cylinder, then allow the pieces to rest for about 10–20 minutes, covered with a clean towel or lightly greased reusable cover.
This brief rest relaxes the gluten and makes the dough easier to elongate.
Step 6: Shape the Mini Baguettes
Take one portion of dough and gently flatten it into a small rectangle.
Fold the upper edge toward the center and press lightly to seal. Fold the opposite edge toward the center, then fold the dough over itself to create a compact cylinder.
Pinch the seam closed. Place the dough seam-side down on the work surface.
Using both hands, roll the cylinder gently outward from the center toward the ends. Gradually lengthen it until it resembles a small baguette.
Taper the ends slightly if you prefer the classic baguette shape. Keep the thickness relatively even along the middle so the loaf bakes uniformly.
Repeat with the remaining portions. If the dough resists stretching or springs back, let it rest for a few minutes before continuing rather than forcing it.
Step 7: Arrange the Baguettes for Final Proofing
Place the shaped baguettes seam-side down on a floured couche or a parchment-lined baking tray.
A couche is a thick, flour-dusted cloth that supports the dough during proofing. You can create folds in the cloth between the loaves to help them maintain their shape.
If using parchment paper, leave sufficient space between the baguettes for expansion.
Cover the dough to prevent the surface from drying out. Let the baguettes proof for approximately 45–90 minutes, adjusting the time according to temperature and dough activity.
They should become slightly puffy and lighter. A gentle touch may leave a shallow indentation that slowly begins to recover.
If the dough springs back immediately, it may need more time. If it feels extremely fragile and the indentation does not recover at all, it may be over-proofed.
Step 8: Preheat the Oven
Preheat your oven to 475°F (245°C).
Position a baking stone, steel, or sturdy baking tray in the oven if you have one. Preheating the baking surface helps the baguettes receive strong heat when they are loaded.
For steam, place a separate sturdy metal tray on a lower rack before heating the oven. Use a tray that is suitable for the high temperature and the steam method you intend to use.
Allow the oven and baking surface to heat thoroughly. A fully preheated oven is important for good oven spring and crust development.
Safety note: Never pour water onto the oven floor, glass, or an unsuitable tray. Adding water to hot metal can create a sudden burst of steam and splashing. Use a method appropriate for your oven, keep your face and hands away from the steam path, and follow the oven manufacturer’s guidance.
Step 9: Score the Baguettes
Just before baking, use a sharp bread lame or a suitable sharp blade to score each baguette.
Make three or four shallow diagonal slashes along the top of each loaf. Angle the blade slightly rather than cutting straight down, and use confident movements.
Scoring gives the expanding dough controlled places to open during baking. It also creates the familiar appearance of a traditional baguette.
Avoid making the cuts excessively deep, as this may weaken the structure. If the blade drags or pulls the dough, it may not be sharp enough.
Step 10: Bake with Steam
Transfer the baguettes to the hot baking surface, leaving space between them.
Introduce steam using a safe method designed for your oven. If using a preheated metal tray, carefully add a small amount of hot water to that tray while keeping your hands and face away from the escaping steam.
Bake for approximately 10 minutes with steam present during the initial stage. The moist environment delays crust formation and helps the baguettes expand.
Do not open the oven repeatedly during this stage, because escaping heat and steam can interfere with oven spring.
Step 11: Finish Baking Until Deeply Golden
After the initial steaming period, carefully vent the oven or remove the steam tray if your setup allows you to do so safely. Never handle a hot tray of water without suitable protection.
Continue baking for another 10–15 minutes, or until the baguettes are deeply golden and the crust feels crisp.
The exact baking time depends on the size of the baguettes, the oven, and the baking surface. If you prefer a darker, crunchier crust, you may need a few additional minutes.
Watch the loaves near the end of baking to avoid excessive browning.
Step 12: Cool Completely
Remove the baguettes from the oven and transfer them to a wire rack.
Let them cool before slicing. During this time, moisture redistributes within the crumb and the crust continues to develop its final texture.