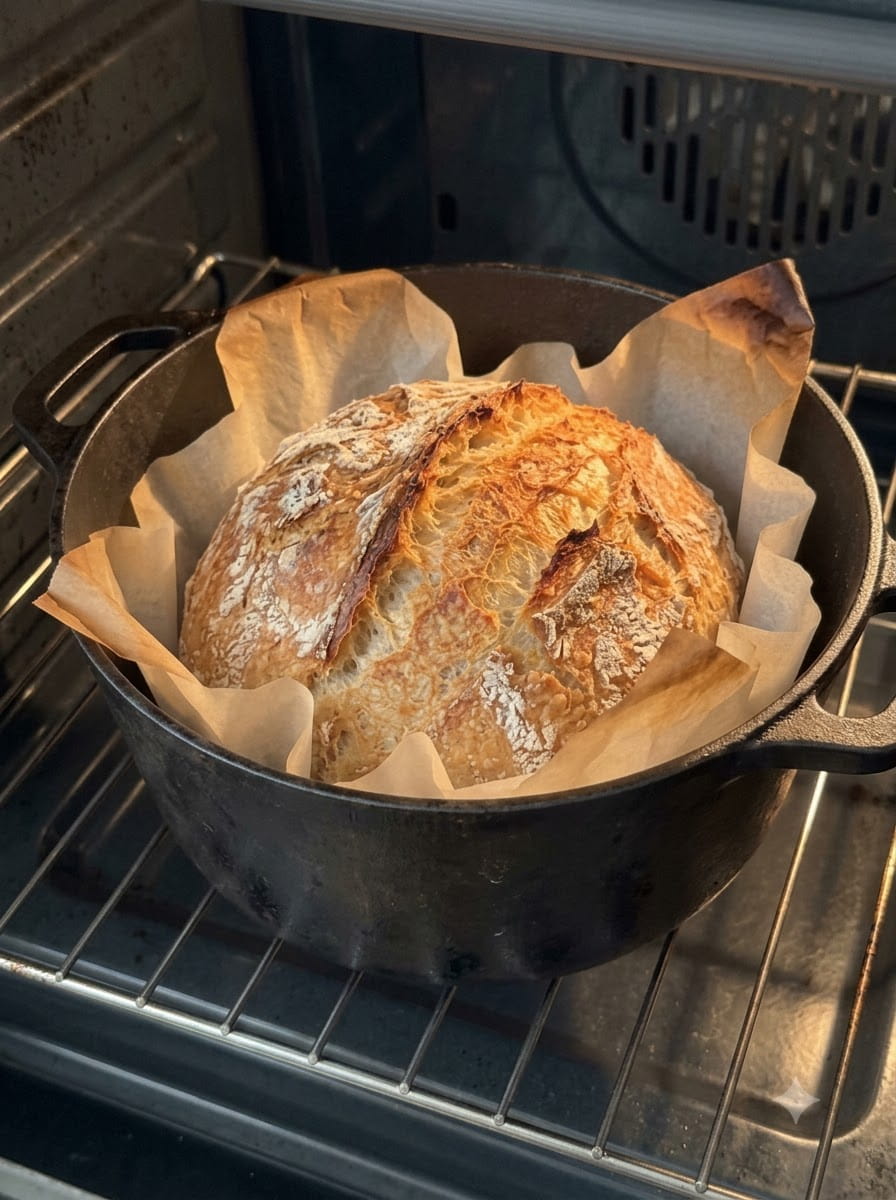
Rustic No-Knead Artisan Italian Bread: Crispy Crust, Soft and Airy Inside 🍞✨
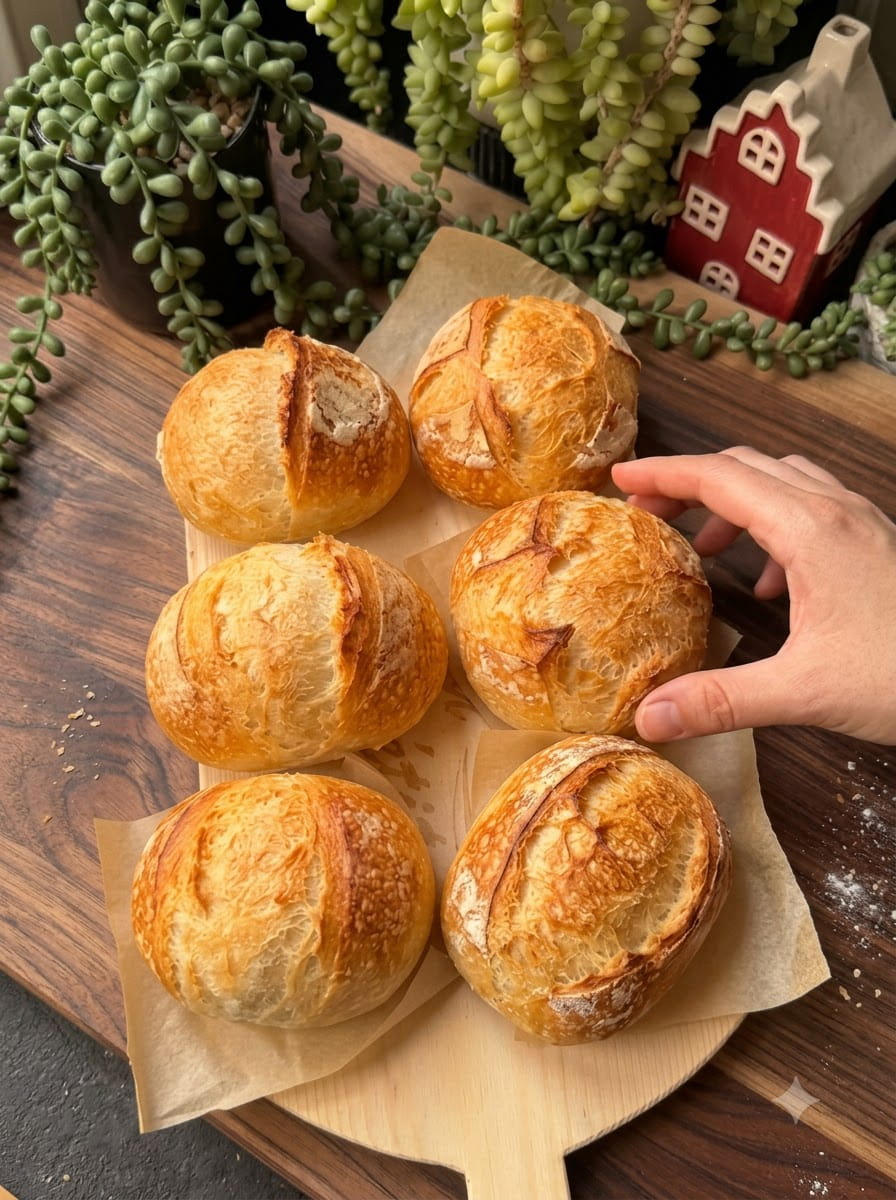
This Rustic No-Knead Artisan Italian Bread has a beautifully golden, crispy crust and a soft, airy interior. Made with simple ingredients and minimal effort, this homemade bread is perfect for serving with soups, pasta, olive oil, or your favorite family meals.
If you have ever admired the crackling crust and open, chewy crumb of a bakery loaf and assumed it was out of reach, this recipe is for you. It uses just four ingredients: bread flour, water, salt, and a tiny amount of yeast. There is no kneading and no special equipment beyond a Dutch oven. You stir the dough together in a few minutes, leave it on the counter to ferment overnight, shape it gently, and bake it in a preheated pot. Time does the work that kneading would do, building structure and flavor while you sleep.
In this guide, you will find the full recipe, a clear step-by-step method, the science behind why no-knead bread works, tips for the best crust and crumb, troubleshooting help, serving ideas, variations, storage advice, and answers to frequently asked questions about no-knead artisan bread.
Why You’ll Love This No-Knead Italian Bread
It needs only four ingredients. Bread flour, warm water, salt, and instant yeast are all you need.
There is no kneading. A long, slow rise develops the gluten for you. You only stir, fold, and shape.
The crust is golden and crispy. Baking inside a preheated, covered Dutch oven traps steam, which creates a blistered, crackly crust like a professional bakery oven.
The inside is soft and airy. The wet dough and long fermentation create an open, tender crumb with a pleasant chew.
The flavor is deep and complex. The slow ferment gives the bread a mildly tangy, wheaty flavor that you cannot get from a fast loaf.
It is mostly hands-off. The active work takes about 15 minutes. Fermentation and baking do the rest.
It is budget friendly. A bakery loaf of this quality can be expensive. Homemade costs just a few cents in ingredients.
It pairs with everything. Serve it with soup, pasta, salad, cheese, or a dish of olive oil.
What Is Artisan No-Knead Bread?
No-knead bread is a method of bread making popularized in the 2000s that replaces kneading with time. A high-hydration dough, meaning one with a lot of water relative to flour, is mixed with a very small amount of yeast and left to ferment for 12 to 18 hours. During that time, the flour fully hydrates and the gluten proteins gradually link together into a strong, elastic network, without any kneading. The long fermentation also produces gas bubbles and flavor compounds that give the bread its character.
The dough is then baked in a very hot, covered pot. The lid traps the steam released by the dough, which keeps the surface soft and flexible for the first part of baking so the loaf can expand fully. Then the lid comes off, the steam escapes, and the crust dries, browns, and crisps.
The result is a rustic, round loaf with a blistered, golden crust and a soft, chewy, open interior. It is often called Italian-style or artisan bread because of its simple ingredients and rustic look.
Ingredients for Rustic No-Knead Artisan Italian Bread
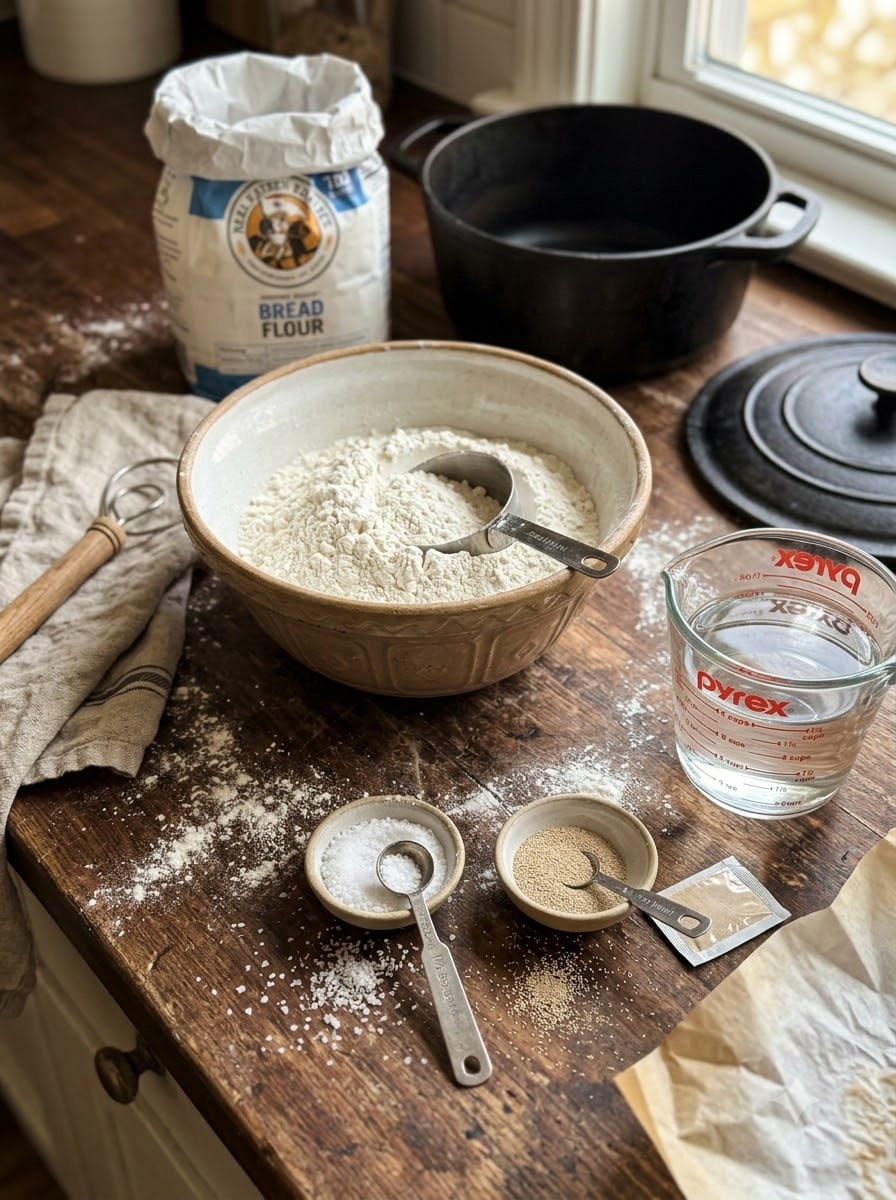
- 3 cups bread flour
- 1½ cups warm water
- 1½ teaspoons salt
- ½ teaspoon instant yeast
A Closer Look at the Ingredients
Bread flour. Bread flour has a higher protein content than all-purpose flour, which gives the dough more strength and helps it trap gas. This is what creates a tall, chewy, open crumb. For the most accurate results, weigh your flour. Three cups of bread flour weigh roughly 360 to 400 grams, depending on how it is measured. If you are measuring by cups, spoon the flour into the cup and level it off rather than scooping.
Warm water. The water should be lukewarm, roughly 100°F (38°C). It should feel barely warm to the touch. Water that is too hot can harm the yeast, while very cold water will slow the fermentation.
Salt. Salt adds flavor, strengthens the gluten, and controls the yeast. Do not skip it. Fine sea salt or kosher salt both work.
Instant yeast. Just half a teaspoon is enough, because the dough ferments for a long time. Instant yeast can be stirred straight into the flour. If you only have active dry yeast, you can use it in the same amount, though it may be slightly slower.
How to Make Rustic No-Knead Artisan Italian Bread: Step-by-Step Instructions
Step 1: Mix the Dough
In a large bowl, combine the bread flour, salt, and instant yeast. Pour in the warm water and stir until a sticky, shaggy dough forms. Mix just until there is no dry flour left. The dough will look rough and wet, and that is exactly right. Do not add more flour.
Step 2: Let It Rise
Cover the bowl and leave the dough at room temperature for 12 to 18 hours, until doubled in size and bubbly. A plate, a damp towel, or plastic wrap all work as a cover. Place the bowl somewhere out of direct sunlight and away from drafts. The dough is ready when the surface is dotted with bubbles, the dough has domed up, and it jiggles when the bowl is shaken. In a warm kitchen, check closer to 12 hours. In a cool kitchen, it may need the full 18.
Step 3: Shape the Dough
Lightly flour your work surface. Gently turn out the dough and fold the edges toward the center. Shape it into a round loaf without kneading. The dough will be sticky and loose. Use a bench scraper or floured hands to help. Fold the left, right, top, and bottom edges into the center like an envelope, then flip it seam-side down and gently tuck it into a round shape. Handle it as little as possible to preserve the air bubbles.
Step 4: Preheat the Oven
Place a Dutch oven with its lid inside the oven and preheat to 450°F (230°C) for about 30 minutes. A very hot pot is the secret to a crisp crust and strong oven spring. Allow a full 30 minutes so the pot is thoroughly heated through. While the oven heats, let the shaped dough rest on a piece of parchment paper, loosely covered.
Step 5: Transfer the Dough
Carefully place the dough on parchment paper and lower it into the hot Dutch oven. Cover with the lid. Use oven mitts, because the pot and lid are extremely hot. Lifting the dough by the parchment makes the transfer easy. If you like, score the top with a sharp knife or razor blade, making a shallow slash about ½ inch deep. Scoring is optional, but it helps the loaf expand in a controlled way.
Step 6: Bake Covered
Bake for 30 minutes with the lid on. During this stage, the trapped steam keeps the crust flexible so the loaf can rise and expand fully.
Step 7: Bake Uncovered
Remove the lid and bake for another 10 to 15 minutes, until the crust is deep golden brown and crispy. Watch the loaf closely during the final minutes. The bread is done when the crust is a rich golden brown and the loaf sounds hollow when tapped on the bottom. The internal temperature should reach about 205°F to 210°F (96°C to 99°C).
Step 8: Cool Before Slicing
Carefully remove the bread and let it cool on a wire rack for at least 45 minutes before slicing. Cooling lets the interior finish setting. Slicing too early can make the crumb gummy and dense. You may hear the crust crackle as it cools, which is a good sign.
The Science Behind No-Knead Bread
Hydration builds gluten. Water allows the proteins in flour, glutenin and gliadin, to link together. Given enough time, they form a strong, stretchy gluten network without any physical kneading.
Fermentation builds flavor. Over 12 to 18 hours, the yeast and naturally present bacteria produce organic acids and aromatic compounds. This is why long-fermented bread has more depth and a slight tang compared with quick bread.
Bubbles build the crumb. Yeast produces carbon dioxide, which is trapped by the gluten network. These bubbles are what make the crumb open and airy.
Steam builds the crust. The moisture trapped by the lid keeps the dough surface moist and stretchy in the early bake. This allows maximum rise, and it also helps the crust develop its glossy, blistered appearance.
Dry heat finishes the crust. Once the lid comes off, the surface dries and the sugars caramelize, giving the crust its deep golden color and crisp texture.
Helpful Tips for the Best Artisan Bread
Preheat the Dutch oven fully. This is the most important tip. A pot that is not hot enough will not give the dough its initial burst of heat, and the crust will be paler and softer.
Do not skip the long rise. The 12 to 18 hour ferment is what makes the bread work. Shorter times give a denser, less flavorful loaf.
Use a large enough bowl. The dough will double, so choose a bowl that gives it room.
Handle the dough gently. Preserve the bubbles by using light, quick movements when shaping.
Use parchment paper. It makes it easy to lower the dough into the hot pot, and it prevents sticking.
Use a heavy pot with a tight lid. A 5 to 6 quart cast iron or enameled Dutch oven works best. Any oven-safe pot with a tight lid can work, but make sure the knob on the lid is rated for 450°F (230°C).
Weigh your ingredients if you can. A kitchen scale gives consistent results. A typical weight formula for this recipe is about 400 grams of flour, 350 grams of water, 9 grams of salt, and 2 grams of yeast.
Let the loaf cool. Wait at least 45 minutes before slicing. The wait is worth it.
Be careful with the hot pot. Use thick oven mitts, and keep your face and arms away from the steam when lifting the lid.
Troubleshooting Common Problems
The dough did not rise or get bubbly. The yeast may be old, the water may have been too cold or too hot, or the room may be too cool. Use fresh yeast and give the dough extra time in a warmer spot.
The dough is too sticky to shape. This dough is meant to be wet. Flour your hands and surface lightly and work quickly. A bench scraper helps. Avoid adding too much extra flour.
The loaf is flat. The dough may have over-fermented, or it may have been handled too roughly. Check the dough at 12 to 14 hours in a warm kitchen, and shape gently.
The crust is pale and soft. The Dutch oven may not have been hot enough, or the loaf may not have baked uncovered long enough. Preheat for the full 30 minutes and bake until the crust is deep golden.
The crust is too hard or too dark. Reduce the uncovered baking time slightly, or lower the oven rack.
The bottom is burnt. The pot may be too close to the heating element. Move the rack up one position, or place a baking sheet on the rack below.
The crumb is dense or gummy. The loaf may have been sliced too soon, or it may be underbaked. Bake until the internal temperature reaches at least 205°F (96°C), and cool completely before slicing.
The loaf stuck to the pot. Use parchment paper, or lightly dust the bottom of the pot with cornmeal or flour.
The bread tastes too sour. The dough may have fermented too long or in a very warm place. Reduce the fermentation time next time.
The bread tastes bland. The salt may have been left out, or the fermentation was too short. Add the full amount of salt and ferment for at least 12 hours.
What If I Don’t Have a Dutch Oven?
A Dutch oven is ideal, but you can still make good bread without one.
Use another oven-safe pot with a lid. A heavy stockpot or casserole dish with a tight, oven-safe lid works. Make sure it can handle 450°F (230°C).
Use a baking stone or steel with a steam pan. Preheat a baking stone or an upside-down baking sheet, and place a metal pan on a lower rack. Slide the loaf onto the hot surface, pour hot water into the pan to create steam, and bake until golden.
Use two oven-safe bowls. An oven-safe bowl turned upside down over the loaf can trap steam, though it requires care.
The crust may be slightly different, but the flavor and crumb will still be wonderful.
Delicious Ways to Serve Artisan Italian Bread
With olive oil and herbs. Pour olive oil into a shallow dish, add a pinch of salt, pepper, dried oregano, or Italian seasoning, and dip warm slices into it.
With soup. Serve a thick slice alongside tomato soup, minestrone, or a hearty stew.
With pasta. Use it to mop up sauces from spaghetti, lasagna, or baked ziti.
As garlic bread. Slice, brush with garlic butter, and toast until golden.
As bruschetta. Toast slices, rub with garlic, and top with chopped tomatoes, basil, and olive oil.
As sandwiches. Thick slices make sturdy, flavorful sandwiches.
With cheese and charcuterie. Pair with cheeses, olives, cured meats, and fruit on a board.
As toast. Toast slices and top with butter and jam, or avocado and a fried egg.
As croutons or panzanella. Cube day-old bread for homemade croutons, or toss with tomatoes and cucumber for panzanella salad.
In French toast or bread pudding. Day-old artisan bread soaks up custard well.
Variations to Try
- Herb and garlic loaf. Add a tablespoon of dried herbs and a few cloves of minced garlic to the dough.
- Rosemary and olive oil. Mix in fresh chopped rosemary, and brush the top with olive oil before baking.
- Olive loaf. Fold in chopped olives during shaping.
- Cheese loaf. Add grated Parmesan or sharp cheddar to the dough.
- Whole wheat blend. Replace up to one cup of the bread flour with whole wheat flour for a heartier loaf. You may need a little more water.
- Seeded crust. Brush the shaped dough with water and roll it in sesame, poppy, or sunflower seeds.
- Sun-dried tomato and basil. Add chopped sun-dried tomatoes and dried basil.
- Smaller loaves. Divide the dough in half and bake two smaller loaves, reducing the covered time slightly.
Keep in mind that mix-ins can change the dough’s hydration and fermentation, so keep an eye on the dough.
How to Store Artisan Bread
At room temperature. Store the loaf cut-side down on a cutting board, or in a paper bag, for 2 to 3 days. Avoid sealed plastic bags, which soften the crust.
In the refrigerator. Refrigeration speeds up staling, so it is not recommended unless your kitchen is hot and humid.
In the freezer. Slice the cooled loaf and freeze the slices in a freezer-safe bag for up to 2 to 3 months. Toast slices straight from the freezer, or thaw and warm in the oven.
Reviving stale bread. Lightly sprinkle the loaf with water and warm it in a 350°F (175°C) oven for 5 to 10 minutes. The crust crisps up and the inside softens.
Using leftovers. Turn stale bread into croutons, breadcrumbs, French toast, or bread pudding.
Is Artisan Italian Bread Healthy?
This loaf is made from just flour, water, salt, and yeast, with no preservatives, additives, or added sugars. Long fermentation can also make bread easier to digest for some people, and it develops more flavor so that you may not need as much butter or toppings.
It is made with refined bread flour, so it is not especially high in fiber. You can replace part of the flour with whole wheat for extra fiber and a nuttier flavor. Nutritional values vary with slice size. If you track nutrition closely, calculate it using your own ingredients.
If you have food allergies or dietary restrictions, check the labels on your ingredients. This bread contains wheat and gluten.
Frequently Asked Questions
Do I really need a Dutch oven?
A Dutch oven gives the best results because it traps steam and holds heat. If you do not have one, use another heavy oven-safe pot with a lid, or bake on a hot baking stone with a pan of water for steam.
Can I use all-purpose flour instead of bread flour?
Yes, but the loaf will be slightly less chewy and may not rise as high. Bread flour is recommended for the best structure.
Can I use active dry yeast instead of instant yeast?
Yes. Use the same amount. It may be a little slower, so allow extra time if the dough is not bubbly after 12 hours.
Why does the dough need 12 to 18 hours?
The long rise builds gluten and flavor without kneading. Shorter rises produce denser, blander bread.
Can I let the dough rise in the refrigerator?
Yes. A cold ferment takes longer, about 18 to 24 hours or more, and develops even more flavor. Let the dough warm up slightly before shaping.
Is it normal for the dough to be this sticky?
Yes. This is a high-hydration dough. Use floured hands and a bench scraper to work with it, and avoid adding much extra flour.
How do I know when the bread is done?
The crust should be deep golden brown, the loaf should sound hollow when tapped on the bottom, and the internal temperature should reach about 205°F to 210°F (96°C to 99°C).
Why is my crust not crispy?
The Dutch oven may not have been hot enough, or the loaf may not have baked uncovered long enough. Preheat the pot for a full 30 minutes, and bake until the crust is deep golden.
Can I bake it without parchment paper?
Yes, but the dough may stick, and it is harder to move. Parchment paper makes transferring the dough easier and safer.
Can I add ingredients like cheese or herbs?
Yes. Fold small amounts in when you mix or shape the dough. See the variations above.
How long does homemade artisan bread last?
It is best on the first day and stays good for 2 to 3 days. Freeze slices for longer storage.
Can I make this bread in a smaller pot?
You can use a smaller pot, but the loaf may spread or bake unevenly. Choose a pot that gives the dough room to expand, usually 5 to 6 quarts.
Final Thoughts
This Rustic No-Knead Artisan Italian Bread proves that bakery-quality bread does not require kneading, complicated techniques, or special skills. With bread flour, water, salt, and a pinch of yeast, time and a hot Dutch oven transform simple ingredients into a golden, crackling loaf with a soft, airy center.
The process is easy to follow: stir, ferment, fold, shape, and bake. With a few simple tips, such as preheating the pot fully, handling the dough gently, and letting the bread cool before slicing, you will have a beautiful homemade loaf every time.
If you are looking for a satisfying bread to serve with soups, pasta, olive oil, or family dinners, give this recipe a try. Tear off a warm slice, dip it in olive oil, and enjoy the crunch of the crust and the softness of the crumb. 🍞✨
Print
Rustic No-Knead Artisan Italian Bread
Ingredients
- 3 cups bread flour
- 1½ cups warm water
- 1½ teaspoons salt
- ½ teaspoon instant yeast
Instructions
In a large bowl, combine the bread flour, salt, and instant yeast. Pour in the warm water and stir until a sticky, shaggy dough forms. Mix just until there is no dry flour left. The dough will look rough and wet, and that is exactly right. Do not add more flour.
Cover the bowl and leave the dough at room temperature for 12 to 18 hours, until doubled in size and bubbly. A plate, a damp towel, or plastic wrap all work as a cover. Place the bowl somewhere out of direct sunlight and away from drafts. The dough is ready when the surface is dotted with bubbles, the dough has domed up, and it jiggles when the bowl is shaken. In a warm kitchen, check closer to 12 hours. In a cool kitchen, it may need the full 18.
Lightly flour your work surface. Gently turn out the dough and fold the edges toward the center. Shape it into a round loaf without kneading. The dough will be sticky and loose. Use a bench scraper or floured hands to help. Fold the left, right, top, and bottom edges into the center like an envelope, then flip it seam-side down and gently tuck it into a round shape. Handle it as little as possible to preserve the air bubbles.
Place a Dutch oven with its lid inside the oven and preheat to 450°F (230°C) for about 30 minutes. A very hot pot is the secret to a crisp crust and strong oven spring. Allow a full 30 minutes so the pot is thoroughly heated through. While the oven heats, let the shaped dough rest on a piece of parchment paper, loosely covered.
Carefully place the dough on parchment paper and lower it into the hot Dutch oven. Cover with the lid. Use oven mitts, because the pot and lid are extremely hot. Lifting the dough by the parchment makes the transfer easy. If you like, score the top with a sharp knife or razor blade, making a shallow slash about ½ inch deep. Scoring is optional, but it helps the loaf expand in a controlled way.
Bake for 30 minutes with the lid on. During this stage, the trapped steam keeps the crust flexible so the loaf can rise and expand fully.
Remove the lid and bake for another 10 to 15 minutes, until the crust is deep golden brown and crispy. Watch the loaf closely during the final minutes. The bread is done when the crust is a rich golden brown and the loaf sounds hollow when tapped on the bottom. The internal temperature should reach about 205°F to 210°F (96°C to 99°C).
Carefully remove the bread and let it cool on a wire rack for at least 45 minutes before slicing. Cooling lets the interior finish setting. Slicing too early can make the crumb gummy and dense. You may hear the crust crackle as it cools, which is a good sign.