

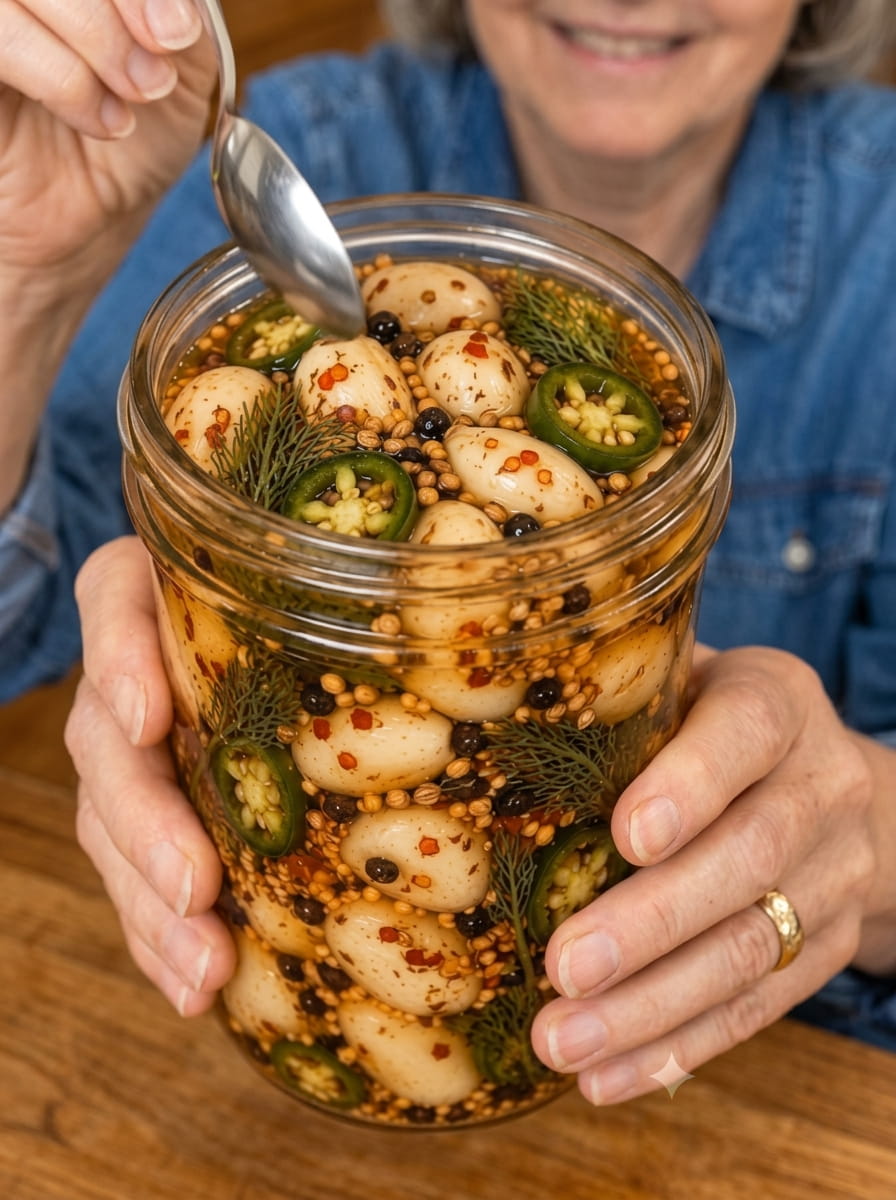
Sweet Heat Pickled Garlic Cloves: The Addictive Sweet-and-Spicy Snack You’ll Crave All Year
If you’ve never tried pickled garlic before, get ready for your new favorite condiment. These Sweet Heat Pickled Garlic Cloves combine everything great about homemade pickles — crunch, tang, and bold flavor — with a spicy-sweet twist that makes them completely different from anything you’ll find in a store. Bright red chilies, warm mustard seed, fragrant dill, and a honey-vinegar brine transform ordinary garlic cloves into something you’ll want to eat straight out of the jar.
Whether you’re a seasoned home fermenter or a total pickling beginner, this recipe is refreshingly simple. No special equipment, no complicated canning process — just a jar, a saucepan, and a little patience while the flavors develop in your fridge. In this guide, we’ll walk through exactly how to make Sweet Heat Pickled Garlic Cloves, explain why this recipe works so well, share tips for getting the best texture and flavor, explore fun variations, and answer the most common questions about pickling garlic at home.
By the end, you’ll have everything you need to make a jar (or three) of this fiery, sweet, tangy garlic that’s perfect for snacking, entertaining, or leveling up everyday meals.
Why You’ll Love This Sweet Heat Pickled Garlic Recipe
There are plenty of pickled garlic recipes out there, but this one stands out for a few key reasons.
It’s the perfect balance of sweet, tangy, and spicy. Most pickled garlic recipes lean heavily into sharp vinegar flavor, which can be a little intense for some palates. This recipe softens that sharpness with honey, while fresh red chilies and crushed red pepper flakes bring real heat. The result is a complex, craveable flavor that hits every note at once.
It’s incredibly easy to make. You don’t need a canning setup, a water bath, or any fermentation expertise. This is a quick refrigerator pickle, meaning you simply pack your jar, pour a warm brine over the top, and let the fridge do the rest of the work.
The texture is unbeatable. Because these are quick-pickled rather than long-fermented or heat-processed in a canner, the garlic cloves retain a satisfying crunch instead of turning soft or mushy. Every bite has that snappy bite you want from a good pickle.
It’s endlessly versatile. Sweet and spicy pickled garlic isn’t just a snack — it’s a flavor bomb you can drop into almost any dish. More on that below.
It keeps for weeks in the fridge. Once made, this pickled garlic is a low-maintenance staple you can keep on hand, getting better and more flavorful with each passing day.
What Makes Pickled Garlic So Special?
Garlic is one of the most beloved ingredients in the world, showing up in nearly every cuisine on the planet. But raw garlic can be sharp, pungent, and overwhelming in large amounts. Pickling changes that completely.
When garlic cloves sit in an acidic brine, the harsh, biting compounds mellow out significantly. What’s left behind is a milder, tangier, more rounded garlic flavor with a pleasant crunch. Add sugar or honey to the mix, and you get a sweet contrast that balances the natural sharpness of the garlic and the acidity of the vinegar. Add chili and pepper flakes, and you introduce a spicy kick that makes the whole thing addictive.
This is why pickled garlic has become such a popular ingredient across food blogs, restaurants, and home kitchens — it takes something already delicious and transforms it into a completely new flavor experience.
Sweet Heat Pickled Garlic Cloves Recipe
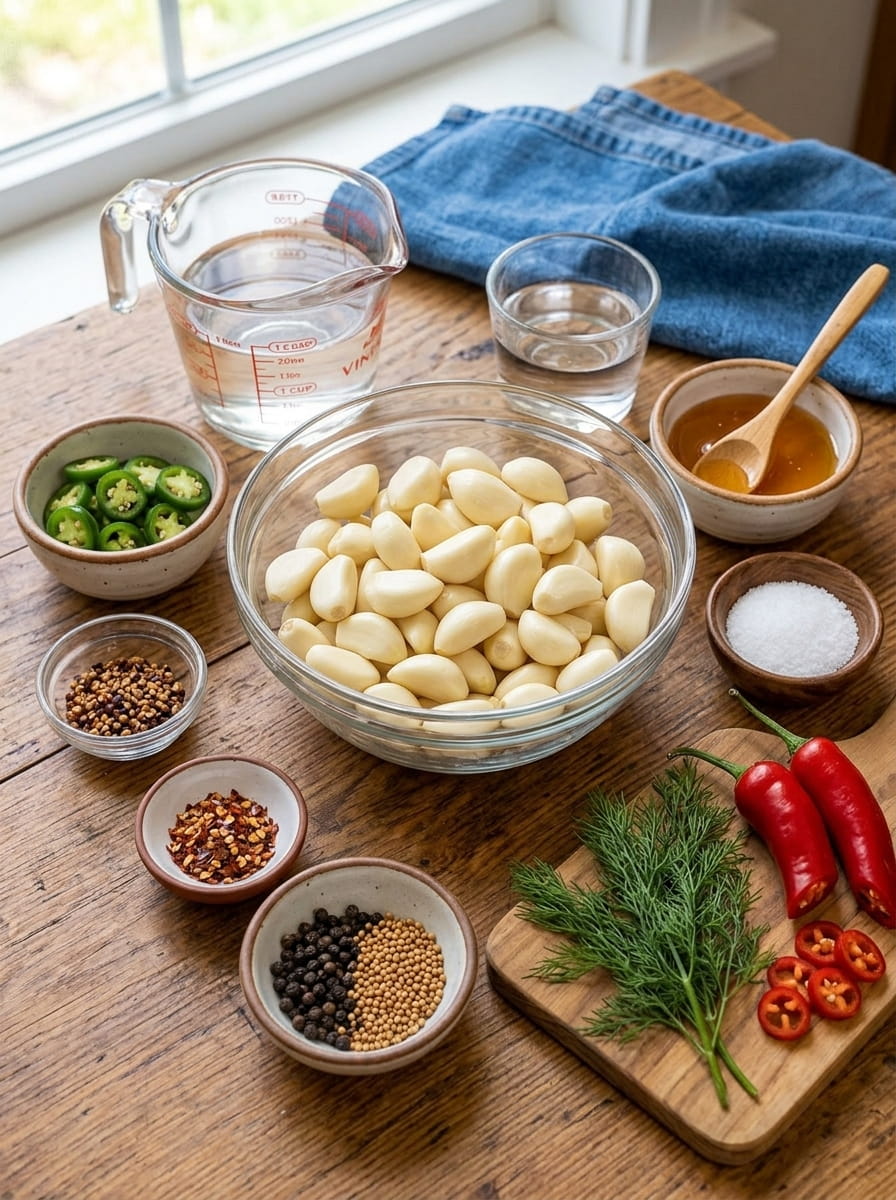
Ingredients
Here’s what you’ll need to make this batch of sweet and spicy pickled garlic:
- 2 cups fresh garlic cloves, peeled
- 1 cup white vinegar
- ½ cup water
- ¼ cup honey
- 1½ tablespoons kosher salt
- ½ teaspoon crushed red pepper flakes
- 2 fresh red chilies, thinly sliced
- 1 teaspoon black peppercorns
- ½ teaspoon mustard seeds
- 2 sprigs fresh dill
Each ingredient plays an important role. The vinegar and water form the acidic base of the brine, the honey adds sweetness and helps balance the tang, and the kosher salt draws out moisture from the garlic while enhancing overall flavor. The red pepper flakes and fresh chilies bring the “heat” in Sweet Heat, while the peppercorns, mustard seeds, and dill add aromatic depth and a subtle herbal complexity.
Step-by-Step Instructions
Step 1: Prepare Your Jar
Start with a clean glass jar — a quart-sized mason jar works perfectly for this recipe. Make sure it’s completely clean and dry before you begin. Pack the peeled garlic cloves into the jar along with the sliced red chilies, black peppercorns, mustard seeds, crushed red pepper flakes, and fresh dill sprigs. Try to distribute the chilies and spices evenly throughout the jar rather than dumping them all in one spot, so every clove gets exposed to that spicy, aromatic flavor.
Step 2: Make the Brine
In a small saucepan, combine the white vinegar, water, honey, and kosher salt. Place the saucepan over medium heat and warm the mixture, stirring gently and consistently. You’re not trying to boil this brine — just warm it enough that the honey fully dissolves and blends smoothly with the vinegar and water, and the salt disappears completely into the liquid. This usually takes just a few minutes.
Step 3: Pour the Brine Over the Garlic
Once the brine is fully combined and the honey and salt have dissolved, carefully pour it over the garlic cloves in the jar. Make sure the liquid completely covers the garlic and other ingredients. If needed, gently press down on the cloves with a spoon to help release any trapped air bubbles and ensure everything stays submerged.
Step 4: Cool and Seal
Let the jar sit at room temperature until the brine has cooled down completely. This is an important step — sealing the jar while the brine is still hot can create pressure buildup or affect texture. Once cooled, seal the jar tightly with its lid.
Step 5: Refrigerate
Place the sealed jar in the refrigerator. This is a refrigerator pickle, not a shelf-stable canned pickle, so it must stay chilled the entire time.
Step 6: Wait for the Magic to Happen
While you technically can taste these after just 24 hours, patience really pays off here. Letting the garlic pickle for 2–3 days allows the flavors to fully penetrate the cloves, mellowing the raw garlic bite and letting the sweet, tangy, spicy brine really soak in. Many people find the flavor keeps improving for a week or more.
Step 7: Serve and Enjoy
Once ready, serve your Sweet Heat Pickled Garlic Cloves chilled straight from the jar. They’re incredible on their own as a snack, but also shine on appetizer boards, tucked into sandwiches, tossed into salads, or served alongside grilled meats.
Step 8: Store Properly
Keep the jar refrigerated at all times and make sure the garlic cloves remain fully submerged in the brine to maintain freshness, crunch, and flavor.
Tips for the Best Sweet and Spicy Pickled Garlic
Choose fresh, firm garlic cloves. The quality of your garlic matters. Look for firm, plump cloves without any soft spots, sprouting, or discoloration. Fresher garlic will hold its crunch better and produce a cleaner flavor.
Peel garlic efficiently. Peeling two cups of garlic cloves by hand can be tedious. A quick trick: place unpeeled cloves in a lidded container or between two bowls and shake vigorously for 30 seconds. The skins loosen and slip right off, saving you significant time.
Adjust the heat to your preference. If you love serious spice, add an extra chili or increase the red pepper flakes. If you prefer a milder version, remove the seeds and membranes from the chilies before slicing, or reduce the pepper flakes by half.
Don’t skip the cooling step. Pouring hot brine directly into a sealed jar can cause pressure to build. Always let the brine cool to room temperature before sealing and refrigerating.
Use a clean utensil every time. When serving, always use a clean fork or spoon to remove garlic cloves from the jar. This helps prevent contamination and extends the shelf life of your pickled garlic.
Keep everything submerged. Any garlic cloves exposed to air above the brine line are more likely to spoil or discolor. If needed, use a small clean weight or a folded piece of parchment to help keep everything pushed below the liquid.
Let it sit longer for maximum flavor. While 24 hours will give you a taste, the real magic happens after 2–3 days, and many fans of this recipe say the garlic tastes even better after a full week in the fridge.
Flavor Variations to Try
One of the best things about this recipe is how easy it is to customize. Here are a few fun variations to experiment with:
Extra Fiery Version: Add sliced habanero or serrano peppers in addition to the red chilies for an even bigger kick.
Herb-Forward Version: Swap the dill for fresh rosemary or thyme for a more savory, earthy profile.
Citrus Twist: Add a few strips of orange or lemon zest to the jar for a bright, citrusy note that pairs beautifully with the honey.
Smoky Version: Add a small pinch of smoked paprika or a few dried chipotle flakes to the brine for a smoky depth.
Extra Sweet Version: Increase the honey slightly or add a tablespoon of brown sugar for an even more caramelized sweetness.
Garlic and Onion Combo: Add a handful of small pearl onions or shallots to the jar along with the garlic for a mixed pickled medley.
Ways to Use Sweet Heat Pickled Garlic Cloves
This pickled garlic isn’t just a snack — it’s a versatile ingredient you can use in countless ways.
As a standalone snack: Simply grab a few cloves straight from the jar whenever you want a burst of sweet, spicy, tangy flavor.
On appetizer and charcuterie boards: Pickled garlic adds color, crunch, and bold flavor next to cheeses, cured meats, olives, and crackers.
In sandwiches and burgers: Slice or chop the cloves and layer them into sandwiches for a spicy, tangy kick that cuts through rich or fatty ingredients.
Tossed into salads: Add whole or sliced pickled garlic cloves to green salads, grain bowls, or pasta salads for a punch of flavor.
Alongside grilled meats: The sweet heat pairs beautifully with grilled chicken, steak, sausages, or pork, cutting through richness with acidity and spice.
Minced into dressings and sauces: Finely chop a few cloves and stir them into vinaigrettes, aioli, or dipping sauces for extra depth.
On pizza or flatbread: Scatter chopped pickled garlic over pizza after baking for a tangy, spicy topping.
In martinis and cocktails: Just like a pickled onion or olive, a pickled garlic clove can make a fun, bold garnish for a savory cocktail.
How Long Does Pickled Garlic Last?
When stored properly in the refrigerator with the cloves fully submerged in brine, this pickled garlic will typically stay fresh for 2 to 3 months. Always use a clean utensil when serving to avoid introducing bacteria into the jar, and keep an eye out for any signs of spoilage, such as an off smell, mold, or unusual discoloration. If anything seems off, it’s best to discard the batch.
Because this is a refrigerator pickle rather than a shelf-stable canned product, it should never be stored at room temperature for extended periods. The refrigeration is what keeps the garlic safe and prevents spoilage over time.
Frequently Asked Questions
Can I use pre-peeled garlic cloves?
Yes, pre-peeled garlic cloves from the grocery store work well and can save significant prep time. Just make sure they’re fresh and firm.
Do I need to sterilize the jar first?
Since this is a refrigerator pickle rather than a shelf-stable canned product, a thoroughly cleaned jar is generally sufficient. However, sterilizing your jar with boiling water beforehand is a good extra precaution and can help extend shelf life.
Why is my garlic turning blue or green?
This is a common and harmless chemical reaction that can occur when garlic reacts with the acid in vinegar, especially with younger or fresher garlic. It doesn’t affect safety or flavor — it’s simply a natural pigment reaction.
Can I make this recipe less spicy?
Absolutely. Simply reduce or omit the crushed red pepper flakes and use fewer chili slices, or remove the seeds and membranes from the chilies before adding them.
Can I reuse the brine after the garlic is gone?
While the flavor won’t be as strong the second time around, some people like to reuse the brine to quick-pickle other vegetables like onions or carrots. Just note it may need a slight adjustment in seasoning.
Is this recipe safe for canning and long-term shelf storage?
This recipe is designed as a refrigerator pickle, not a shelf-stable canned product. If you want to can garlic for long-term room-temperature storage, you’ll need to follow a tested, science-based canning recipe with the proper acidity levels and processing method for food safety.
Can I double or triple the recipe?
Yes, this recipe scales easily. Just make sure you have a large enough jar or split the mixture between multiple jars, and adjust your brine ingredients proportionally.
Final Thoughts
These Sweet Heat Pickled Garlic Cloves are proof that a few simple pantry ingredients can create something truly special. With just a little bit of prep and a few days of patience, you’ll end up with crunchy, tangy, sweet, and spicy garlic cloves that elevate everything from sandwiches to cocktails. Once you try this recipe, it’s easy to see why homemade pickled garlic has become such a beloved staple in kitchens everywhere.
Make a batch, tuck it in your fridge, and get ready to reach for it constantly — on boards, in bowls, and straight off a fork.
Print
Sweet Heat Pickled Garlic Cloves
Ingredients
Ingredients
Here’s what you’ll need to make this batch of sweet and spicy pickled garlic:
- 2 cups fresh garlic cloves, peeled
- 1 cup white vinegar
- ½ cup water
- ¼ cup honey
- 1½ tablespoons kosher salt
- ½ teaspoon crushed red pepper flakes
- 2 fresh red chilies, thinly sliced
- 1 teaspoon black peppercorns
- ½ teaspoon mustard seeds
- 2 sprigs fresh dill
Each ingredient plays an important role. The vinegar and water form the acidic base of the brine, the honey adds sweetness and helps balance the tang, and the kosher salt draws out moisture from the garlic while enhancing overall flavor. The red pepper flakes and fresh chilies bring the “heat” in Sweet Heat, while the peppercorns, mustard seeds, and dill add aromatic depth and a subtle herbal complexity.
Instructions
Step 1: Prepare Your Jar
Start with a clean glass jar — a quart-sized mason jar works perfectly for this recipe. Make sure it’s completely clean and dry before you begin. Pack the peeled garlic cloves into the jar along with the sliced red chilies, black peppercorns, mustard seeds, crushed red pepper flakes, and fresh dill sprigs. Try to distribute the chilies and spices evenly throughout the jar rather than dumping them all in one spot, so every clove gets exposed to that spicy, aromatic flavor.
Step 2: Make the Brine
In a small saucepan, combine the white vinegar, water, honey, and kosher salt. Place the saucepan over medium heat and warm the mixture, stirring gently and consistently. You’re not trying to boil this brine — just warm it enough that the honey fully dissolves and blends smoothly with the vinegar and water, and the salt disappears completely into the liquid. This usually takes just a few minutes.
Step 3: Pour the Brine Over the Garlic
Once the brine is fully combined and the honey and salt have dissolved, carefully pour it over the garlic cloves in the jar. Make sure the liquid completely covers the garlic and other ingredients. If needed, gently press down on the cloves with a spoon to help release any trapped air bubbles and ensure everything stays submerged.
Step 4: Cool and Seal
Let the jar sit at room temperature until the brine has cooled down completely. This is an important step — sealing the jar while the brine is still hot can create pressure buildup or affect texture. Once cooled, seal the jar tightly with its lid.
Step 5: Refrigerate
Place the sealed jar in the refrigerator. This is a refrigerator pickle, not a shelf-stable canned pickle, so it must stay chilled the entire time.
Step 6: Wait for the Magic to Happen
While you technically can taste these after just 24 hours, patience really pays off here. Letting the garlic pickle for 2–3 days allows the flavors to fully penetrate the cloves, mellowing the raw garlic bite and letting the sweet, tangy, spicy brine really soak in. Many people find the flavor keeps improving for a week or more.
Step 7: Serve and Enjoy
Once ready, serve your Sweet Heat Pickled Garlic Cloves chilled straight from the jar. They’re incredible on their own as a snack, but also shine on appetizer boards, tucked into sandwiches, tossed into salads, or served alongside grilled meats.
Step 8: Store Properly
Keep the jar refrigerated at all times and make sure the garlic cloves remain fully submerged in the brine to maintain freshness, crunch, and flavor.






