
5-Minute No-Knead Bread: Crusty, Golden & Wonderfully Soft
There is nothing quite like the smell of fresh bread baking in your kitchen. For many people, though, homemade bread feels intimidating. It seems to demand kneading, special equipment, and hours of attention. This no-knead bread removes all of that.
You need four basic ingredients, one bowl, and a spoon. About five minutes of hands-on effort gets you a rustic loaf with a deeply golden, crackly crust and a soft, airy, tender inside. The dough does the work on its own while you go about your day.
This guide covers the full recipe, the science behind why it works, tips for a better crust and crumb, troubleshooting, variations, storage, and answers to the questions bakers ask most often.
Why You’ll Love This No-Knead Bread Recipe
- Truly minimal effort. There is no kneading, no stand mixer, and no complicated shaping. You stir, wait, shape, and bake.
- Only four ingredients. Flour, yeast, salt, and water are all you need.
- Bakery-style results. The Dutch oven traps steam and creates the blistered, crackly crust people pay a lot for at artisan bakeries.
- Perfect for beginners. The dough is very forgiving, and a wetter dough is actually better here.
- Flexible timing. Rise the dough for a couple of hours on the counter, or overnight in the refrigerator for deeper flavor.
- Budget-friendly. A whole loaf costs only pennies compared to store-bought artisan bread.
- Endlessly versatile. Serve it with soup, slice it for sandwiches, toast it for breakfast, or dip it in olive oil.
Recipe Overview
- Hands-On Time: 5 minutes
- Rise Time: 2 to 3 hours (or 8 to 18 hours in the refrigerator)
- Bake Time: 40 to 45 minutes
- Total Time: About 3½ to 4 hours (not counting overnight options)
- Yield: 1 large loaf (about 10 slices)
- Course: Bread, side dish
- Cuisine: Rustic, European-inspired
Ingredients
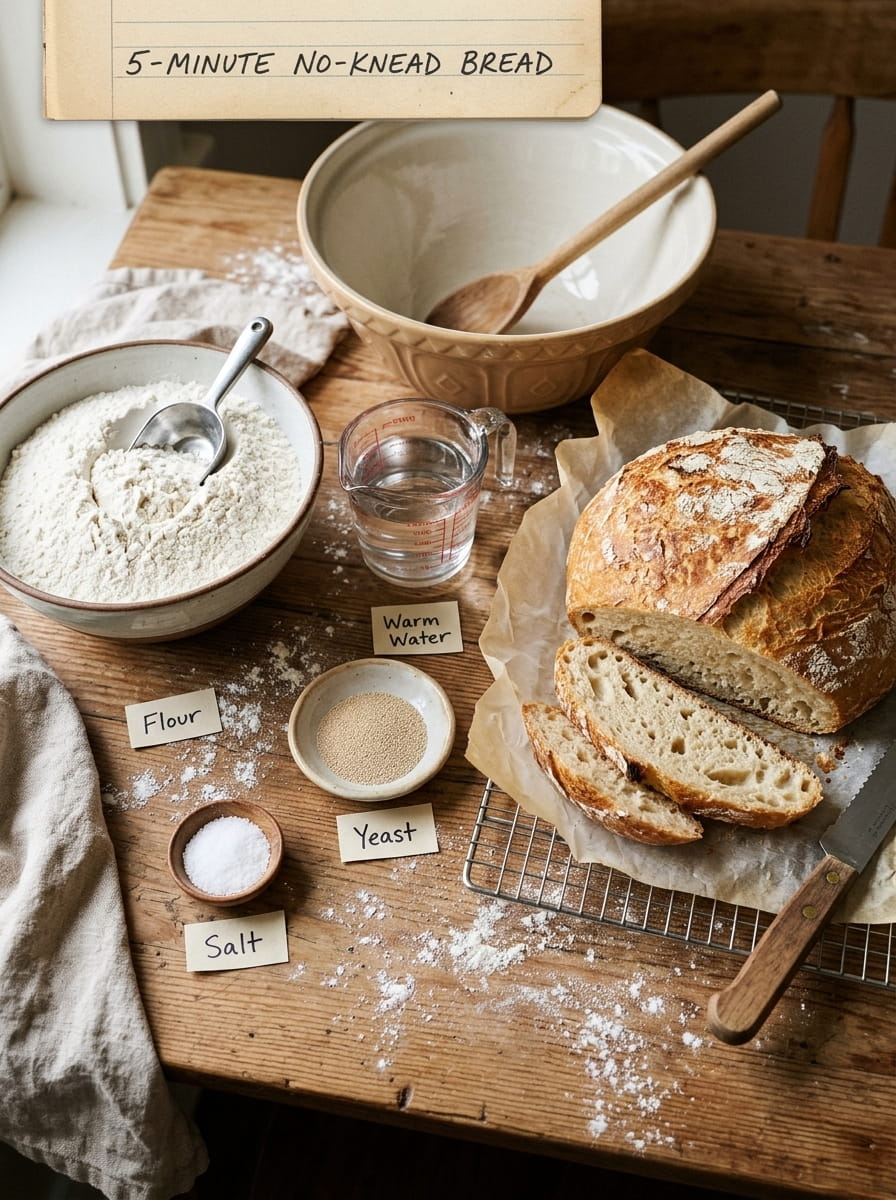
- 3 cups (390 g) all-purpose flour, plus extra for dusting. Bread flour also works and gives a chewier crumb.
- 1 teaspoon instant yeast (or active dry yeast)
- 1½ teaspoons fine salt
- 1½ cups (355 ml) lukewarm water, about 100°F (38°C)
Optional: Cornmeal, wheat bran, or parchment paper for the bottom of the pot to prevent sticking.
Equipment
- Large mixing bowl
- Wooden spoon or dough whisk
- Kitchen towel, plate, or plastic wrap to cover the bowl
- Dutch oven with a lid (5 to 6 quarts works best)
- Parchment paper (optional but helpful)
- Wire cooling rack
- Serrated bread knife
No Dutch oven? See the substitution tips below.
Instructions
Step 1: Mix the Dough
In a large mixing bowl, combine the flour, yeast, and salt. Pour in the lukewarm water. Stir with a wooden spoon or dough whisk until no dry flour remains and you have a sticky, shaggy dough. This takes about a minute. Don’t worry if it looks messy and wet. That’s exactly what you want.
Step 2: Let It Rise
Cover the bowl with a plate, a damp towel, or plastic wrap. Leave it at room temperature for 2 to 3 hours, until the dough has doubled in size and is dotted with bubbles across the surface. In a cool kitchen, it may take closer to 4 hours.
For the best flavor, you can instead refrigerate the covered dough for 8 to 18 hours. The long, cold rise develops a tangier, more complex taste.
Step 3: Shape the Bread
Dust a work surface lightly with flour. Scrape the dough out of the bowl. It will be loose and sticky, so flour your hands and the top of the dough as needed. Fold the edges toward the center a few times to form a rough round. Don’t knead it or press out all the air. Gentle handling keeps the bubbles that create an open, airy crumb.
Place the dough seam-side down on a sheet of parchment paper. Cover it loosely and let it rest for 30 minutes while the oven heats.
Step 4: Preheat the Oven
Place a Dutch oven with its lid in the oven and preheat to 450°F (230°C) for at least 30 minutes. The pot must be thoroughly hot. This sudden blast of heat is what gives the loaf its dramatic rise, called oven spring.
Step 5: Bake
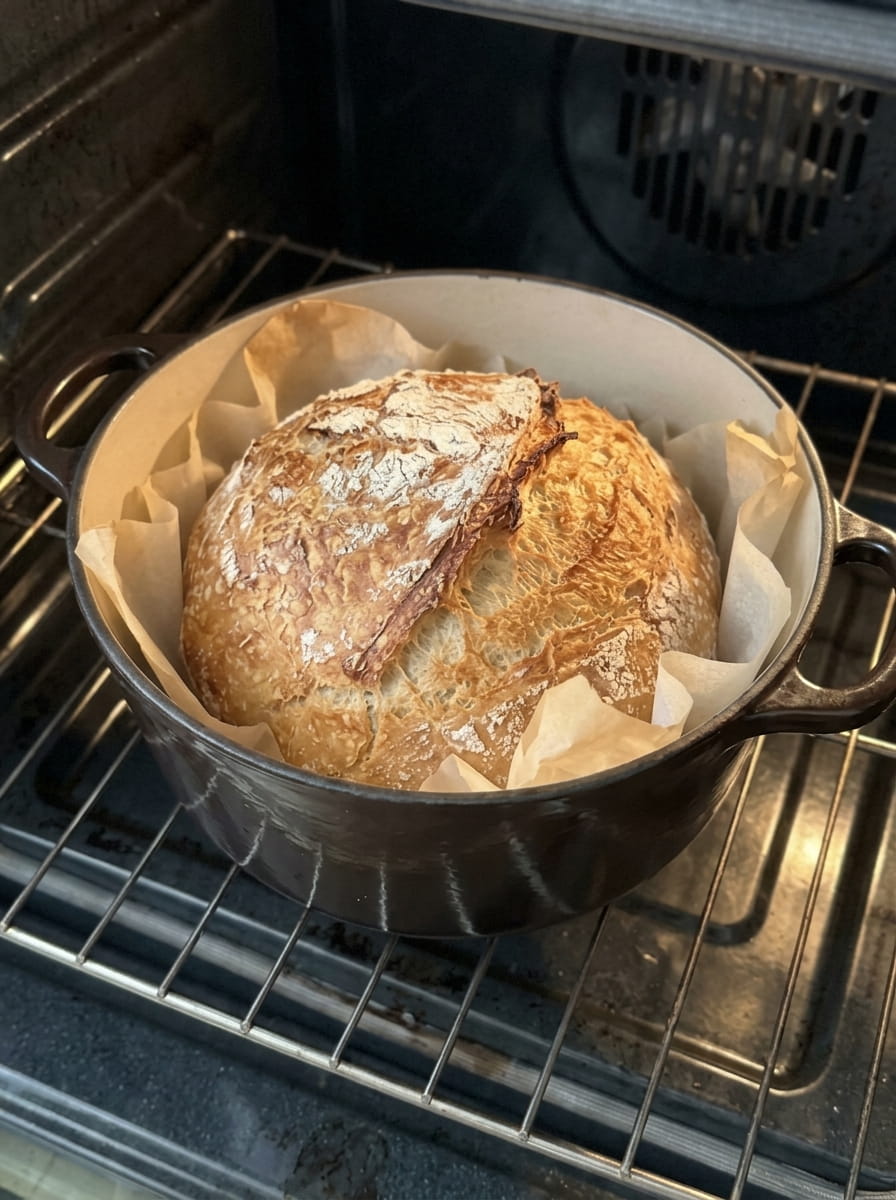
Use oven mitts to remove the hot pot carefully. Lift the dough by the parchment edges and lower it into the pot. For a decorative finish and controlled expansion, score the top with a sharp knife or razor blade, making one slash about ½ inch deep. Cover with the lid and return the pot to the oven.
Bake covered for 30 minutes. The trapped steam keeps the crust soft at first so the loaf can expand fully. Then remove the lid and bake for another 10 to 15 minutes, until the crust is deep golden brown and crisp.
The bread is done when it sounds hollow if you tap the bottom, or when an instant-read thermometer reads about 205–210°F (96–99°C) in the center.
Step 6: Cool and Serve
Lift the loaf out of the pot and place it on a wire rack. Resist slicing right away. Let it cool for at least 30 to 60 minutes. The inside is still finishing its cooking, and cutting too soon can leave the crumb gummy. As it cools, you’ll likely hear the crust crackle, which bakers call “singing.”
Why No-Knead Bread Works: The Simple Science
Traditional bread is kneaded to develop gluten, the stretchy protein network that gives bread structure. Kneading forces flour proteins to align and bond. No-knead bread achieves the same result with time and water instead of effort.
A wet dough lets gluten form on its own as the dough sits. During the long rise, enzymes break down starches, and the proteins slowly link together into a strong, elastic web. At the same time, the yeast ferments, producing carbon dioxide bubbles that get trapped in that network. The result is an open, tender crumb without any kneading.
The Dutch oven plays an equally important role. Moisture from the dough turns to steam inside the sealed pot. That steam keeps the surface flexible, allowing maximum expansion, and then helps the crust gelatinize and turn glossy and crisp once the lid comes off. A home oven alone can’t hold steam this way, which is why Dutch oven bread tastes like it came from a professional deck oven.
Tips for the Best No-Knead Bread
Use a Scale if You Can
Cup measurements vary depending on how you scoop. Weighing your flour (390 g for this recipe) gives consistent results every time. If you use cups, spoon the flour into the cup and level it off rather than scooping directly from the bag.
Don’t Skip the Preheated Pot
A cold pot slows down oven spring and leads to a denser loaf with a paler crust. Give the Dutch oven a full 30 minutes in the hot oven.
Embrace the Sticky Dough
Many beginners panic and add too much flour. Resist the urge. The high water content is the secret to the airy texture, so use just enough flour on your hands to keep the dough manageable.
Choose the Right Water Temperature
Lukewarm water, roughly 100°F, activates the yeast gently. Water that’s too hot can kill the yeast, while water that’s too cold slows the rise considerably.
Try the Overnight Method for More Flavor
A slow, cold fermentation develops complex flavors that a quick rise can’t match. Mix the dough in the evening, refrigerate it overnight, and bake the next day. You can bake straight from the fridge after a brief shaping, or let the shaped dough warm up for 30 minutes.
Use Parchment for Easy Handling
Parchment paper makes it simple to lower the dough into a blistering hot pot without burning your hands or deflating the loaf. It also prevents sticking. Just make sure the paper is rated for oven temperatures up to 450°F.
No Dutch Oven? Try These Alternatives
You can still make great bread without a Dutch oven. Here are some options:
- Oven-safe pot with a lid. A heavy stainless steel or enameled cast iron pot works as long as the lid and handles are oven-safe at 450°F.
- Baking stone or steel with a steam pan. Preheat a baking stone, and place a metal pan on the rack below. When you load the bread, pour a cup of hot water into the pan and close the oven door quickly to trap the steam.
- Baking sheet with an inverted roasting pan. Place the dough on a preheated baking sheet and cover it with a large oven-safe roasting pan or foil tent for the first 30 minutes.
- Loaf pan method. Bake the dough in a greased loaf pan for a sandwich-style loaf. The crust will be softer, but the bread is still delicious.
Troubleshooting Common Problems
My Bread Is Dense
This usually means the dough didn’t rise enough, the yeast was old, or the water was too cold. Make sure the dough doubles in size and looks bubbly before shaping. Check the expiration date on your yeast.
The Crust Is Too Hard or Too Thick
Overbaking is the likely cause. Check the bread a few minutes earlier next time, and use a thermometer to confirm it has reached about 205–210°F. A slightly lower oven temperature, such as 425°F, can also help.
The Bread Spread Out Flat
A dough that is too wet, over-proofed, or handled roughly may spread instead of rising. Use a scale for accuracy, shorten the rise slightly, and shape the dough more gently with a light dusting of flour.
The Bottom Is Burned
Dutch ovens retain a lot of heat. Place an oven rack in the lower-middle position rather than the very bottom, and use parchment paper. You can also set a baking sheet on the rack beneath the pot to shield the base.
The Inside Is Gummy
The loaf was either underbaked or cut while still hot. Bake until the internal temperature reaches at least 205°F, and always let the loaf cool before slicing.
The Bread Has No Flavor
Salt and time create flavor. Make sure you used the full amount of salt, and consider the overnight refrigerator rise for a richer taste.
Delicious Variations
Once you’ve mastered the basic loaf, experiment with these additions. Fold them in gently during the mixing step.
- Garlic and Herb No-Knead Bread. Add 3 cloves of minced garlic and 1 tablespoon of chopped rosemary, thyme, or parsley.
- Cheese Bread. Mix in 1 cup of shredded cheddar, Parmesan, or Gruyère.
- Olive and Rosemary Loaf. Stir in ¾ cup of chopped olives and a tablespoon of fresh rosemary.
- Whole Wheat No-Knead Bread. Replace 1 cup of the all-purpose flour with whole wheat flour, and add 2 tablespoons more water, since whole grains absorb more liquid.
- Seeded Crust Loaf. Brush the top with water and sprinkle with sesame, poppy, or sunflower seeds before baking.
- Cinnamon Raisin Bread. Add 1 cup of raisins and 2 teaspoons of cinnamon, plus 2 tablespoons of sugar, for a lightly sweet breakfast loaf.
- Jalapeño Cheddar. Mix in diced jalapeños and sharp cheddar for a spicy, savory loaf.
What to Serve With Homemade Bread
This bread is versatile enough to fit almost any meal:
- With soup or stew. Tear off thick slices to soak up tomato soup, chili, or beef stew.
- With olive oil and balsamic vinegar. A classic, simple appetizer.
- As sandwiches. Slice it for turkey and cheese, grilled cheese, or avocado toast.
- With butter and jam. Warm slices with butter and honey or jam make a comforting breakfast.
- As bruschetta or crostini. Toast thin slices and top them with tomatoes, basil, or whipped ricotta.
- As croutons or breadcrumbs. Leftover bread cubes become golden croutons or homemade breadcrumbs.
- As French toast or bread pudding. Day-old bread is the best choice for both.
How to Store Homemade No-Knead Bread
At Room Temperature
Store the cooled loaf cut-side down on a cutting board for up to 2 days to protect the crumb while keeping the crust crisp. For up to 4 days, wrap it in a clean kitchen towel or keep it in a paper bag. Avoid sealing it in plastic right away, which softens the crust.
In the Freezer
Slice the cooled loaf, wrap it tightly in plastic wrap or foil, and place it in a freezer bag. Freeze for up to 3 months. Toast slices straight from the freezer, or thaw at room temperature.
Refreshing Stale Bread
To bring back that fresh-baked crispness, sprinkle the loaf lightly with water and warm it in a 350°F oven for 8 to 10 minutes.
Frequently Asked Questions
Why is it called “5-minute” bread if it takes hours?
Only about five minutes of that time is your active work. The rest is hands-off waiting while the dough rises and the bread bakes.
Can I use active dry yeast instead of instant yeast?
Yes. Use the same amount, and dissolve it in the warm water for 5 minutes first. The dough may take slightly longer to rise.
Can I use bread flour instead of all-purpose flour?
Yes. Bread flour has more protein, which creates a chewier, taller loaf. You may need an extra tablespoon or two of water, since bread flour absorbs a little more liquid.
Do I need to use a Dutch oven?
A Dutch oven gives the best crust, but it’s not essential. You can use any oven-safe pot with a lid, or create steam with a pan of hot water in the oven.
Can I make the dough ahead of time?
Yes. The dough keeps in the refrigerator for up to 3 days in a covered container. Bake a loaf whenever you want fresh bread, and the flavor will deepen each day.
Why does my dough not rise?
Common causes include expired yeast, water that was too hot or too cold, or a cold kitchen. Move the bowl to a warmer spot, such as an oven with just the light on, and give it more time.
Can I reduce the salt?
Salt controls fermentation and builds flavor, so reducing it too much creates a bland loaf that can rise unevenly. If you must cut back, do so modestly.
How do I get a crispier crust?
Bake with the lid off long enough to fully brown the crust, and cool the loaf on a wire rack. For extra crispness, turn off the oven after baking and leave the bread inside with the door slightly open for 5 to 10 minutes.
Can I make this recipe gluten-free?
This recipe relies on gluten for structure, so a direct swap with a single gluten-free flour won’t work well. Look for a recipe developed specifically for a gluten-free flour blend.
What’s the best way to cut the bread?
Use a serrated bread knife and a gentle sawing motion. Let the loaf cool first so the crumb sets and slices cleanly.
Can I add sugar or oil?
You can. A teaspoon of sugar can help browning, and a tablespoon of olive oil softens the crumb. The basic recipe works well without either.
How do I know when the dough has risen enough?
The dough should be roughly doubled, with visible bubbles on top and sides. When you jiggle the bowl, the dough should wobble like a soft, airy mass.
Final Thoughts
This 5-Minute No-Knead Bread proves that great bread doesn’t require hard work or years of experience. With four ingredients, a bowl, a spoon, and a little patience, you can bake a loaf with a crackling golden crust and a soft, open interior that rivals anything from a bakery.
Once you’ve tried it, make it your own. Add herbs, swap in whole wheat, or try the overnight method for even more flavor. Before long, fresh homemade bread will be a regular part of your routine, and your kitchen will smell wonderful every time.
If you bake this recipe, leave a rating and a comment to let us know how it turned out. Happy baking! 🍞
Word count: about 2,700 words (excluding the SEO metadata block).
Suggested internal link ideas: easy homemade soup recipes, garlic herb butter, whole wheat bread recipe, how to proof yeast.
Suggested image alt text:
- “Golden crusty no-knead bread loaf cooling on a wire rack”
- “Sliced homemade bread showing a soft, airy crumb”
- “No-knead dough rising in a bowl until doubled in size”
- “Bread baking in a Dutch oven”
I can also add recipe schema markup, translate it into French or Arabic, or write a shorter version for social media if you’d like.
Print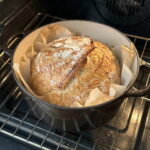
5-Minute No Knead Bread Recipe
Ingredients
- 3 cups (390 g) all-purpose flour, plus extra for dusting. Bread flour also works and gives a chewier crumb.
- 1 teaspoon instant yeast (or active dry yeast)
- 1½ teaspoons fine salt
- 1½ cups (355 ml) lukewarm water, about 100°F (38°C)
Instructions
In a large mixing bowl, combine the flour, yeast, and salt. Pour in the lukewarm water. Stir with a wooden spoon or dough whisk until no dry flour remains and you have a sticky, shaggy dough. This takes about a minute. Don’t worry if it looks messy and wet. That’s exactly what you want.
Cover the bowl with a plate, a damp towel, or plastic wrap. Leave it at room temperature for 2 to 3 hours, until the dough has doubled in size and is dotted with bubbles across the surface. In a cool kitchen, it may take closer to 4 hours.
For the best flavor, you can instead refrigerate the covered dough for 8 to 18 hours. The long, cold rise develops a tangier, more complex taste.
Dust a work surface lightly with flour. Scrape the dough out of the bowl. It will be loose and sticky, so flour your hands and the top of the dough as needed. Fold the edges toward the center a few times to form a rough round. Don’t knead it or press out all the air. Gentle handling keeps the bubbles that create an open, airy crumb.
Place the dough seam-side down on a sheet of parchment paper. Cover it loosely and let it rest for 30 minutes while the oven heats.
Place a Dutch oven with its lid in the oven and preheat to 450°F (230°C) for at least 30 minutes. The pot must be thoroughly hot. This sudden blast of heat is what gives the loaf its dramatic rise, called oven spring.
Use oven mitts to remove the hot pot carefully. Lift the dough by the parchment edges and lower it into the pot. For a decorative finish and controlled expansion, score the top with a sharp knife or razor blade, making one slash about ½ inch deep. Cover with the lid and return the pot to the oven.
Bake covered for 30 minutes. The trapped steam keeps the crust soft at first so the loaf can expand fully. Then remove the lid and bake for another 10 to 15 minutes, until the crust is deep golden brown and crisp.
The bread is done when it sounds hollow if you tap the bottom, or when an instant-read thermometer reads about 205–210°F (96–99°C) in the center.
Lift the loaf out of the pot and place it on a wire rack. Resist slicing right away. Let it cool for at least 30 to 60 minutes. The inside is still finishing its cooking, and cutting too soon can leave the crumb gummy. As it cools, you’ll likely hear the crust crackle, which bakers call “singing.”