

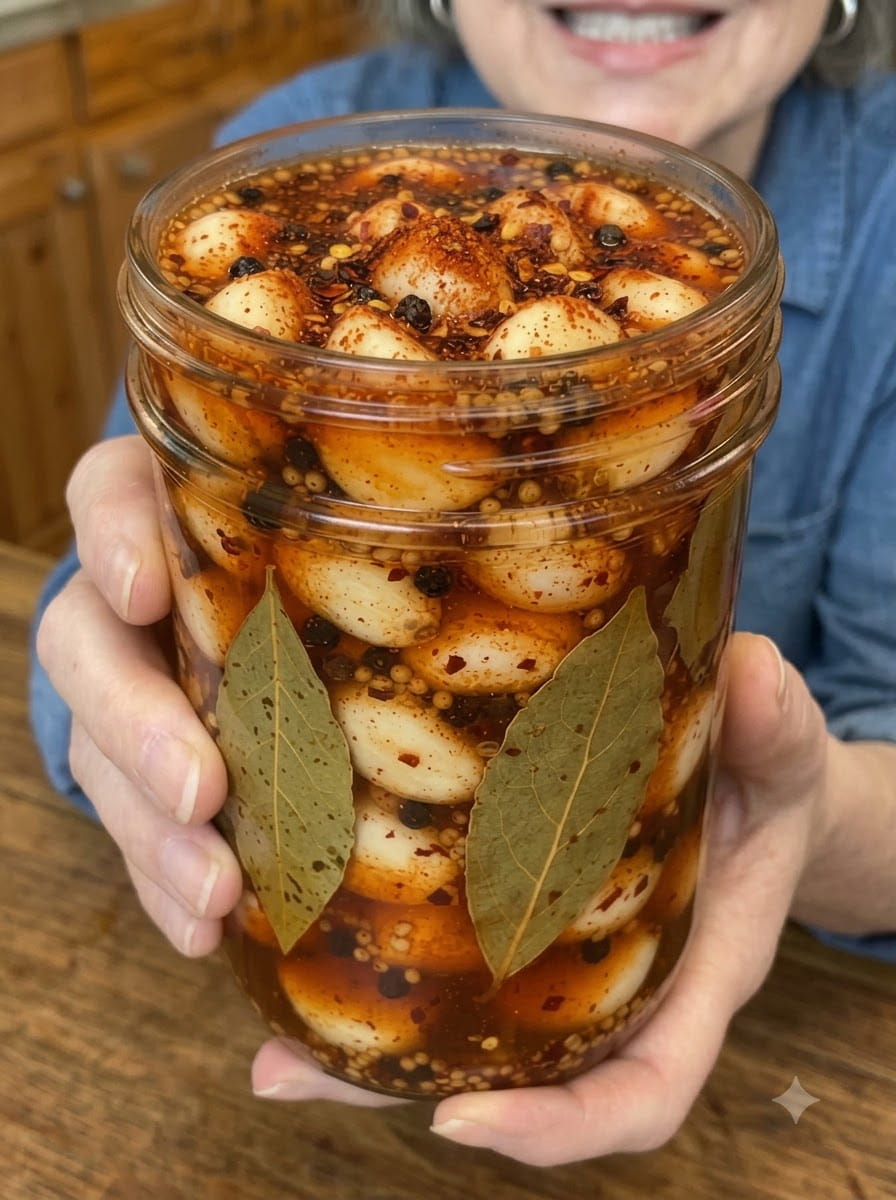
Fiery Cayenne Pickled Garlic: The Spicy Refrigerator Pickle Every Heat Lover Needs
Fiery, tangy, crunchy, and loaded with bold cayenne heat, this Fiery Cayenne Pickled Garlic is made for serious spice lovers. 🧄🌶️🔥 Every clove soaks up sharp vinegar, hot cayenne, and savory seasonings, creating a punch of flavor you will want on almost everything. The garlic stays crisp, turns mellow and tangy, and carries a warm, lingering heat in every bite.
This is an easy refrigerator pickle, which means no canning equipment, no pressure cookers, and no complicated steps. You peel the garlic, simmer a quick spicy brine, fill a jar, and let the fridge do the rest. Within a few days, you have a jar of fiery pickled garlic that works on sandwiches, burgers, salads, pizza, charcuterie boards, and grilled meats.
Why You’ll Love This Fiery Cayenne Pickled Garlic
It delivers real heat. Cayenne pepper and red pepper flakes give the brine a bright, assertive spice that soaks into every clove. If you think most pickles are too tame, this one is for you.
It is easy to make. The whole recipe takes about 30 minutes of active time, mostly spent peeling garlic. After that, the brine comes together in one saucepan.
The garlic turns crunchy and mellow. Raw garlic is sharp and pungent. Pickling softens that bite while keeping a pleasant crunch, so the cloves taste tangy, savory, and spicy instead of harsh.
It makes everything better. A few cloves can transform a plain sandwich, wake up a salad, or add a fiery edge to a cheese board. Chopped finely, they add punch to dressings, marinades, and dips.
It is a great homemade gift. A pretty jar of spicy pickled garlic is a thoughtful present for the food lovers in your life. Just remember to tell them it needs to stay in the refrigerator.
It uses simple ingredients. Garlic, vinegar, water, sugar, salt, and a handful of spices are all you need. Most of them are probably already in your pantry.
Ingredients for Fiery Cayenne Pickled Garlic
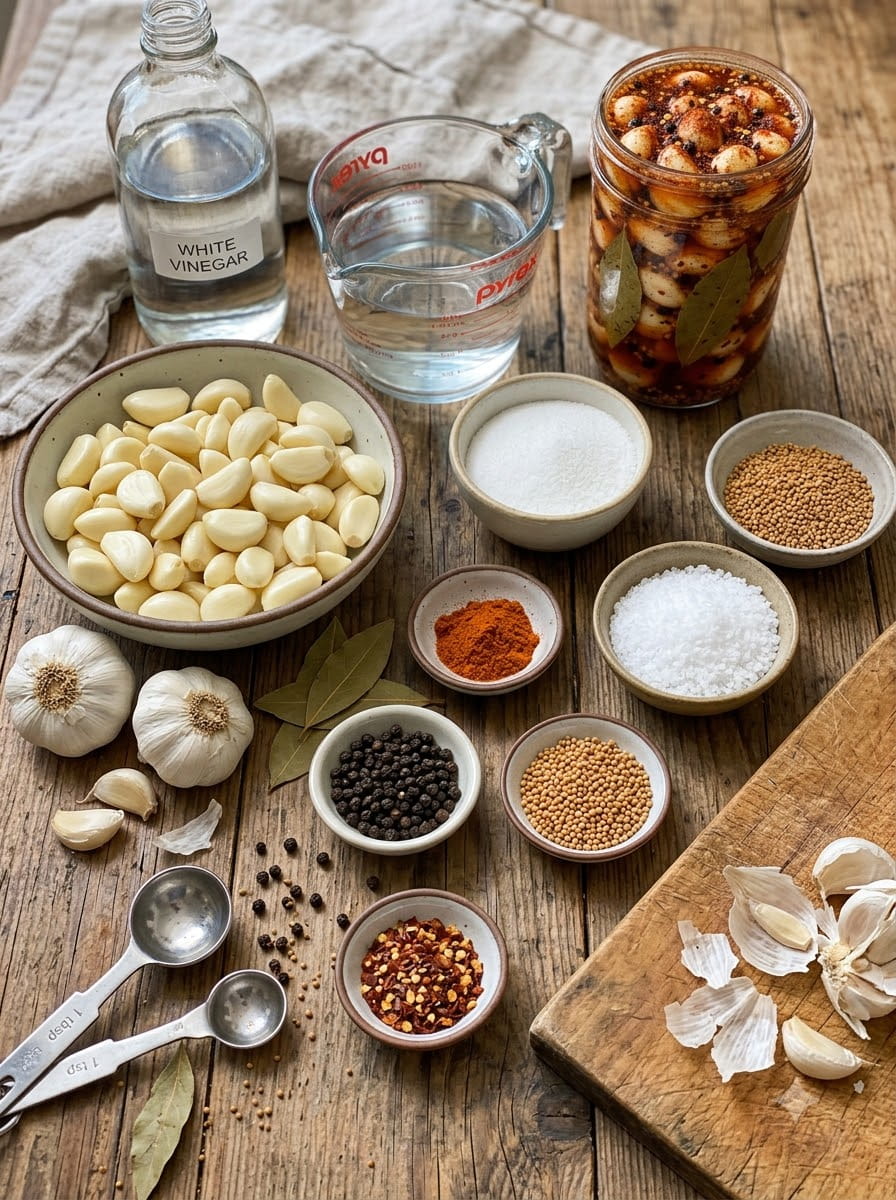
- 2 cups fresh garlic cloves, peeled
- 1 cup white vinegar with 5% acidity
- 1 cup water
- 1 tbsp granulated sugar
- 1 tbsp pickling salt
- 1 tsp cayenne pepper
- 1 tsp black peppercorns
- 1 tsp mustard seeds
- ½ tsp red pepper flakes
- 2 dried bay leaves
Ingredient Notes
Fresh garlic cloves. Choose firm, plump heads of garlic with tight, dry skins. Avoid heads that feel soft, look shriveled, or show green sprouts or dark spots. Two cups of peeled cloves is roughly 6 to 8 large heads, depending on size.
White vinegar with 5% acidity. The acidity matters for both flavor and safety. Always check the label and use vinegar with at least 5% acidity. Do not dilute the vinegar further than the recipe calls for.
Water. Plain water balances the sharpness of the vinegar. Use filtered or tap water that tastes good, since it makes up half the brine.
Granulated sugar. Just one tablespoon rounds out the sharp vinegar without making the garlic sweet. It softens the edges of the brine so the heat and tang stand out.
Pickling salt. Pickling salt contains no anti-caking agents or additives, so it keeps the brine clear. If you cannot find it, use plain non-iodized fine salt. Iodized salt can darken the garlic and cloud the liquid.
Cayenne pepper. This is the star of the show and the main source of heat. One teaspoon gives a bold, fiery kick. Use less for a milder jar or more for extra heat.
Black peppercorns. Whole peppercorns release a slow, warm, earthy spice into the brine.
Mustard seeds. They add a subtle tang and a classic pickle flavor, along with pretty speckles in the jar.
Red pepper flakes. They layer a second kind of heat on top of the cayenne and add visible flecks of red.
Dried bay leaves. Bay leaves bring a faint herbal depth that rounds out the spicy brine.
How to Make Fiery Cayenne Pickled Garlic
This recipe takes just five steps. Allow time for peeling, then the rest moves quickly.
Step 1: Prepare the Garlic
Peel the garlic cloves and remove any damaged pieces. Rinse briefly and pat dry. Peeling is the slowest part of this recipe, so plan ahead. A few tricks help: separate the cloves, trim off the root ends, then soak them in warm water for a few minutes to loosen the skins. You can also gently crush each clove with the flat side of a knife to pop the skin free.
Step 2: Make the Spicy Brine
In a saucepan, combine the white vinegar, water, sugar, pickling salt, cayenne pepper, black peppercorns, mustard seeds, red pepper flakes, and bay leaves. Bring to a gentle boil, stirring until the sugar and salt dissolve. Use a non-reactive saucepan, such as stainless steel, enamel-coated, or glass. Aluminum and unlined copper can react with vinegar and affect flavor and color.
Step 3: Add the Garlic
Add the peeled garlic cloves to the brine and simmer gently for 1 to 2 minutes. Avoid prolonged cooking to help preserve their texture. This short simmer softens the raw bite and helps the cloves absorb the brine, but longer cooking would make them mushy.
Step 4: Fill the Jar
Transfer the garlic and hot brine into a clean, heat-safe glass jar. Make sure the cloves are completely covered by the liquid. Let the mixture cool briefly, then cover. Use a clean jar that has been washed in hot, soapy water and rinsed well. Press the garlic down gently so every clove stays under the brine, since exposed cloves can spoil more easily.
Step 5: Refrigerate and Develop the Flavor
Refrigerate promptly and allow the garlic to pickle for at least 3 to 5 days before tasting. The flavor will become more pronounced as it sits. Be patient. The garlic tastes good after a few days, but the heat and tang deepen and balance beautifully over the first week or two.
Important Food Safety Notes
Garlic is a low-acid vegetable, and handling it safely matters. Please read this section before you make the recipe.
This is a refrigerator pickle, not a canning recipe. It is not designed to be shelf-stable. Do not water-bath can it, and do not store the jar at room temperature.
Keep it cold. Store the jar in the refrigerator at 40°F (4°C) or below at all times. Refrigerate it promptly after cooling briefly.
Use clean utensils. Always use a clean fork or spoon to remove garlic from the jar. Never eat straight from the jar or use a utensil that touched other food.
Keep the cloves submerged. The cloves should stay fully covered by the brine.
Use it within 3 to 4 weeks. For the safest approach, enjoy the garlic within 3 to 4 weeks.
Know when to discard. Throw the jar out if you see mold, notice unusual or off odors, or spot other signs of spoilage. When in doubt, throw it out.
Do not alter the acid ratio. Do not reduce the vinegar or increase the water. The vinegar-to-water balance in this recipe is part of what keeps the brine acidic enough for refrigerator storage.
Skip the oil. Do not add oil, fresh herbs, or other low-acid ingredients to the jar, since they can change the safety of the pickle.
About That Blue or Green Garlic
If your pickled garlic turns blue or green, do not panic. This is a well-known and harmless reaction. Garlic contains sulfur compounds and amino acids that can react with the acid in vinegar, sometimes producing a blue-green tint. It is more common with younger garlic or garlic stored in cold conditions.
The color change does not mean the garlic has gone bad. However, always judge the jar by smell, appearance, and storage time too. Mold, slime, or a bad odor are the real warning signs.
Tips for the Best Spicy Pickled Garlic
Choose firm, fresh garlic. Older, soft cloves make soft pickles. Fresh garlic gives you the best crunch.
Peel in advance. Peel the garlic the day before if you want to spread the work out. Store the peeled cloves in an airtight container in the refrigerator overnight.
Do not overcook. The garlic only needs a 1 to 2 minute simmer. Longer cooking takes away the crunch.
Adjust the heat gradually. For milder garlic, use ½ teaspoon cayenne and skip the red pepper flakes. For extra fire, increase the cayenne to 1½ teaspoons or add a few dried chile de árbol peppers.
Use a clean jar. A freshly washed, well-rinsed glass jar helps keep your pickles fresh. Choose a jar with a tight-fitting lid.
Label the jar. Write the date you made it on a piece of tape so you know when to use it by.
Be patient. Resist tasting on day one. The flavor needs at least 3 to 5 days to develop, and the best taste often comes after a week.
Save the brine. The leftover spicy brine is wonderful in salad dressings, marinades, and even Bloody Marys. Keep it refrigerated and use it within the same time frame as the garlic.
Easy Variations
Smoky pickled garlic. Replace the cayenne with smoked paprika and add a pinch of chipotle powder for a smoky, medium-heat version.
Extra-hot garlic. Add a sliced fresh cayenne, serrano, or habanero pepper to the jar for even more fire.
Herby spicy garlic. Add a teaspoon of dried dill seed or dried oregano to the brine for a more Mediterranean flavor.
Sweet and spicy garlic. Increase the sugar to 2 tablespoons for a sweeter, more balanced heat.
Apple cider vinegar version. Swap the white vinegar for apple cider vinegar with 5% acidity for a slightly fruitier tang. Keep the same amount to preserve the acidity.
Coriander and fennel. Add ½ teaspoon coriander seeds or fennel seeds for a warm, aromatic layer.
How to Serve Fiery Cayenne Pickled Garlic
This spicy garlic is incredibly versatile. Here are some of the best ways to enjoy it.
On burgers and sandwiches. Slice a few cloves thinly and layer them on burgers, grilled cheese, or deli sandwiches for a tangy, spicy crunch.
On pizza. Scatter chopped cloves over a hot pizza just out of the oven for a garlicky, spicy finish.
In salads. Chop the cloves and toss them into green salads, potato salad, pasta salad, or grain bowls.
On charcuterie boards. Pickled garlic pairs beautifully with cheese, cured meats, olives, nuts, and crusty bread.
With grilled meats. Serve alongside steak, sausages, chicken, or kebabs to cut through rich, smoky flavors.
In dressings and marinades. Mince the cloves finely and whisk them into vinaigrettes, yogurt sauces, or marinades.
On toast. Mash a clove or two onto toast with avocado, cream cheese, or butter.
In sauces and dips. Stir chopped cloves into hummus, aioli, or tzatziki for an instant spicy upgrade.
With eggs. Add a few chopped cloves to scrambled eggs or an omelet for a kick in the morning.
As a bold snack. Serious spice lovers can enjoy a clove or two straight from the jar, served with a clean fork onto a plate.
Frequently Asked Questions
How long does fiery pickled garlic last?
Because this is a refrigerator pickle, it is best used within 3 to 4 weeks for the safest approach. Keep it refrigerated at 40°F (4°C) or below at all times, and discard it if you see signs of spoilage.
Can I can this recipe for shelf storage?
No. This recipe is designed only as a refrigerator pickle and has not been tested for canning. Do not store it at room temperature.
How long should I wait before eating it?
Wait at least 3 to 5 days before tasting. The flavor continues to develop as the garlic sits in the brine.
Why did my garlic turn blue or green?
This harmless color change happens when sulfur compounds in garlic react with acid. It does not automatically mean the garlic is spoiled. Check the smell, texture, and appearance, and discard the jar if anything seems off.
Can I use pre-peeled garlic?
Yes, pre-peeled garlic saves a lot of time. Choose fresh, firm cloves and avoid any that look yellow, soft, or slimy. Rinse them briefly and pat them dry.
Can I use jarred minced garlic?
No. Whole cloves are needed for this recipe, since they stay crisp and hold their shape in the brine.
How spicy is this recipe?
It has a noticeable, warming heat from one teaspoon of cayenne and a half teaspoon of red pepper flakes. Spice levels vary by brand, so taste after a few days and adjust future batches to your liking.
Can I make it less spicy?
Yes. Cut the cayenne to ½ teaspoon and leave out the red pepper flakes for a milder version, or use a mild paprika instead.
Can I use a different vinegar?
You can use apple cider vinegar or another vinegar, as long as it has at least 5% acidity. Always check the label.
Can I reuse the brine?
It is not recommended to reuse brine for a new batch of garlic. You can use leftover brine in dressings and marinades, kept refrigerated and used within a few days.
Do I have to simmer the garlic?
The short simmer helps soften the raw edge of the garlic and helps it absorb the brine. Keep it brief to preserve crunch.
What kind of jar should I use?
Use a clean, heat-safe glass jar with a tight-fitting lid. A pint jar or two smaller jars usually work well for this amount of garlic.
Final Thoughts
This Fiery Cayenne Pickled Garlic is a bold, tangy, crunchy condiment that brings serious heat to your table. It takes a little patience to peel the garlic, but the payoff is a jar of spicy cloves that elevates sandwiches, burgers, pizza, salads, and cheese boards. 🧄🌶️
Remember to keep it refrigerated at 40°F (4°C) or below, use clean utensils, enjoy it within 3 to 4 weeks, and let it rest in the fridge for at least 3 to 5 days before tasting. Follow those simple steps, and you will have a jar full of flavor that spice lovers will keep coming back to.
Print
Fiery Cayenne Pickled Garlic
Ingredients
- 2 cups fresh garlic cloves, peeled
- 1 cup white vinegar with 5% acidity
- 1 cup water
- 1 tbsp granulated sugar
- 1 tbsp pickling salt
- 1 tsp cayenne pepper
- 1 tsp black peppercorns
- 1 tsp mustard seeds
- ½ tsp red pepper flakes
- 2 dried bay leaves
Instructions
This recipe takes just five steps. Allow time for peeling, then the rest moves quickly.
Peel the garlic cloves and remove any damaged pieces. Rinse briefly and pat dry. Peeling is the slowest part of this recipe, so plan ahead. A few tricks help: separate the cloves, trim off the root ends, then soak them in warm water for a few minutes to loosen the skins. You can also gently crush each clove with the flat side of a knife to pop the skin free.
In a saucepan, combine the white vinegar, water, sugar, pickling salt, cayenne pepper, black peppercorns, mustard seeds, red pepper flakes, and bay leaves. Bring to a gentle boil, stirring until the sugar and salt dissolve. Use a non-reactive saucepan, such as stainless steel, enamel-coated, or glass. Aluminum and unlined copper can react with vinegar and affect flavor and color.
Add the peeled garlic cloves to the brine and simmer gently for 1 to 2 minutes. Avoid prolonged cooking to help preserve their texture. This short simmer softens the raw bite and helps the cloves absorb the brine, but longer cooking would make them mushy.
Transfer the garlic and hot brine into a clean, heat-safe glass jar. Make sure the cloves are completely covered by the liquid. Let the mixture cool briefly, then cover. Use a clean jar that has been washed in hot, soapy water and rinsed well. Press the garlic down gently so every clove stays under the brine, since exposed cloves can spoil more easily.
Refrigerate promptly and allow the garlic to pickle for at least 3 to 5 days before tasting. The flavor will become more pronounced as it sits. Be patient. The garlic tastes good after a few days, but the heat and tang deepen and balance beautifully over the first week or two.






