

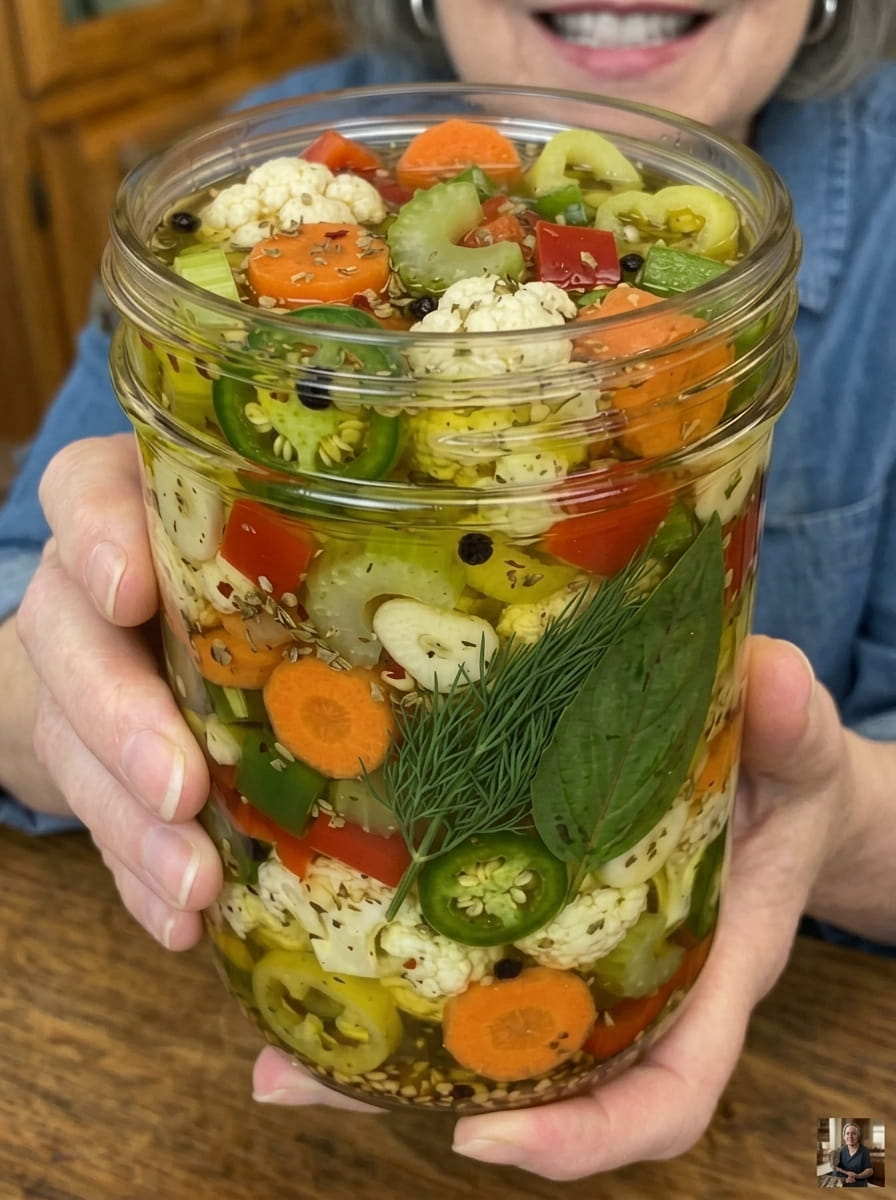
Italian Giardiniera: A Crisp, Tangy, Colorful Pickled Vegetable Medley
Meta Description: Learn how to make homemade Italian Giardiniera with this easy recipe. Crisp, tangy pickled vegetables in a zesty vinegar and olive oil brine — perfect for antipasto, sandwiches, and more.
If you’ve ever ordered a Chicago-style Italian beef sandwich or built an antipasto platter, chances are you’ve encountered giardiniera — the vibrant, tangy, crunchy pickled vegetable mix that instantly elevates whatever it touches. This homemade Italian Giardiniera recipe brings that same bold, colorful flavor into your own kitchen, combining crisp cauliflower, carrots, celery, bell peppers, banana peppers, and jalapeños with garlic, herbs, and a touch of chili heat, all suspended in a zesty vinegar brine finished with rich extra-virgin olive oil.
Giardiniera (pronounced jar-din-YEHR-ah) is an Italian word simply meaning “from the garden,” and that’s exactly what this recipe delivers: a colorful garden’s worth of crisp, tangy vegetables in every jar. It’s a staple of Italian-American cuisine, beloved for its versatility, bold flavor, and satisfying crunch. Once you make a batch at home, you’ll understand why it’s such a beloved condiment — and why store-bought versions rarely compare to the fresh, vibrant flavor of homemade.
This guide covers everything you need to make perfect Italian Giardiniera at home, from ingredient breakdowns and step-by-step instructions to storage tips, flavor variations, and the best ways to serve it.
What Is Giardiniera?
Giardiniera refers to a mix of pickled vegetables, typically combining crunchy vegetables like cauliflower, carrots, and celery with peppers of varying heat levels, all preserved in a vinegar-based brine. While giardiniera has roots in Italian cuisine, it became especially popular in Chicago, where it’s a signature topping for Italian beef sandwiches, often served either “mild” (sweet, using bell peppers) or “hot” (spicy, loaded with hot peppers).
This homemade version strikes a balance between the two styles, incorporating both bell peppers and banana peppers for sweetness alongside jalapeños and red pepper flakes for a noticeable, but not overwhelming, kick. The result is a vibrant, colorful, versatile condiment that works beautifully whether you’re going for classic Italian-American flavor or something with a bit more heat.
Why You’ll Love This Recipe
- Bold, tangy, and crunchy. The salt-brining and quick blanching process ensures every vegetable stays satisfyingly crisp, never soggy.
- Colorful and visually stunning. Red and green peppers, orange carrots, and white cauliflower create a jar that looks as good as it tastes.
- Balanced heat. Sweet bell peppers and banana peppers balance the spice from jalapeños and red pepper flakes for a well-rounded flavor.
- Incredibly versatile. Use it as a sandwich topping, a pizza ingredient, a salad mix-in, or a snack straight from the jar.
- Great make-ahead condiment. It keeps well in the fridge for weeks and only gets better with time.
- Customizable spice level. Adjust the ratio of sweet peppers to hot peppers to make it as mild or as fiery as you like.
Ingredients You’ll Need
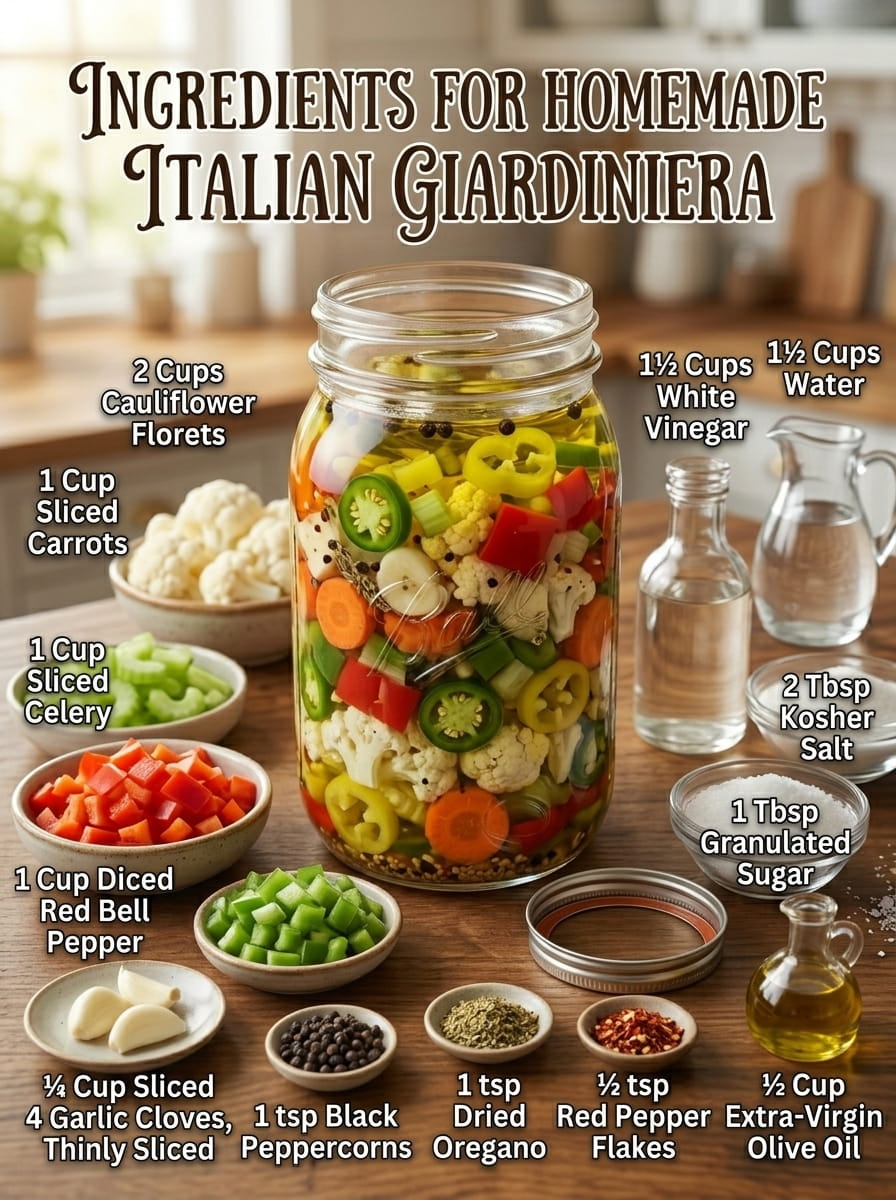
This recipe uses a colorful mix of vegetables combined with a tangy vinegar brine and finished with olive oil for classic Italian flavor. Here’s what you’ll need:
- 2 cups cauliflower florets
- 1 cup carrots, sliced
- 1 cup celery, sliced
- 1 cup red bell pepper, diced
- 1 cup green bell pepper, diced
- ½ cup banana peppers, sliced
- ¼ cup jalapeños, thinly sliced
- 4 garlic cloves, thinly sliced
- 1½ cups white vinegar
- 1½ cups water
- 2 tbsp kosher salt
- 1 tbsp granulated sugar
- 1 tsp black peppercorns
- 1 tsp dried oregano
- ½ tsp red pepper flakes
- ½ cup extra-virgin olive oil
Understanding Each Ingredient’s Role
- Cauliflower provides a hearty, satisfying crunch and absorbs the brine’s tangy flavor beautifully.
- Carrots add natural sweetness and vibrant color, along with a firm bite that holds up well to pickling.
- Celery contributes a fresh, slightly peppery crunch that balances the richer vegetables.
- Red and green bell peppers bring sweetness, color, and classic giardiniera flavor without adding heat.
- Banana peppers offer a mild tang and gentle warmth, bridging the gap between the sweet bell peppers and spicier jalapeños.
- Jalapeños deliver the primary source of heat in this recipe, giving the giardiniera its signature kick.
- Garlic cloves infuse the entire jar with a bold, aromatic, savory backbone.
- White vinegar provides the essential tangy, acidic base of the brine and acts as a natural preservative.
- Water balances the vinegar’s acidity while maintaining enough acidity for safe pickling.
- Kosher salt is used both in the initial brining step to draw out moisture and firm up the vegetables, and in the pickling brine itself for flavor.
- Granulated sugar softens the brine’s sharp edges with a touch of sweetness.
- Black peppercorns add warm, subtle spice.
- Dried oregano brings classic Italian herbal flavor that ties the whole dish together.
- Red pepper flakes add an additional layer of background heat throughout the brine.
- Extra-virgin olive oil finishes the giardiniera with richness and a distinctly Italian flavor, while also helping preserve the vegetables and giving the jar its classic glossy appearance.
Step-by-Step Instructions
Making Italian Giardiniera at home involves a few key stages: salt-brining the vegetables, blanching them briefly in a seasoned vinegar brine, and finishing with olive oil before chilling.
Step 1: Prep the Vegetables
Wash all the vegetables and cut them into bite-size pieces. Uniform sizing helps everything pickle evenly and makes for easier eating once the giardiniera is ready.
Step 2: Salt-Brine the Vegetables
Place the cauliflower, carrots, celery, bell peppers, banana peppers, and jalapeños in a large bowl. Sprinkle generously with kosher salt and toss well to coat. Cover the bowl and refrigerate for 8 to 12 hours.
This initial salt-brining step is a crucial part of what makes giardiniera so crisp. The salt draws out excess moisture from the vegetables, firming up their texture and helping them stay crunchy even after the pickling process, rather than turning soft or waterlogged.
Step 3: Drain and Rinse
After the salt-brining period, drain the vegetables thoroughly and rinse them briefly with cold water to remove excess salt. Make sure they’re well-drained before moving on to the next step.
Step 4: Build the Pickling Brine
In a saucepan, combine the white vinegar, water, granulated sugar, black peppercorns, dried oregano, and red pepper flakes. Bring the mixture to a gentle boil, stirring until the sugar dissolves completely.
Step 5: Blanch the Vegetables
Add the drained, rinsed vegetables directly into the boiling brine and simmer for just 2 to 3 minutes. The goal here is to slightly soften the vegetables while keeping them crisp — you’re not fully cooking them, just giving them a quick head start on absorbing flavor.
Step 6: Pack the Jars
Place the thinly sliced garlic into clean glass jars, then pack the vegetables tightly on top. Packing the vegetables snugly helps ensure the jars hold enough brine to fully cover everything while maximizing how much giardiniera you can fit into each jar.
Step 7: Pour the Brine
Pour the hot pickling brine over the vegetables until they are completely submerged.
Step 8: Cool
Let the jars cool to room temperature on the counter. This step helps prevent thermal shock and allows the olive oil (added next) to be incorporated properly without breaking down from residual heat.
Step 9: Add the Olive Oil
Once the jars have cooled, add the extra-virgin olive oil to each jar. The oil rises to the top and adds richness, classic Italian flavor, and an extra layer of preservation.
Step 10: Seal and Refrigerate
Seal the jars tightly and transfer them to the refrigerator.
Step 11: Let the Flavors Develop
Allow the giardiniera to marinate for at least 24 to 48 hours before serving. This resting period lets the vegetables fully absorb the tangy, herby, garlicky brine. For even deeper flavor, many people find that giardiniera tastes best after 4 to 5 days in the fridge.
How Long Does Giardiniera Last?
When stored properly in an airtight jar in the refrigerator, homemade Italian Giardiniera will typically stay fresh for up to 3 to 4 weeks. The combination of vinegar, salt, and olive oil helps preserve the vegetables while maintaining their signature crunch.
This recipe is intended as a refrigerator pickle rather than a shelf-stable canned product. Because olive oil is added to the jars, this recipe is not suitable for room-temperature or shelf-stable storage — always keep giardiniera refrigerated to ensure food safety, since oil-packed vegetables stored at room temperature can create conditions for bacterial growth.
Tips for the Best Giardiniera
- Don’t skip the salt-brining step. This is the secret to giardiniera’s signature crunch. Skipping it can result in softer, less crisp vegetables.
- Cut vegetables uniformly. Consistent bite-size pieces ensure even pickling and a better eating experience.
- Don’t over-blanch. A brief 2–3 minute simmer is all you need — the vegetables should still have plenty of crunch when the giardiniera is finished.
- Use a mix of sweet and hot peppers. This balance is what gives classic giardiniera its signature flavor profile. Adjust the ratio based on your personal spice preference.
- Pack the jars tightly. This helps ensure the vegetables stay submerged in the brine and oil, which is important for both flavor and food safety.
- Be patient. While ready after 24 hours, the flavor continues to deepen over the following days, so longer marinating time yields better results.
Flavor Variations to Try
Once you’ve made the classic version, consider these variations to switch things up:
- Extra Spicy Giardiniera: Increase the jalapeños or add a sliced serrano or fresno chili for more heat.
- Sweet Giardiniera: Skip the jalapeños entirely and use only bell peppers and banana peppers for a milder, sweeter version.
- Herb-Forward Version: Add fresh basil or parsley along with the dried oregano for a brighter, more herbaceous flavor.
- Extra Garlicky: Double the garlic cloves for a bolder, more pungent flavor throughout the jar.
- Fennel Addition: Add thinly sliced fennel bulb for a subtle anise flavor and extra crunch.
- Green Olive Giardiniera: Fold in a handful of pitted green olives for a briny, Mediterranean twist.
Delicious Ways to Use Italian Giardiniera
Giardiniera’s bold, tangy crunch makes it an incredibly versatile addition to countless dishes. Here are some of the best ways to use it:
- Antipasto Platters – A classic addition to any antipasto spread, pairing beautifully with cured meats, cheeses, and olives.
- Italian Beef Sandwiches – The quintessential Chicago-style topping, adding tangy crunch to slow-cooked, juicy beef.
- Sandwiches and Subs – Layer it onto any deli sandwich or sub for an instant flavor and texture upgrade.
- Salads – Chop and toss into green salads, pasta salads, or grain bowls for a burst of tangy flavor.
- Pizza Topping – Scatter giardiniera over pizza, especially after baking, for a fresh, tangy contrast to melted cheese.
- Grilled Meats – Serve alongside grilled sausages, chicken, or steak as a crunchy, palate-cleansing side.
- Charcuterie Boards – Add a generous bowl to any charcuterie or grazing board for color, crunch, and tang.
- Grain Bowls – Mix into rice, quinoa, or farro bowls alongside protein and other fresh vegetables.
- Hot Dogs and Sausages – Top hot dogs, bratwursts, or Italian sausages with a spoonful for a bold flavor boost.
- Snacking Straight From the Jar – Simple, refreshing, and endlessly satisfying on its own.
Frequently Asked Questions
Why do I need to salt the vegetables before pickling? Salting draws excess moisture out of the vegetables, which firms up their texture and helps them stay crisp throughout the pickling process, rather than turning soft or waterlogged.
Can I skip the olive oil? The olive oil adds classic Italian flavor and richness, but you can omit it if you prefer a lighter, purely vinegar-based giardiniera. Keep in mind this will change the traditional flavor and texture slightly.
Is this giardiniera very spicy? It has a mild-to-moderate heat from the jalapeños and red pepper flakes, balanced by the sweetness of the bell and banana peppers. Adjust the ratio of hot to sweet peppers to make it milder or spicier to your taste.
Can I use frozen vegetables for this recipe? Fresh vegetables are strongly recommended, as they hold up much better to the salting, blanching, and pickling process and result in a far crisper final product.
Why is my giardiniera not staying submerged under the oil? Make sure the vegetables are packed tightly enough into the jar and that you’re using an appropriately sized jar so the brine and oil can fully cover the vegetables. Pressing down gently on the vegetables before sealing can also help.
How long should I wait before eating it? While technically ready after 24 hours, most people find the flavor is noticeably better after 3 to 5 days, once the vegetables have had more time to absorb the brine and oil.
Final Thoughts
Italian Giardiniera is a vibrant, versatile condiment that brings bold Mediterranean flavor and satisfying crunch to just about any dish. With its colorful mix of cauliflower, carrots, celery, and peppers, all pickled in a tangy vinegar brine and finished with rich olive oil, this homemade version far surpasses anything you’ll find on a store shelf.
Whether you’re building an antipasto platter, topping an Italian beef sandwich, or simply snacking straight from the jar, this giardiniera recipe is guaranteed to become a fridge staple. Make a batch, let the flavors develop over a few days, and get ready to add bold, tangy crunch to everything you eat.
Print
Italian Giardiniera
Ingredients
This recipe uses a colorful mix of vegetables combined with a tangy vinegar brine and finished with olive oil for classic Italian flavor. Here’s what you’ll need:
- 2 cups cauliflower florets
- 1 cup carrots, sliced
- 1 cup celery, sliced
- 1 cup red bell pepper, diced
- 1 cup green bell pepper, diced
- ½ cup banana peppers, sliced
- ¼ cup jalapeños, thinly sliced
- 4 garlic cloves, thinly sliced
- 1½ cups white vinegar
- 1½ cups water
- 2 tbsp kosher salt
- 1 tbsp granulated sugar
- 1 tsp black peppercorns
- 1 tsp dried oregano
- ½ tsp red pepper flakes
- ½ cup extra-virgin olive oil
Instructions
Wash all the vegetables and cut them into bite-size pieces. Uniform sizing helps everything pickle evenly and makes for easier eating once the giardiniera is ready.
Place the cauliflower, carrots, celery, bell peppers, banana peppers, and jalapeños in a large bowl. Sprinkle generously with kosher salt and toss well to coat. Cover the bowl and refrigerate for 8 to 12 hours.
This initial salt-brining step is a crucial part of what makes giardiniera so crisp. The salt draws out excess moisture from the vegetables, firming up their texture and helping them stay crunchy even after the pickling process, rather than turning soft or waterlogged.
After the salt-brining period, drain the vegetables thoroughly and rinse them briefly with cold water to remove excess salt. Make sure they’re well-drained before moving on to the next step.
In a saucepan, combine the white vinegar, water, granulated sugar, black peppercorns, dried oregano, and red pepper flakes. Bring the mixture to a gentle boil, stirring until the sugar dissolves completely.
Add the drained, rinsed vegetables directly into the boiling brine and simmer for just 2 to 3 minutes. The goal here is to slightly soften the vegetables while keeping them crisp — you’re not fully cooking them, just giving them a quick head start on absorbing flavor.
Place the thinly sliced garlic into clean glass jars, then pack the vegetables tightly on top. Packing the vegetables snugly helps ensure the jars hold enough brine to fully cover everything while maximizing how much giardiniera you can fit into each jar.
Pour the hot pickling brine over the vegetables until they are completely submerged.
Let the jars cool to room temperature on the counter. This step helps prevent thermal shock and allows the olive oil (added next) to be incorporated properly without breaking down from residual heat.
Once the jars have cooled, add the extra-virgin olive oil to each jar. The oil rises to the top and adds richness, classic Italian flavor, and an extra layer of preservation.
Seal the jars tightly and transfer them to the refrigerator.
Allow the giardiniera to marinate for at least 24 to 48 hours before serving. This resting period lets the vegetables fully absorb the tangy, herby, garlicky brine. For even deeper flavor, many people find that giardiniera tastes best after 4 to 5 days in the fridge.






